Takafumi Horiuchi

Three Design Studio Projects

Overview

As part of the Design & Engineering master's program at Politecnico di Milano, I worked with a different team each semester in the Design Studio courses. We developed integrated product proposals, from defining the problem and user needs to designing the form, mechanisms, interactions, and manufacturing approach. This page presents three projects completed between winter 2019 and winter 2020.

  1. Coffee machine design (winter 2019)HUBBLE is a shared coffee machine concept designed around individual preferences. The proposal includes a circular interface, a height-adjustable nozzle, a rotating dispensing head, internal mechanisms, and manufacturing drawings.
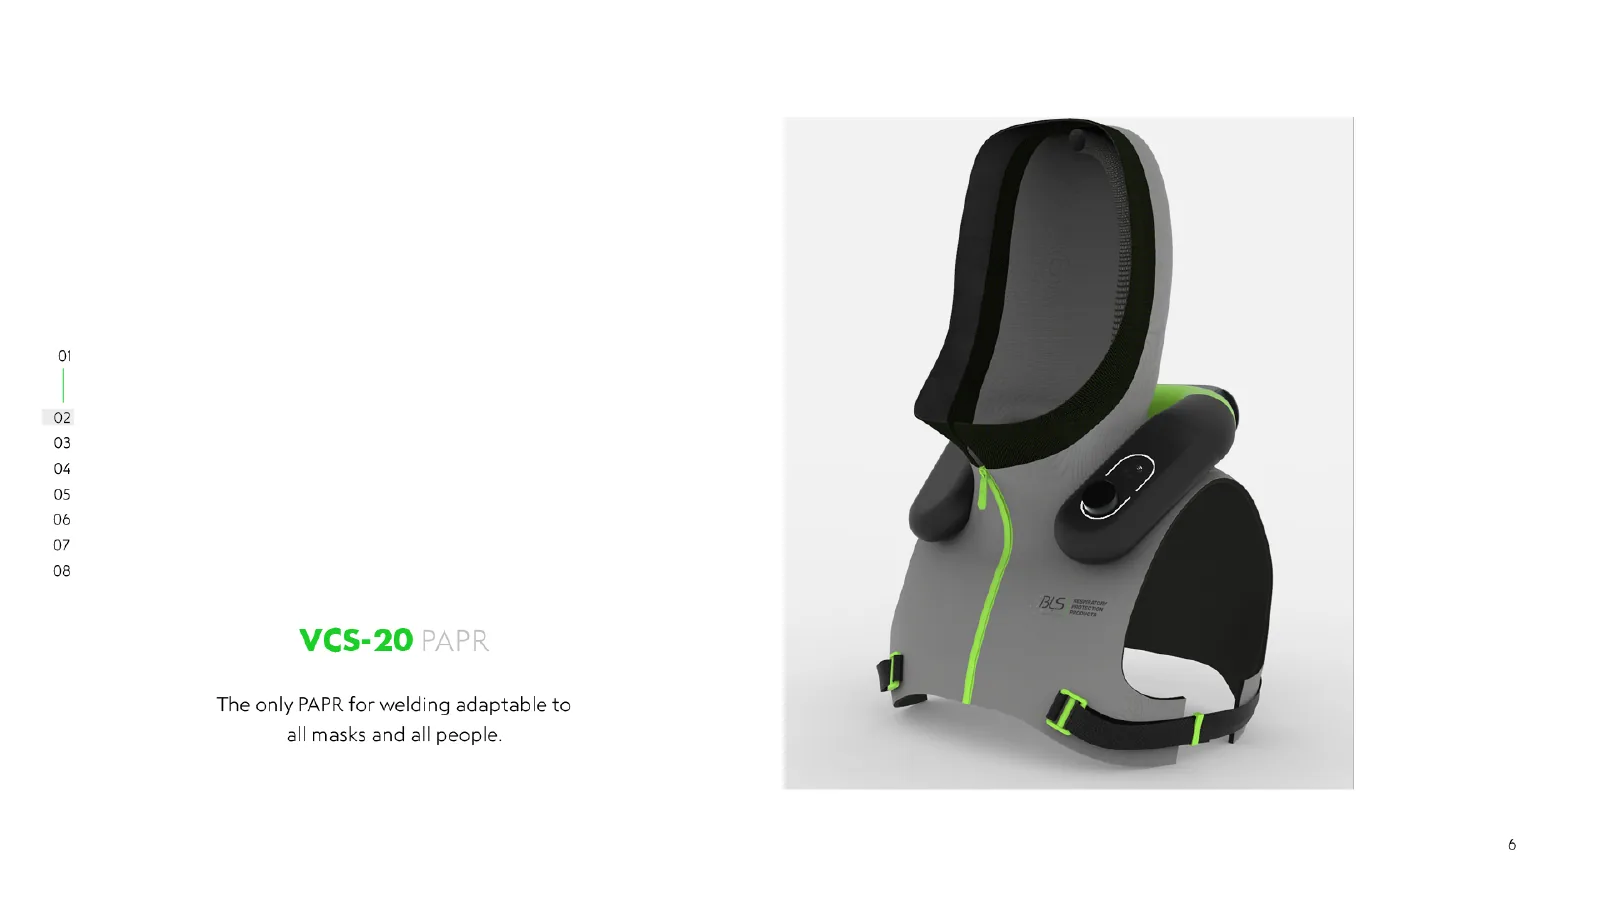
  2. PAPR design for welders (summer 2020)VCS-20 is a powered air-purifying respirator concept designed to work with existing welding shields. It combines a hood, vest, and shoulder-mounted blower, developed into a full-scale wearable prototype.
  3. Blood donor screening device design (winter 2020)DELCON Massachusetts is a concept for contactless pre-donation screening of temperature, heart rate, blood pressure, and hemoglobin. We designed the enclosure and a self-service experience covering QR check-in, measurement, and cloud-based sharing of results.

Coffee machine design (winter 2019)

Challenge: Personalized coffee from a shared machine

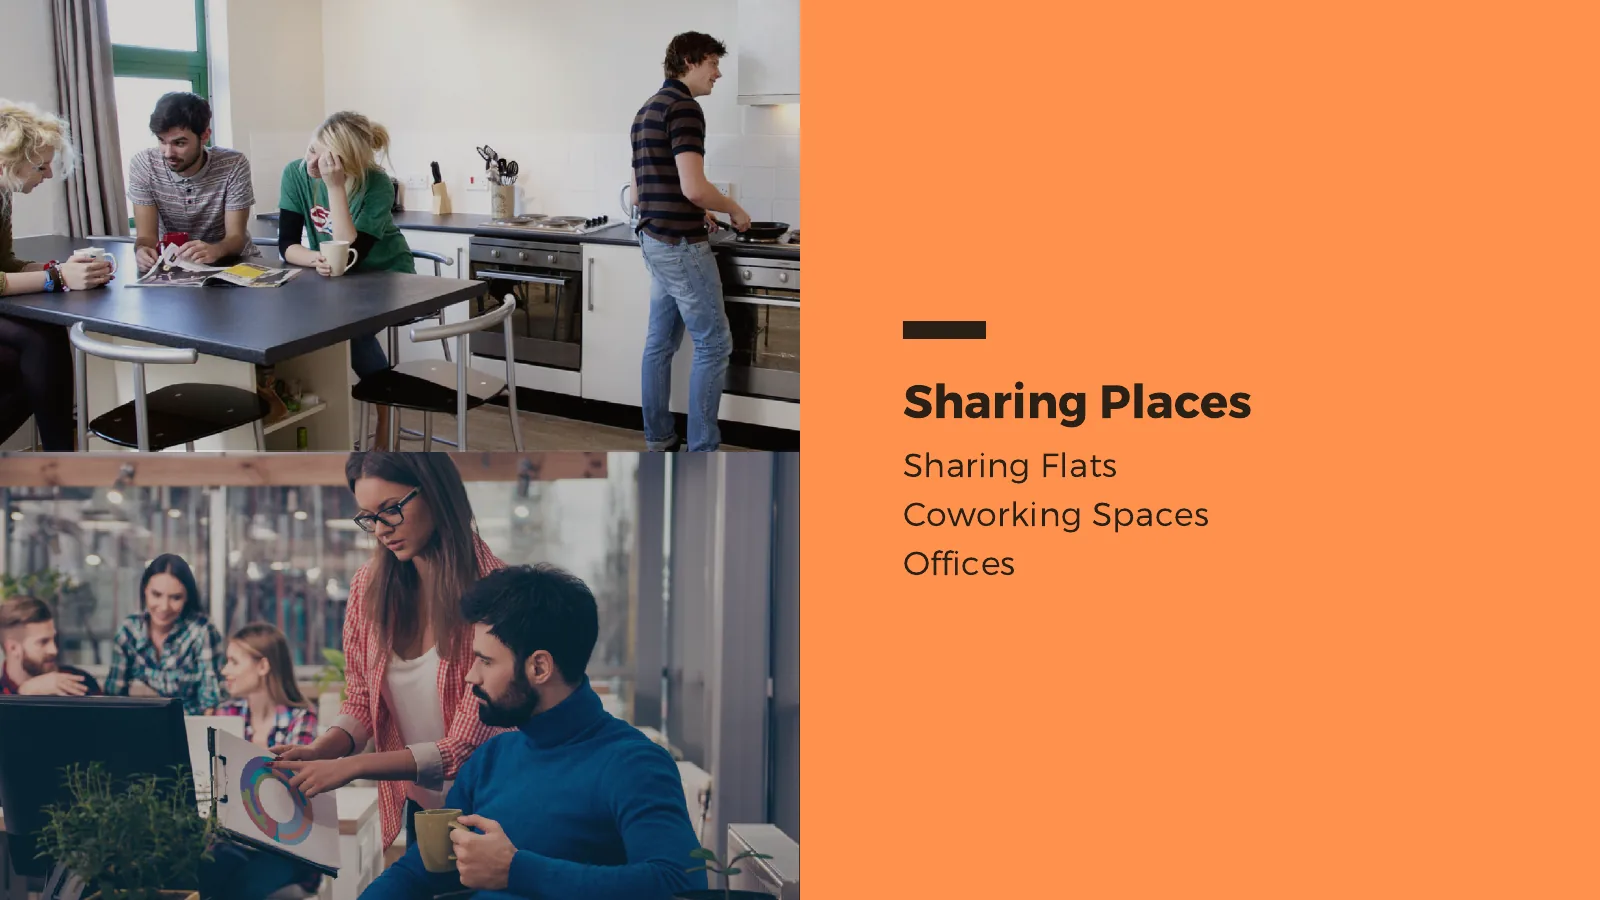
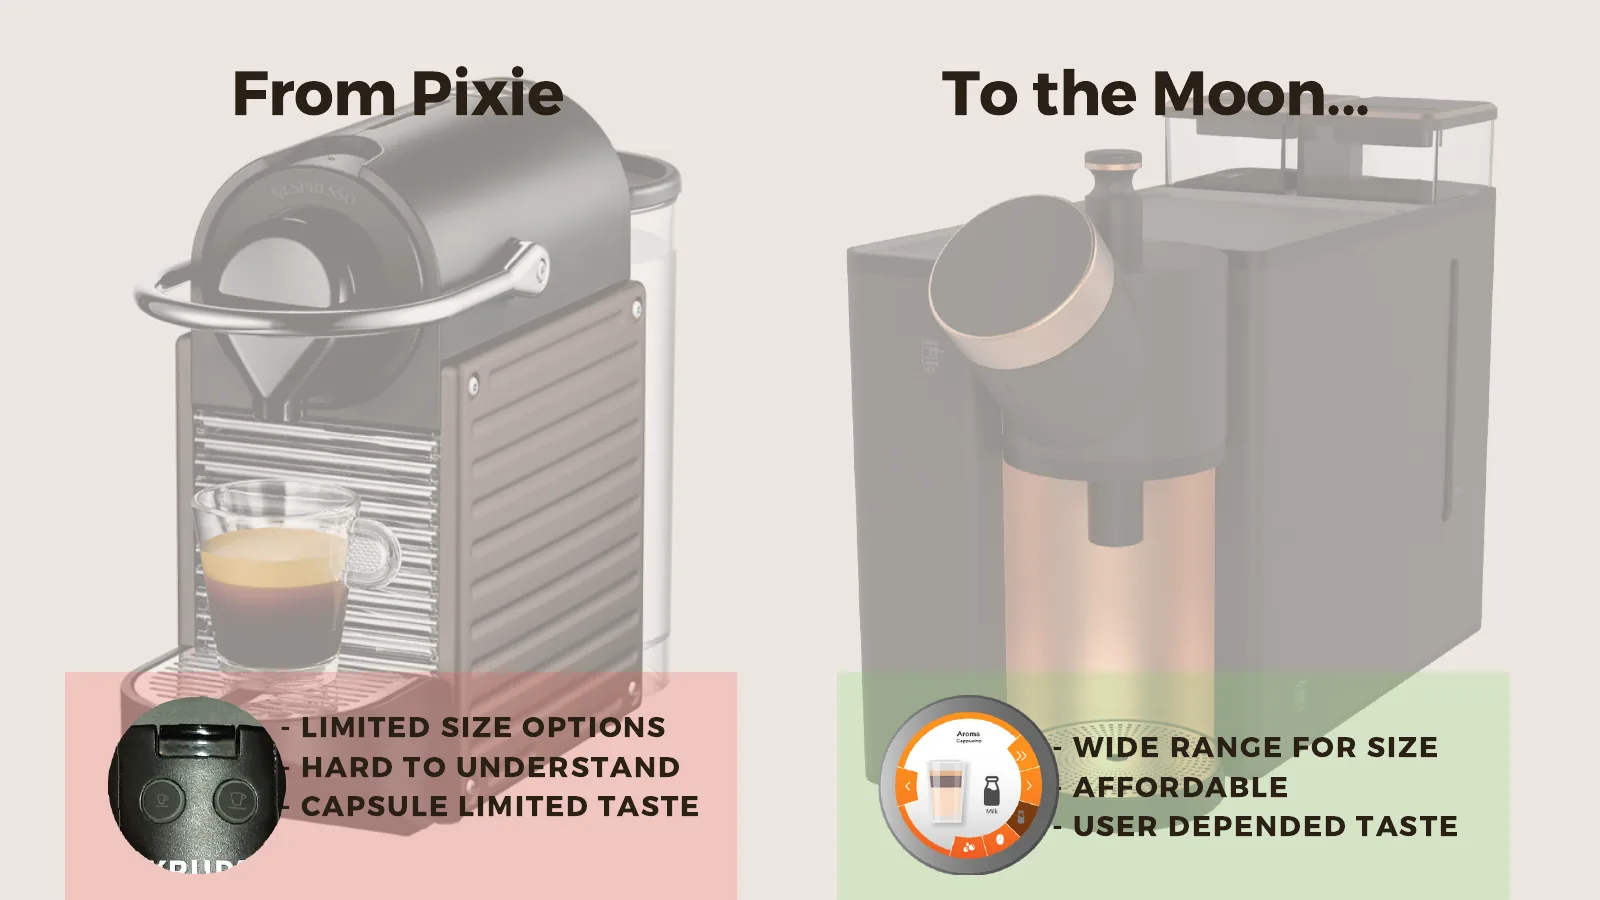
In shared flats, coworking spaces, and offices, one coffee machine serves people with different cultural backgrounds and preferences. Our review of existing capsule machines identified limits on cup size, unclear controls, and flavors determined by the capsule. Requiring people to repeat detailed settings for every drink would also make a shared machine cumbersome.

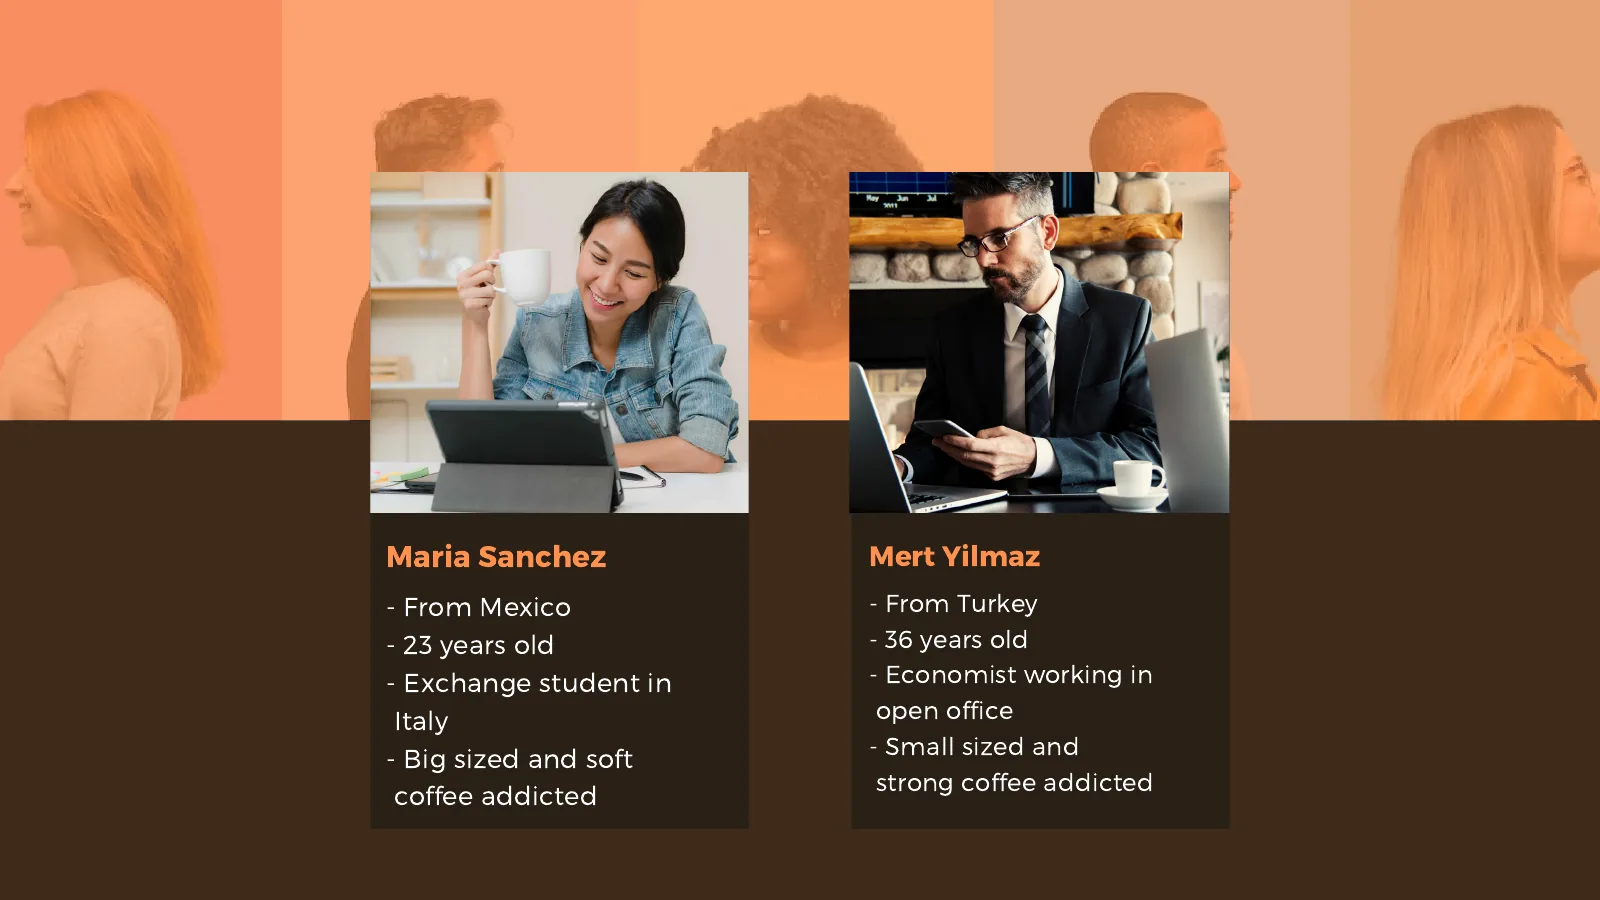
We developed two contrasting personas: Maria, from Mexico, who prefers a large, mild coffee, and Mert, from Turkey, who prefers a small, strong one. These personas informed requirements for adjustable aroma, strength, temperature, and volume; saved user profiles and recipes; support for different cup sizes and installation orientations; and easy refilling and cleaning.
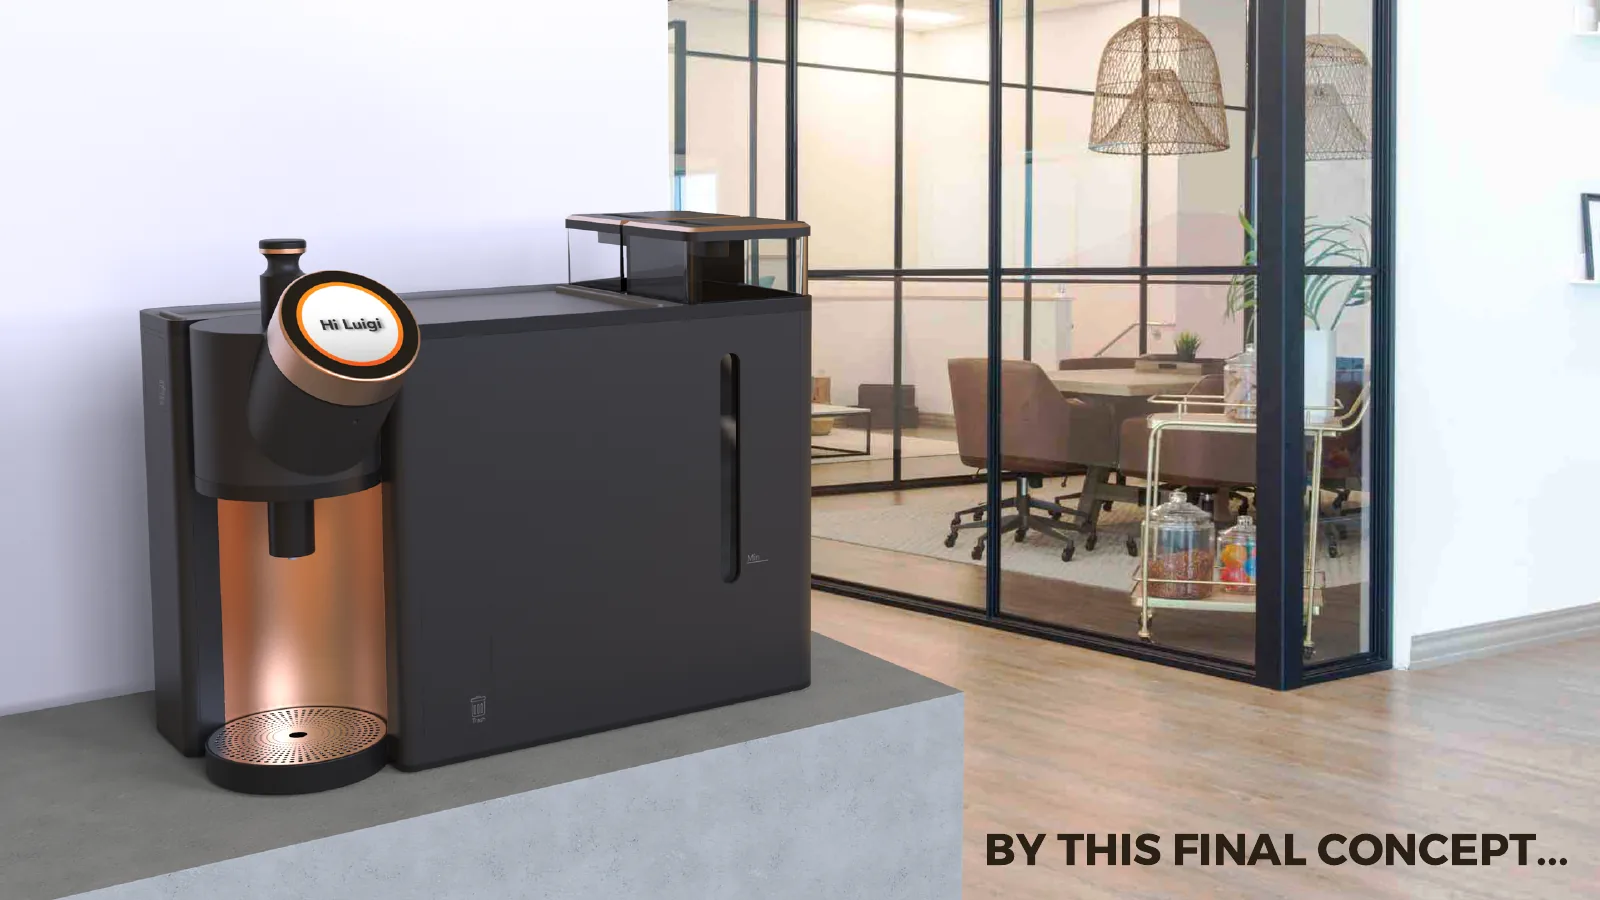
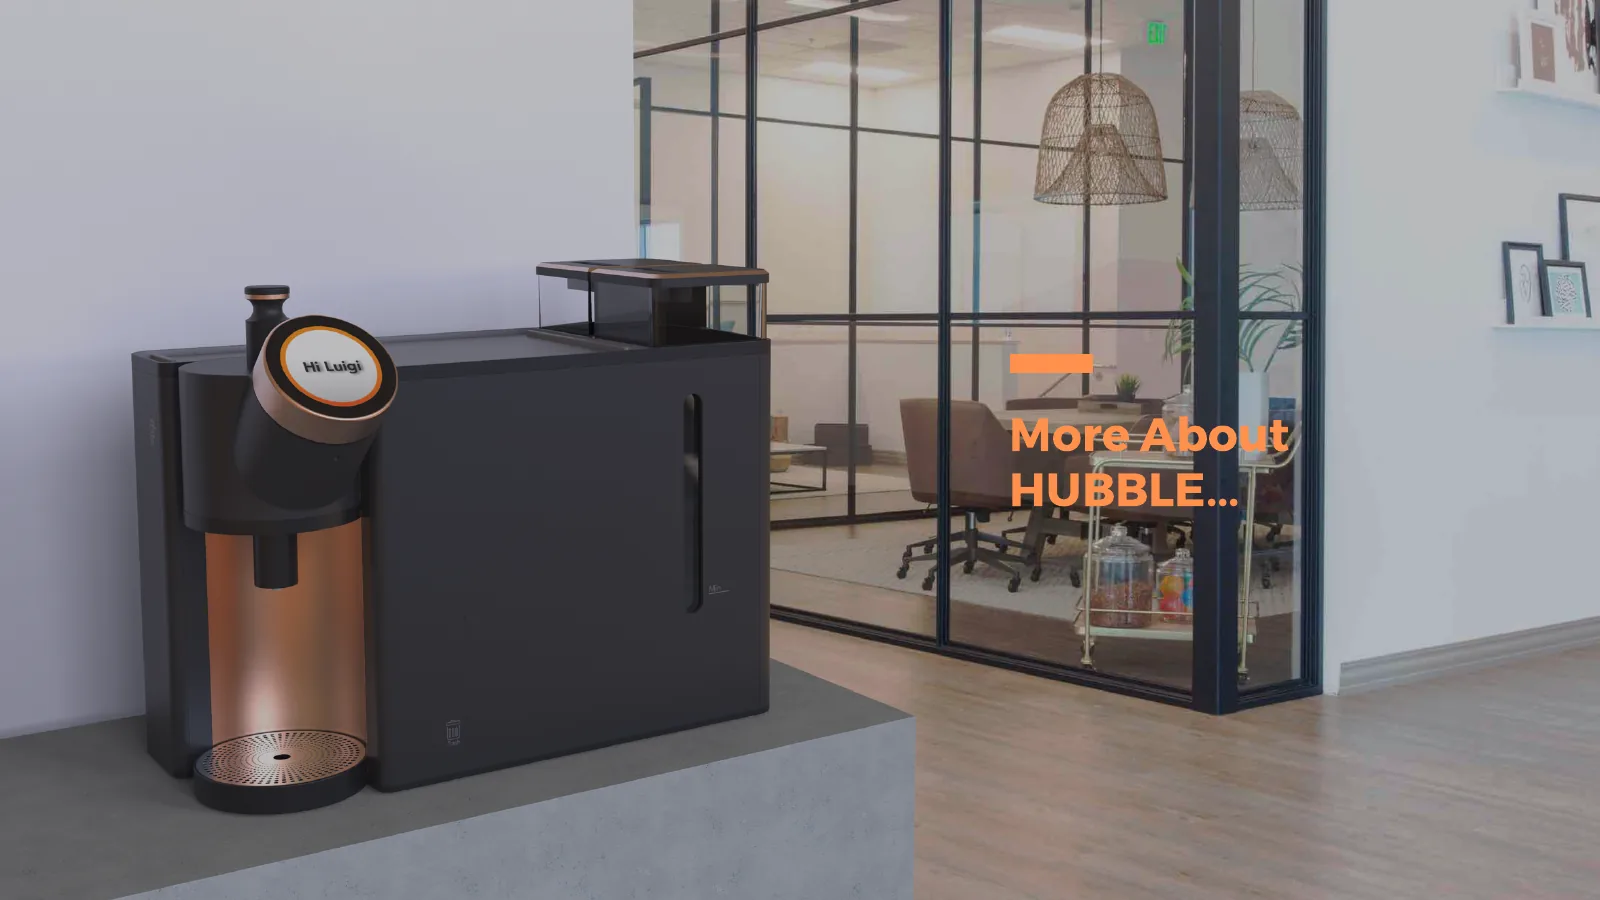
A rendering of the HUBBLE coffee machine on a shared office counter. A copper-colored dispensing head projects from the black body, with a circular display and cup visible.
The proposed HUBBLE design brings a matte-black body, copper-colored dispensing head, and circular control together in a form intended for shared spaces.

Design: Saved preferences and a circular interface

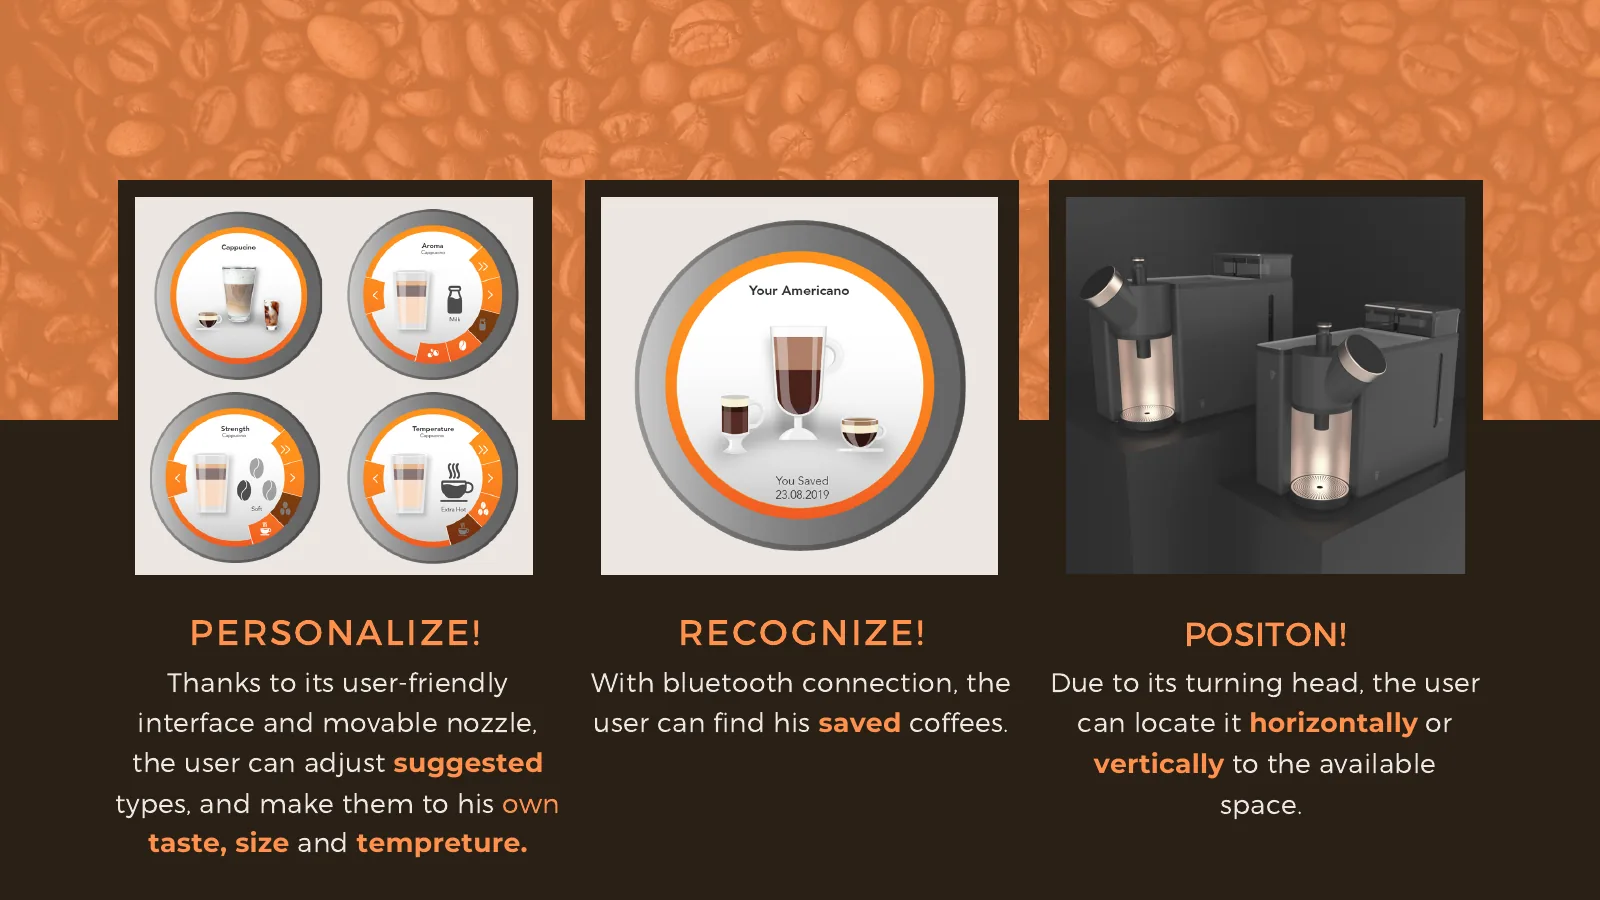
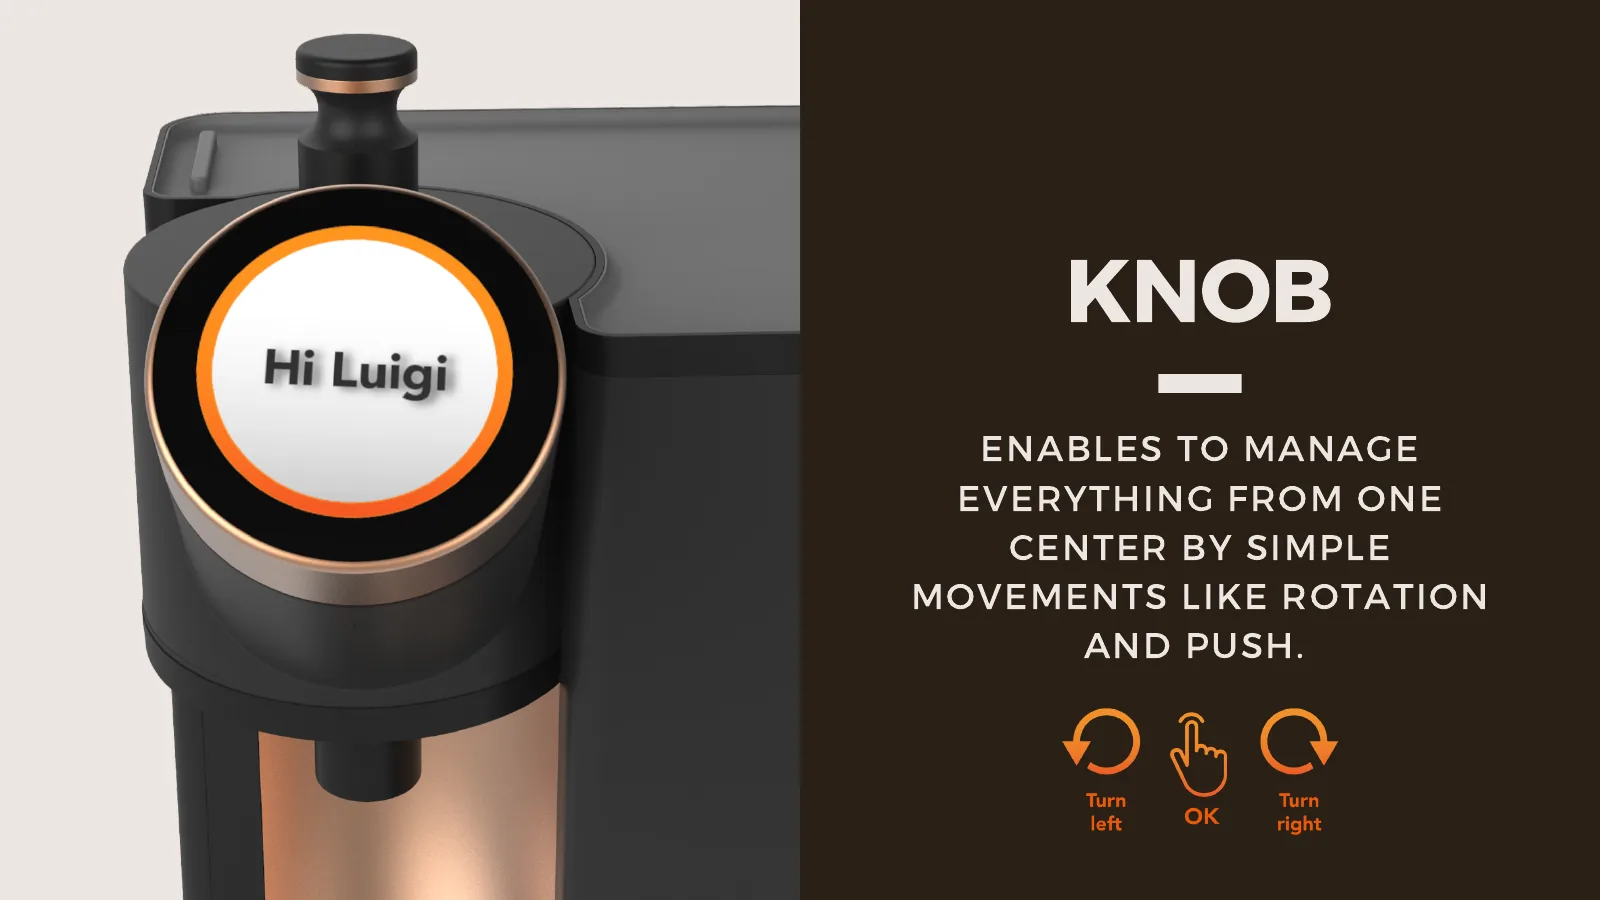
HUBBLE was designed to recognize users via Bluetooth and retrieve their saved recipes. On first use, the user turns the circular knob to select aroma, strength, temperature, and other settings, then presses it to confirm. A favorite drink can be named and saved for quick selection next time, while recommendations offer a way to try other flavors.

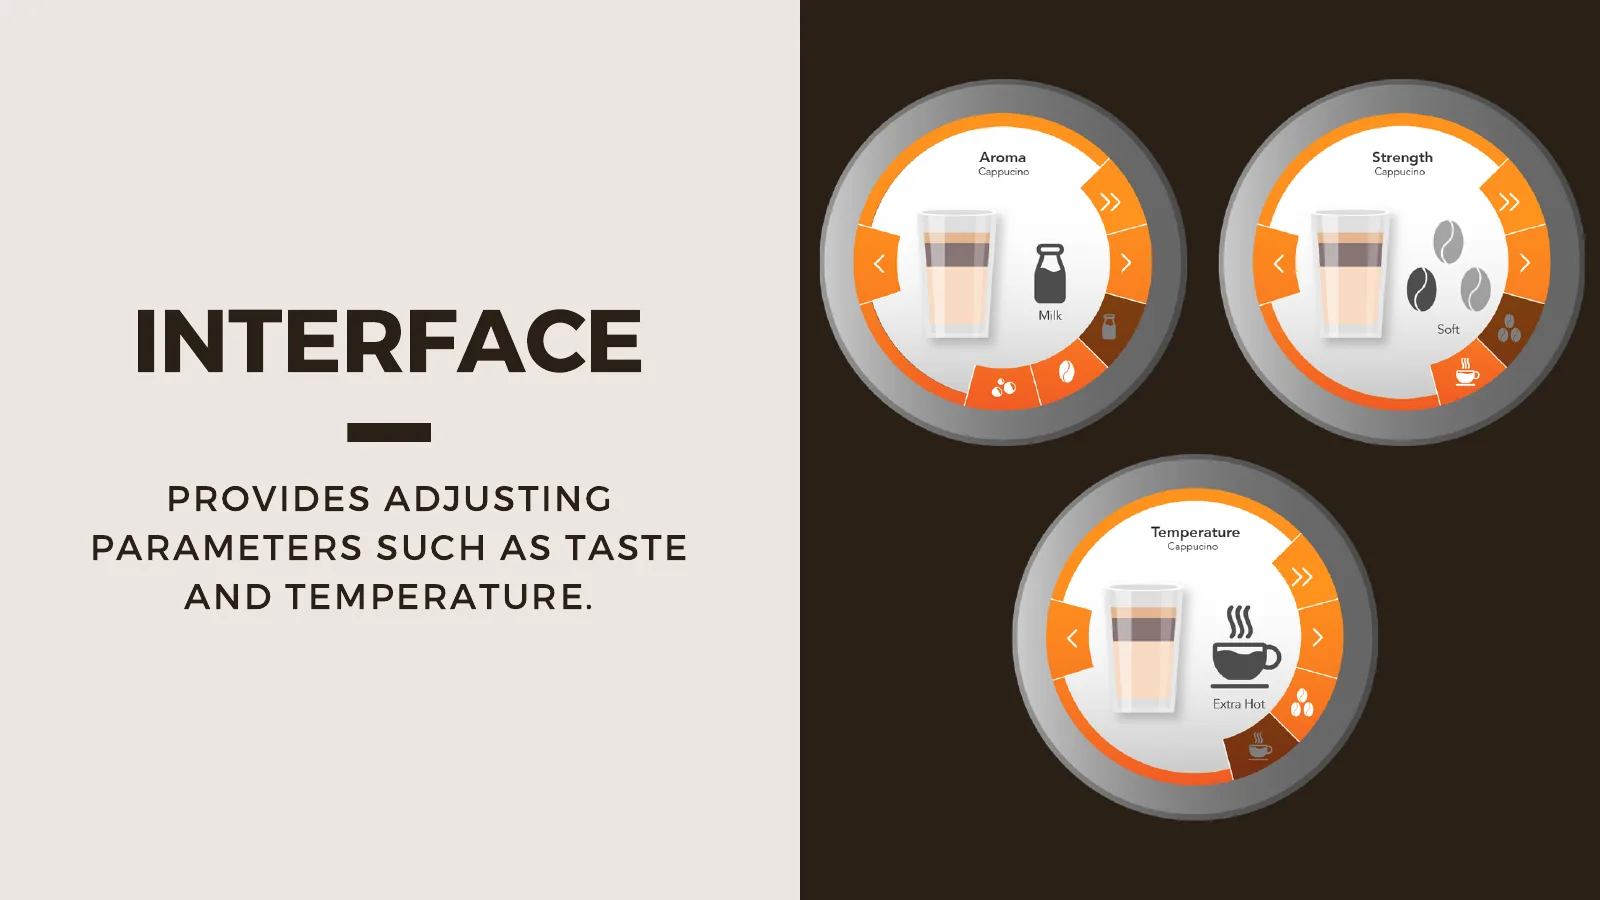
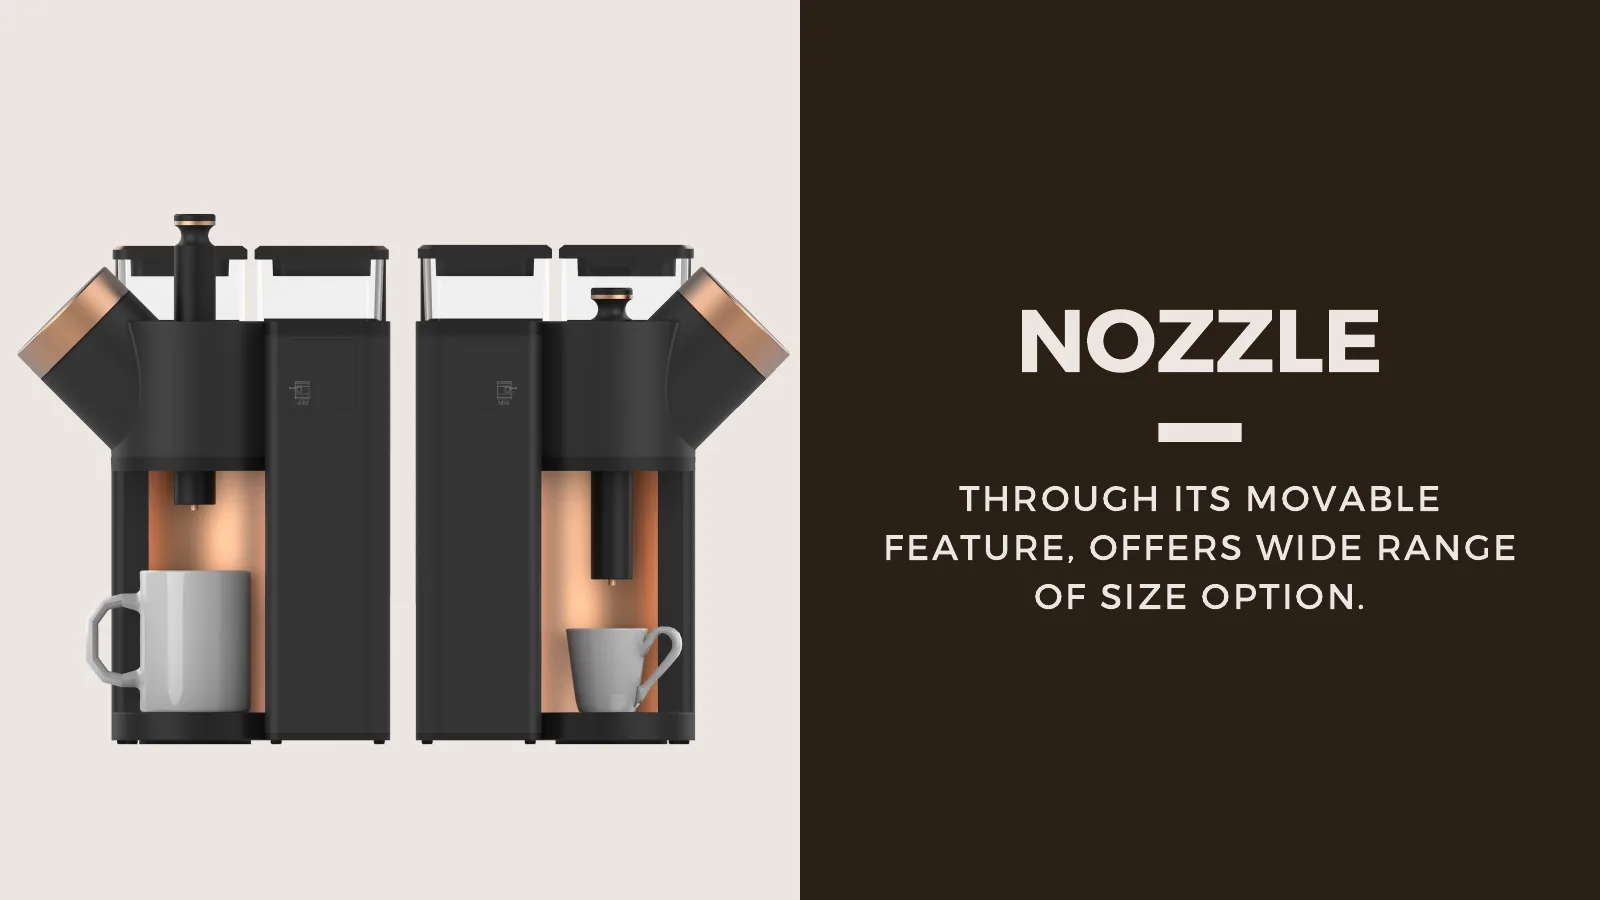
The interface combines a circular display with a rotary push control, keeping the front panel uncluttered and showing the setting sequence and current values in one place. The nozzle moves vertically to suit the cup, maintaining an appropriate distance from a small espresso cup or a tall mug.

Circular interface demonstration showing user recognition, recipe selection, adjustments to aroma, strength, and temperature, and the designed screen sequence leading to brewing. This is not a test of brewing performance on a physical machine.

Integrating placement, refilling, and maintenance

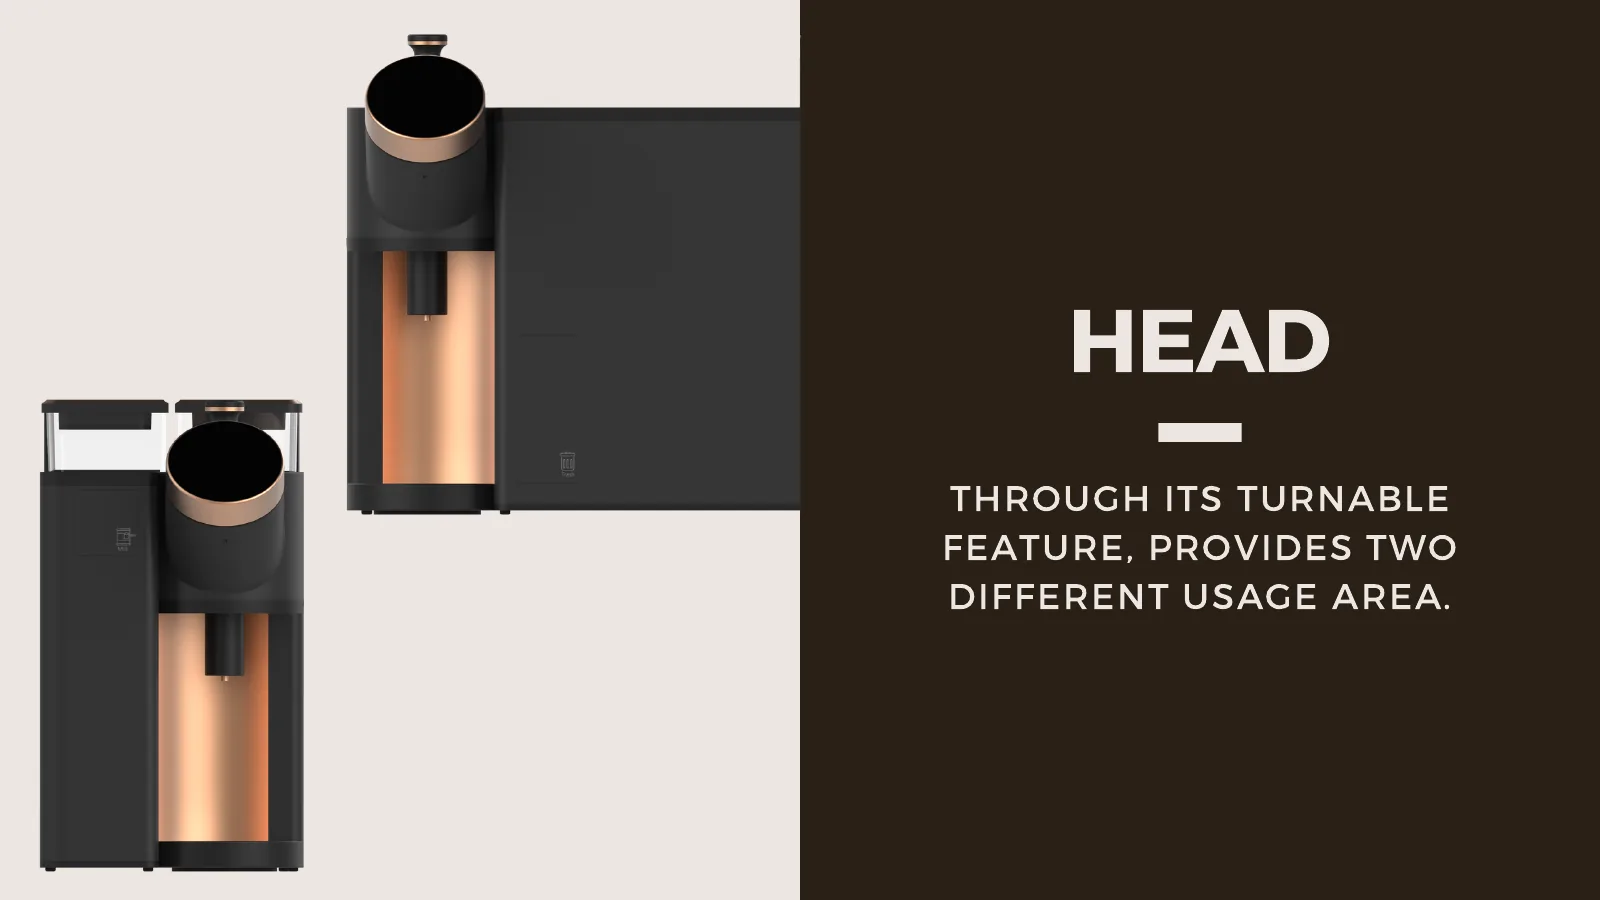
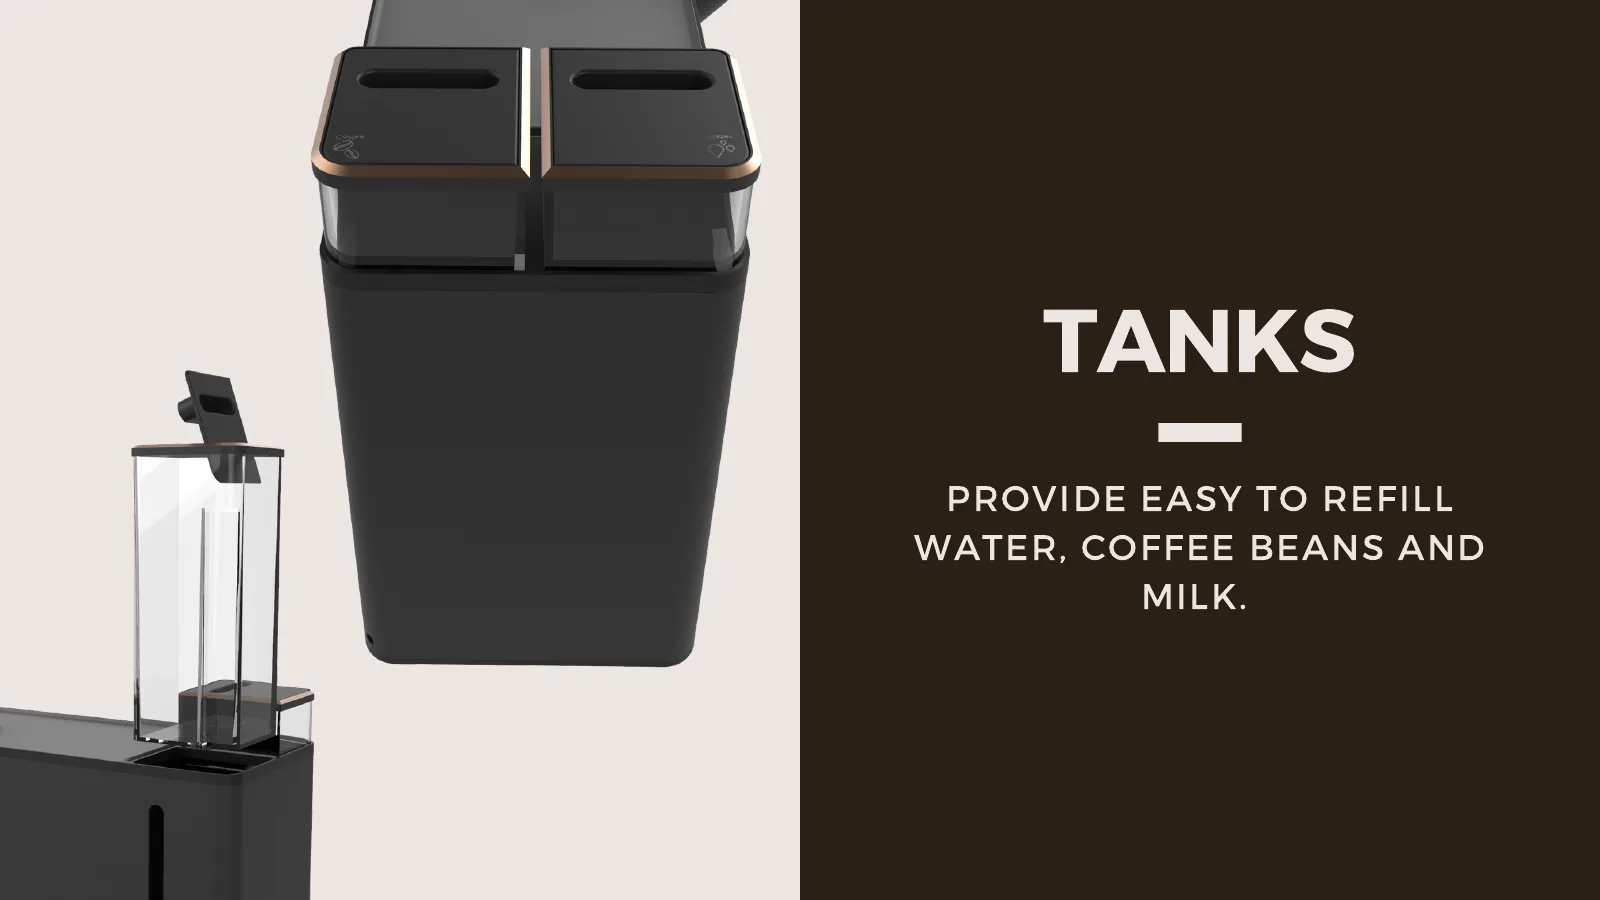
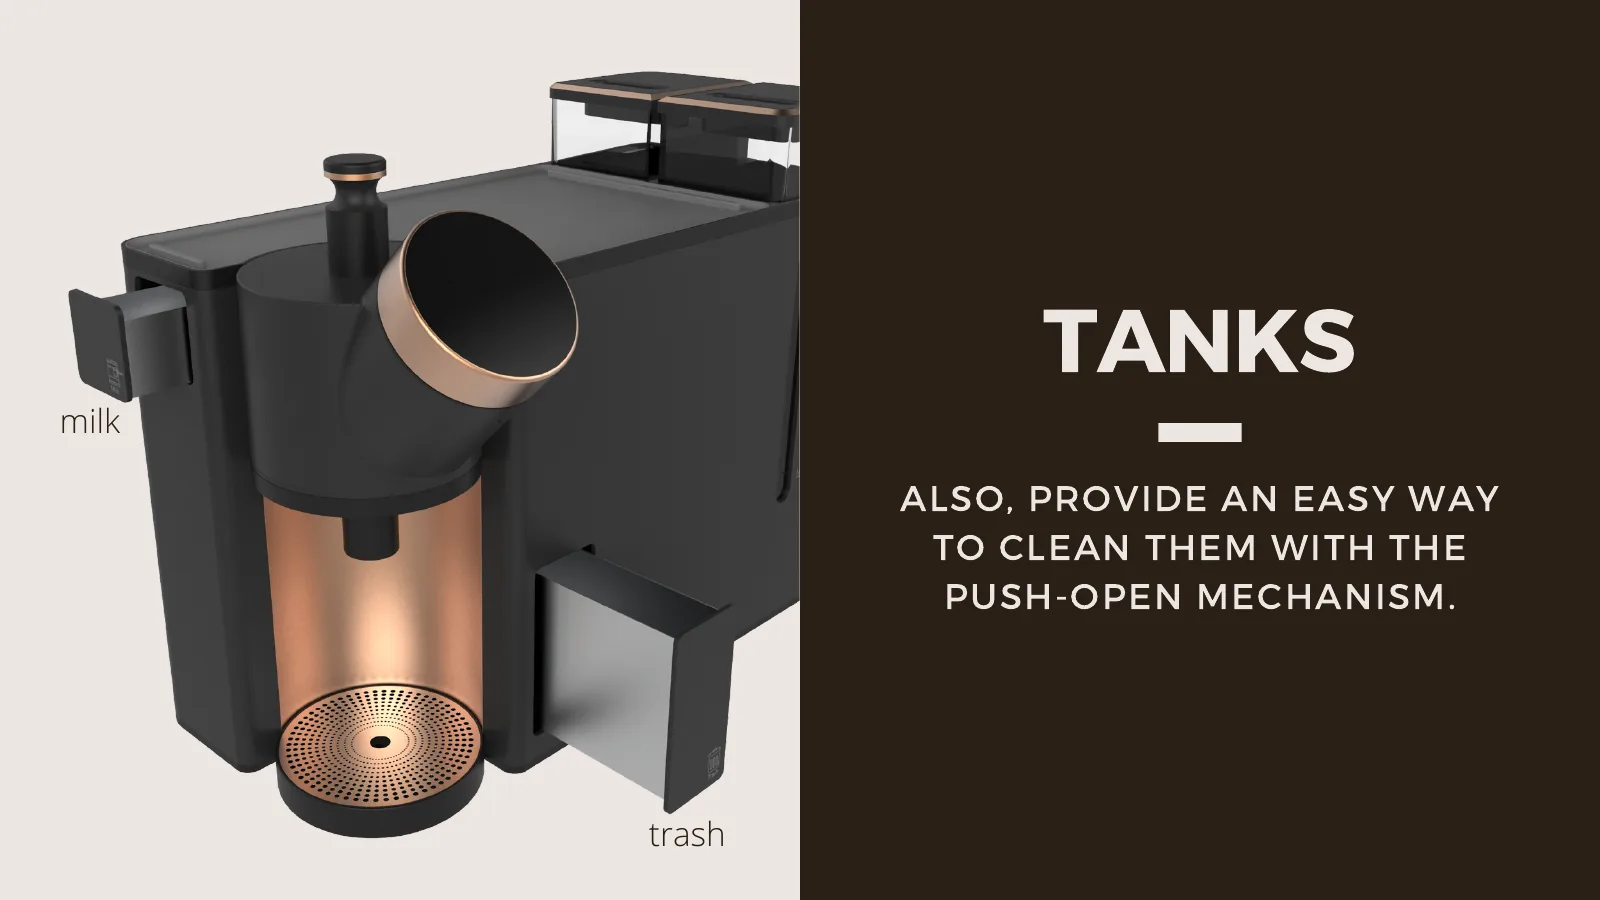
The dispensing head rotates relative to the body so that cups can be placed along either the long or short side of the counter. This lets the machine adapt to walls and circulation routes in compact kitchens and offices. The water and bean tanks lift out from the top, while the milk container and waste bin open with a push from the front, providing access for refilling and cleaning from more than one direction.

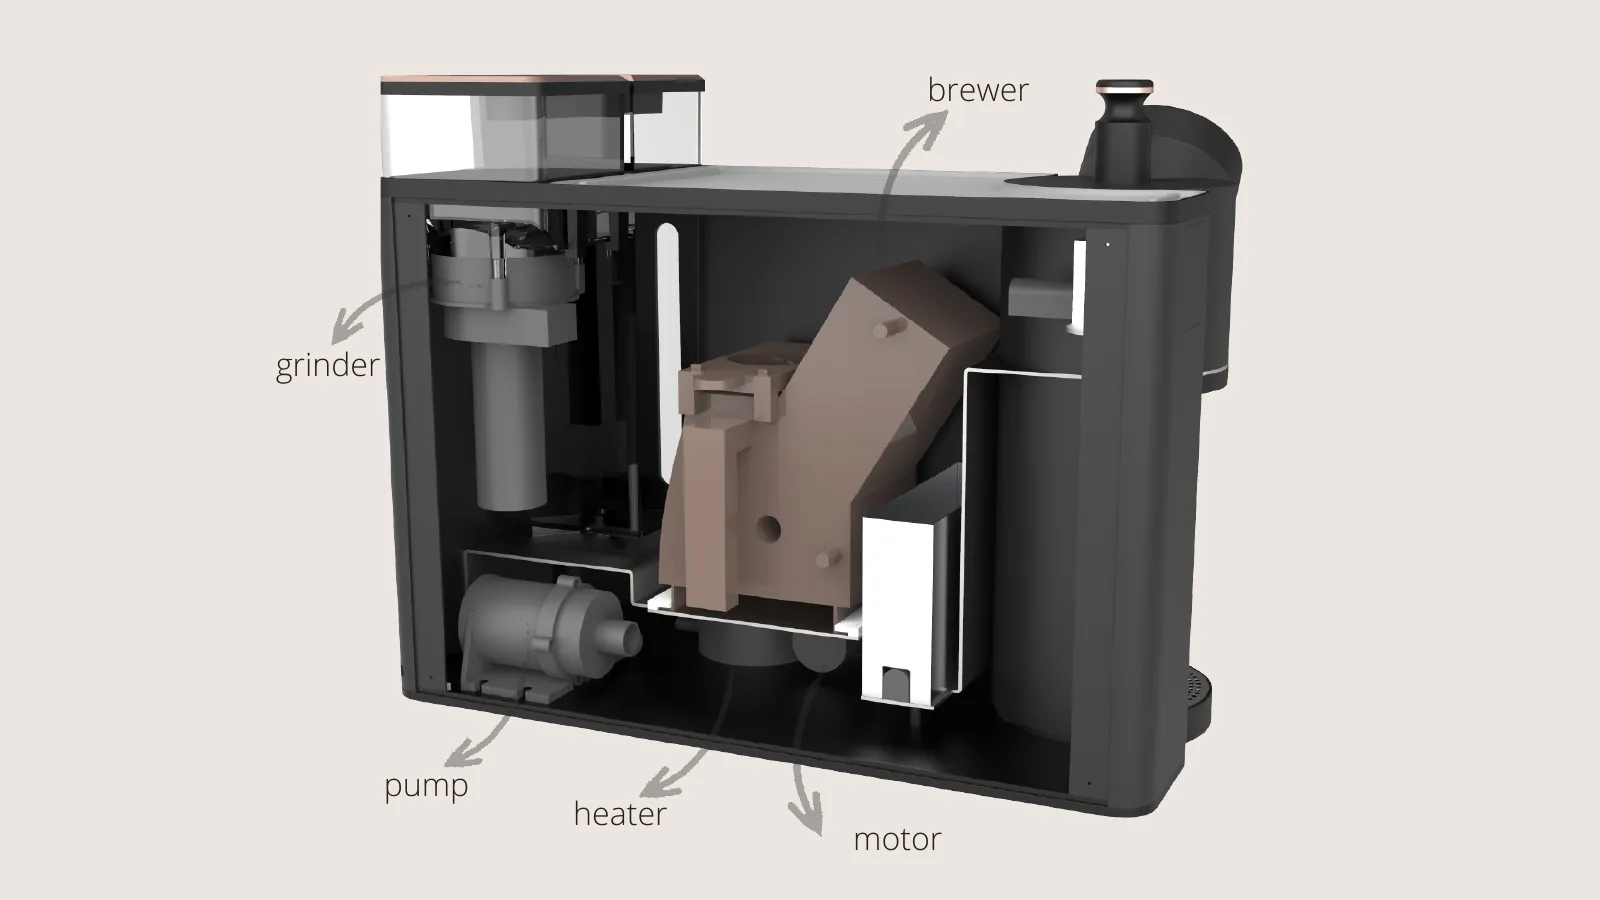
We also arranged the grinder, pump, heater, brewing mechanism, and rotation motor within the enclosure and developed the 3D CAD model and component structure. The final drawing set includes assembly drawings, a bill of materials, and manufacturing drawings for individual parts.
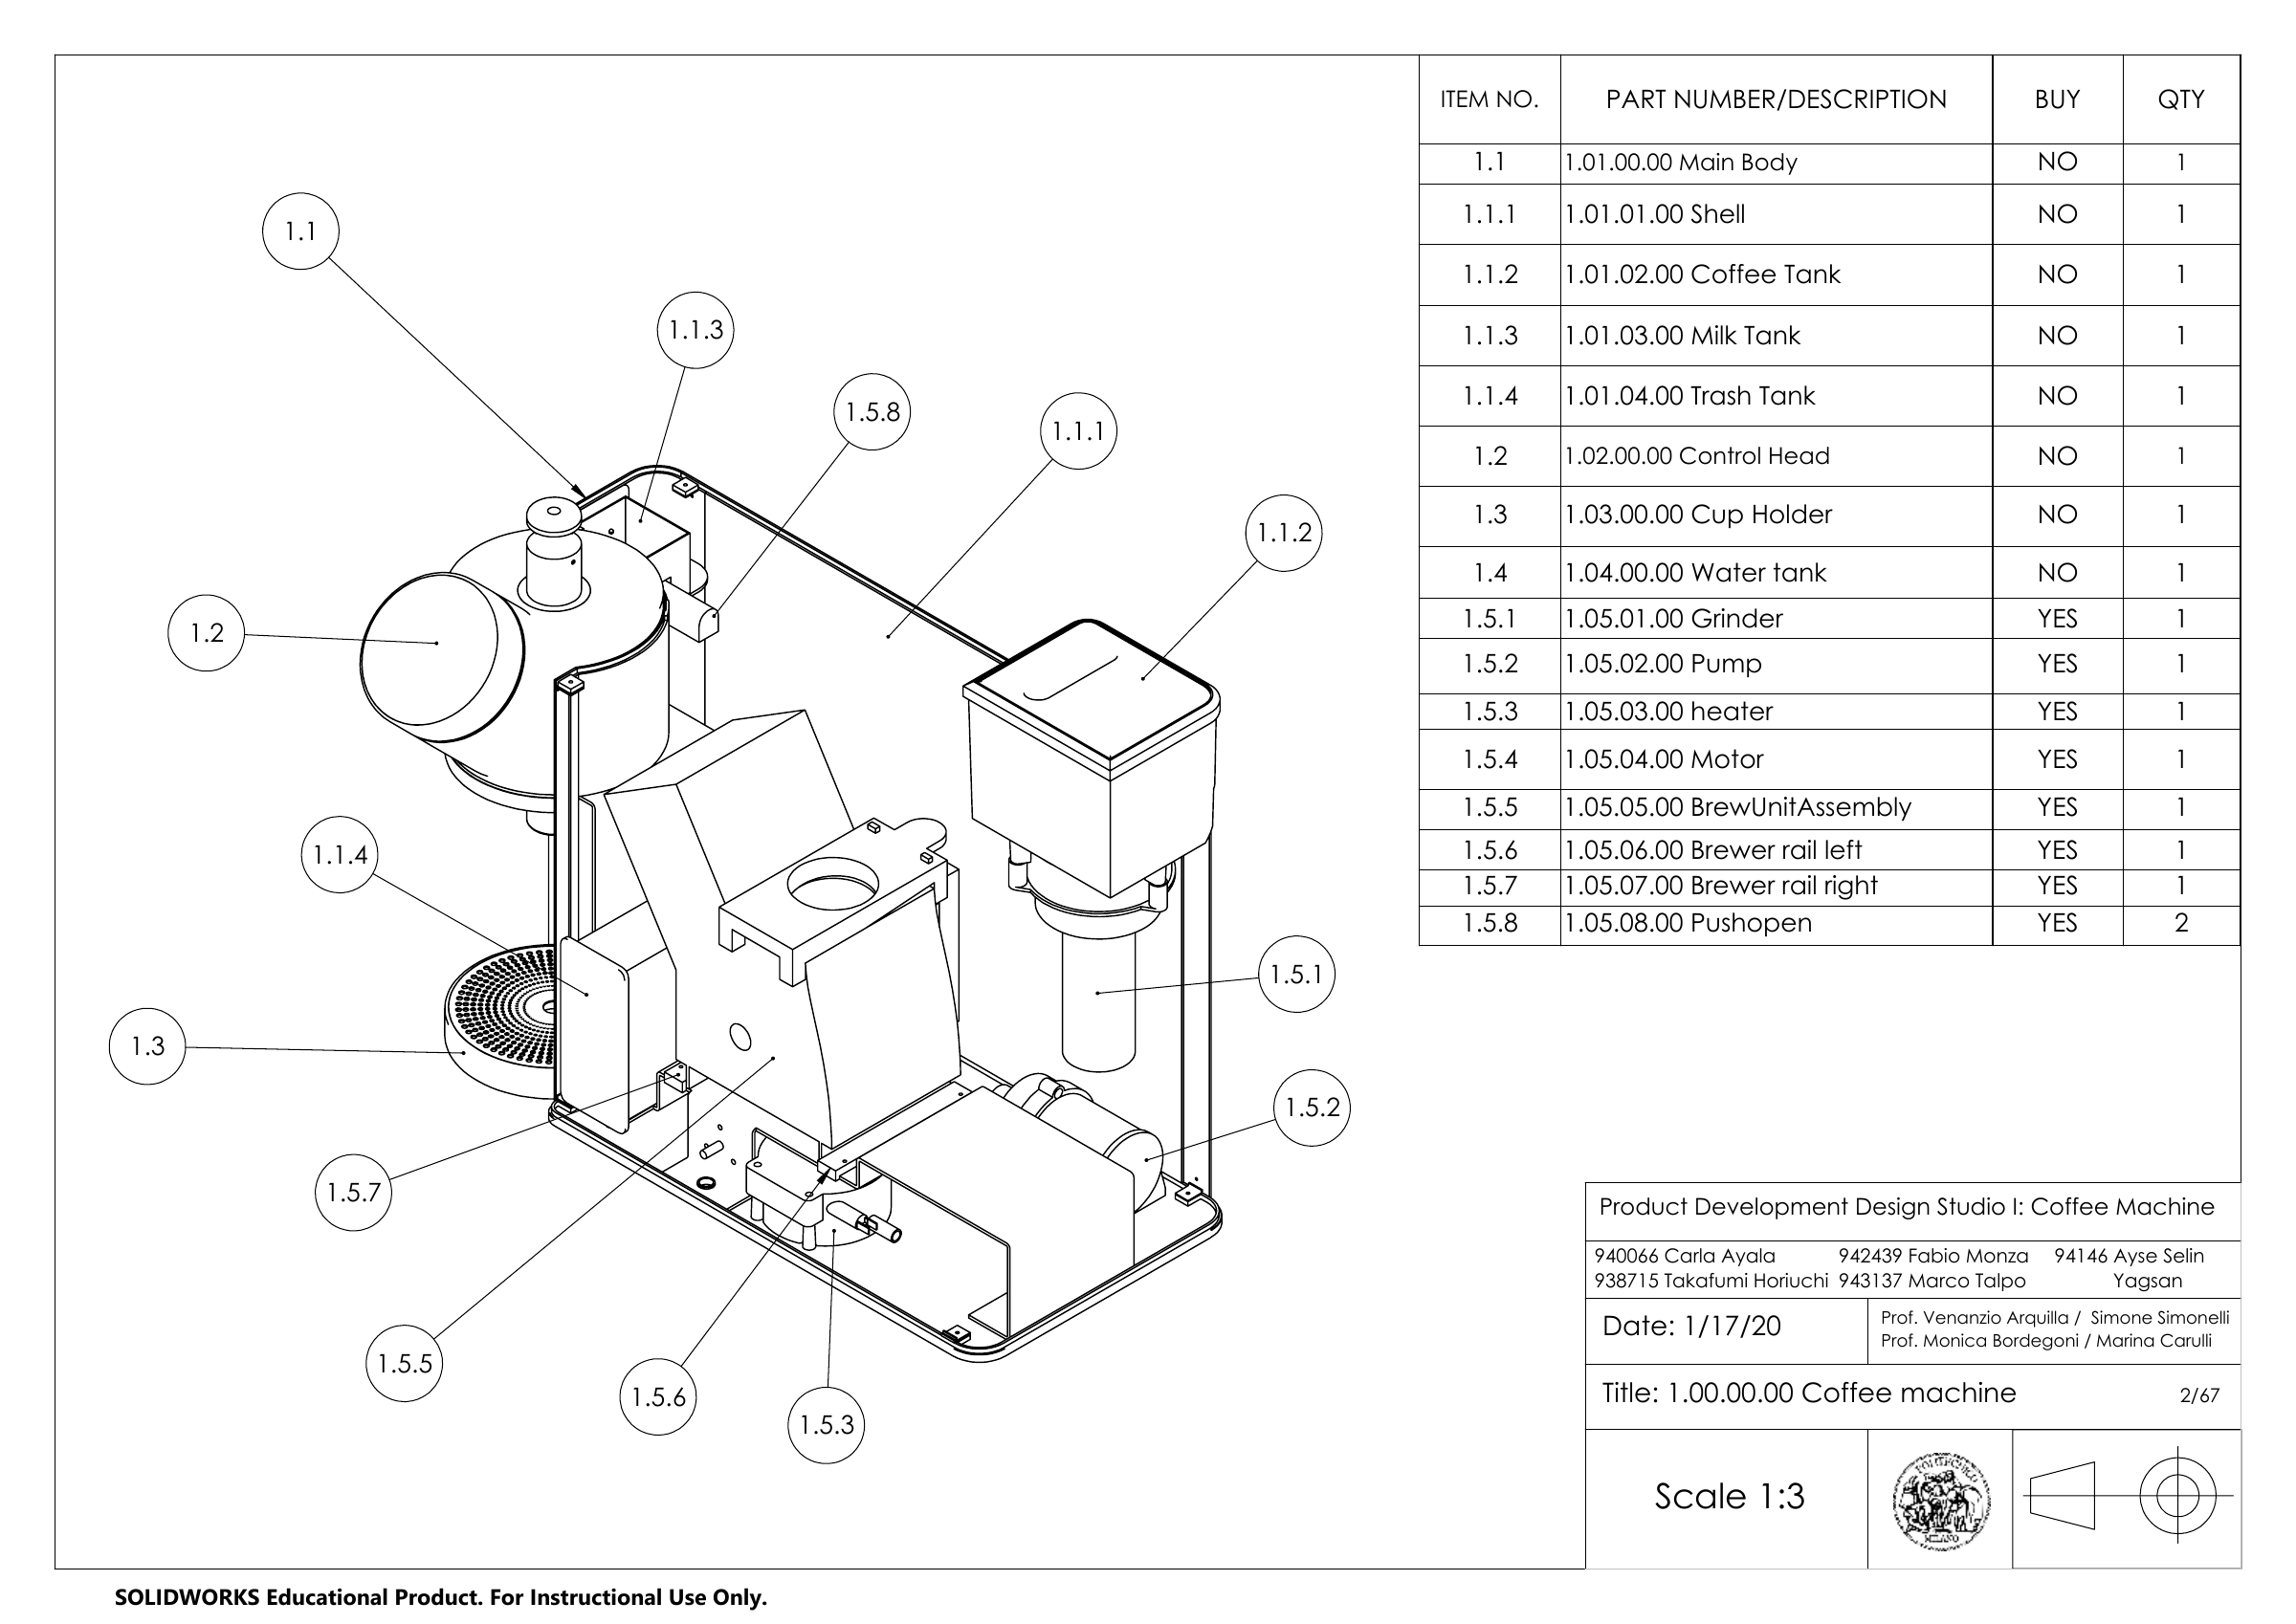
An assembly drawing of HUBBLE, showing the exploded body, rotating dispensing head, circular control, and numbered internal components, with a bill of materials on the right.
HUBBLE assembly drawing and bill of materials, showing the overall structure and the relationship between the enclosure and internal mechanisms.

Outcome: An integrated design developed through CAD and engineering drawings

The final proposal integrates requirements based on use scenarios and personas, product styling, circular interface flows, moving components, maintenance access, internal layout, 3D CAD, assembly drawings, and part drawings. It addresses shared use through a machine designed to remember each person's preferences.

Product Development Design Studio I, Coffee Machine, Group 7. Joint work by Carla Ayala, Fabio Monza, Ayse Selin Yagsan, Takafumi Horiuchi, and Marco Talpo.

Final presentation

  1. A cover slide for HUBBLE Coffee Machine, with a blurred silhouette of the machine centered against a dark background.
  2. A project section divider with a close-up of HUBBLE’s copper-colored circular control and dispensing head.
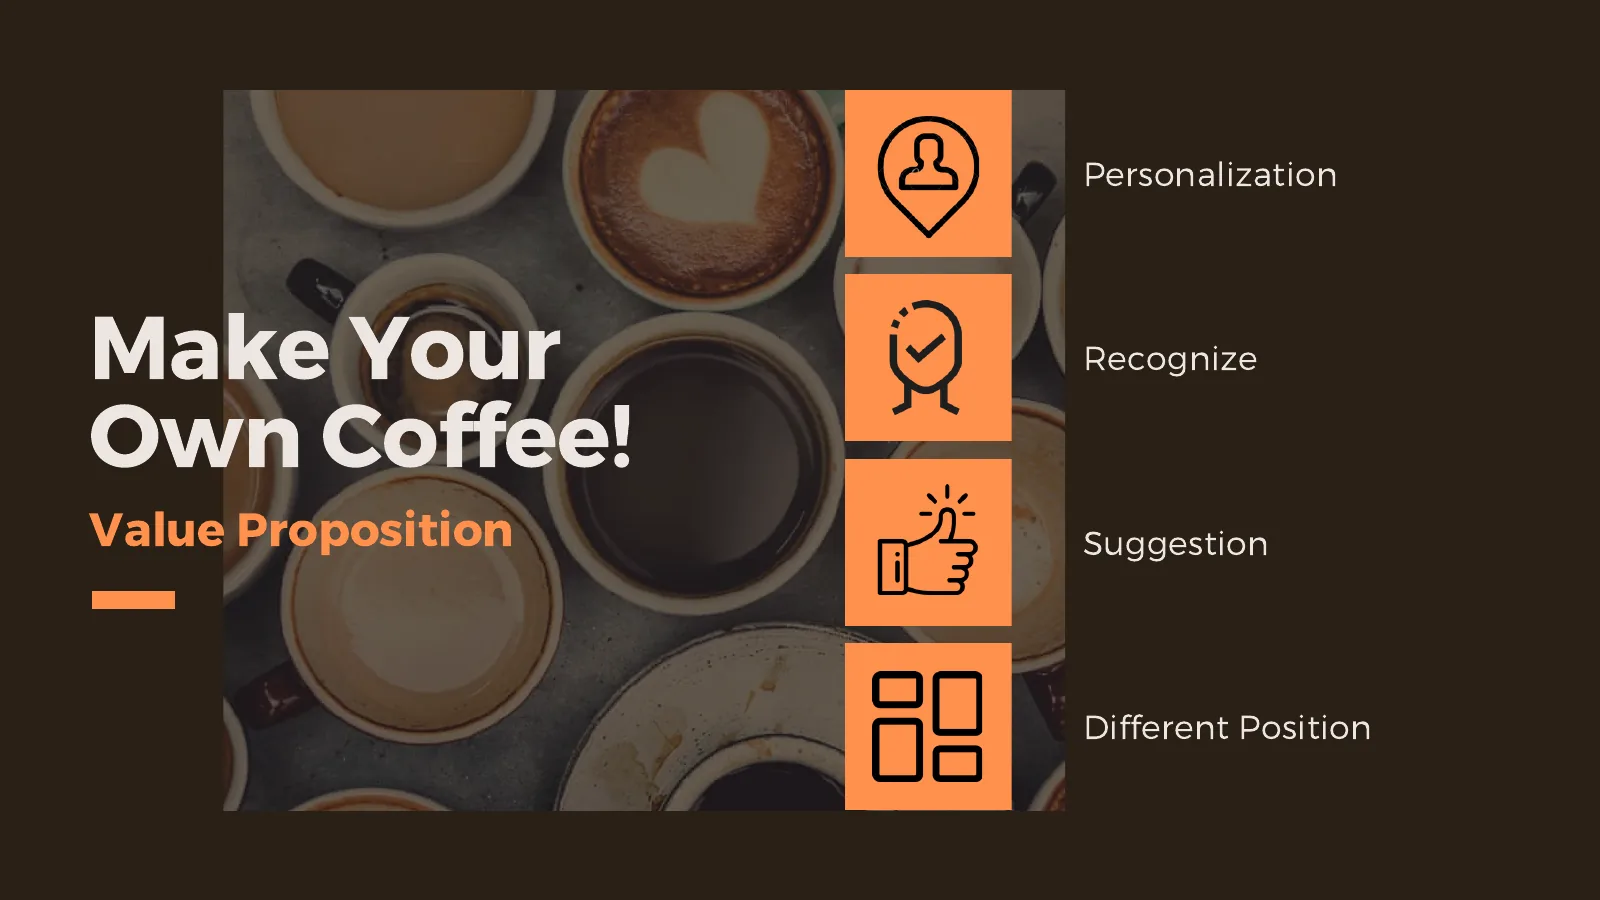
  3. The HUBBLE value proposition, with a product rendering and the keywords “Personalize,” “Recognize,” “Suggestion,” and “Position.”
  4. A final design section divider showing the HUBBLE dispensing head from above at an angle.
  5. A rendering of the proposed HUBBLE coffee machine on a counter in a shared office.
  6. Three features, “Personalize,” “Recognize,” and “Position,” illustrated through the circular interface, user recognition, and rotating dispensing head.
  7. A research section divider with an overhead photograph of a table holding several cups.
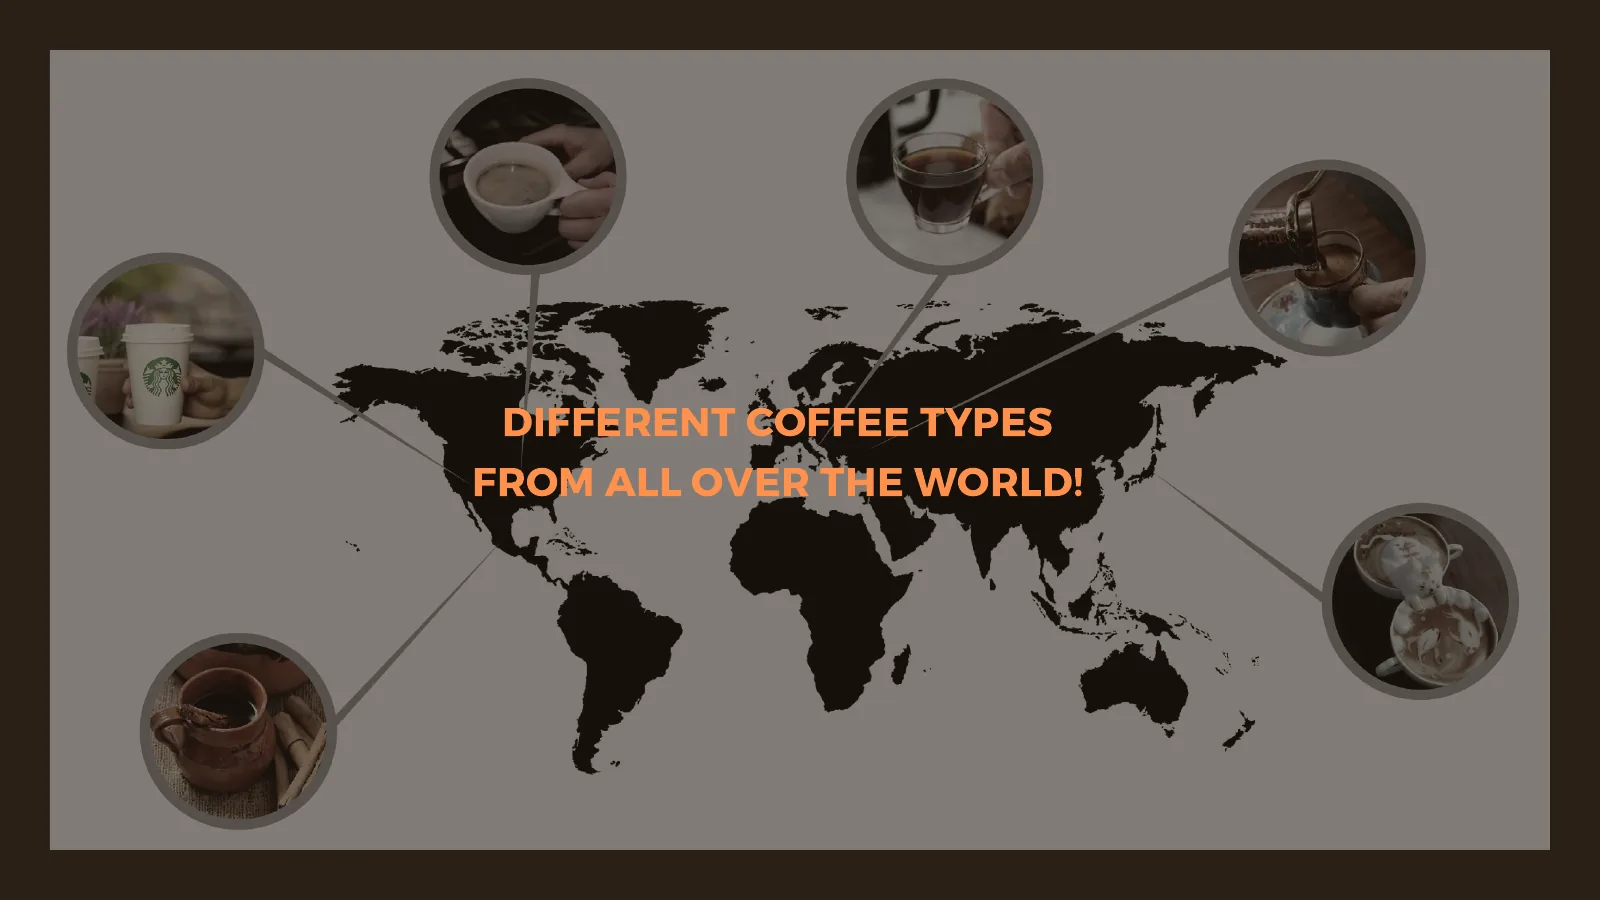
  8. A comparison of coffee cultures around the world, using a world map and different types of coffee cups.
  9. A shared spaces section divider with a photograph of people gathered around a coffee machine.
  10. Photographs of three intended settings: a shared flat, a coworking space, and an office.
  11. Two contrasting personas: Maria, who prefers a large, mild coffee, and Mert, who prefers a small, strong one.
  12. A design process section divider with sketches, models, and CAD details.
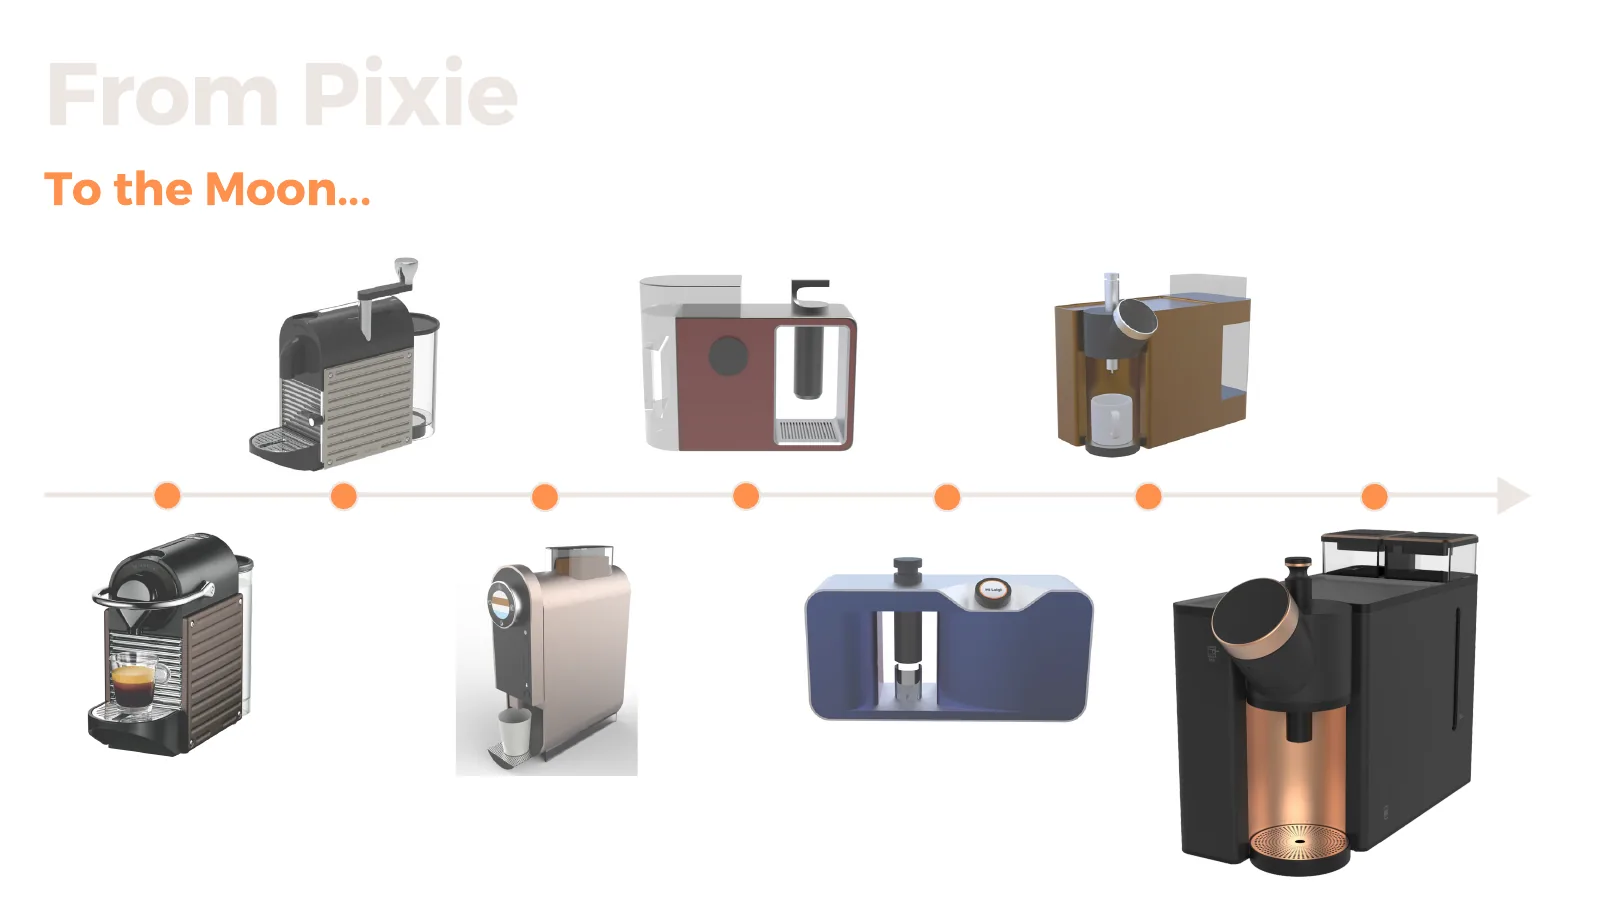
  13. The evolution of the coffee machine’s form, from early sketches to a design with a rotating dispensing head.
  14. A comparison of the size and configuration of the Nespresso Pixie and HUBBLE.
  15. A final rendering of HUBBLE in a shared kitchen, dispensing coffee into a cup.
  16. A mood board section divider with a collage of products featuring black and copper-colored finishes.
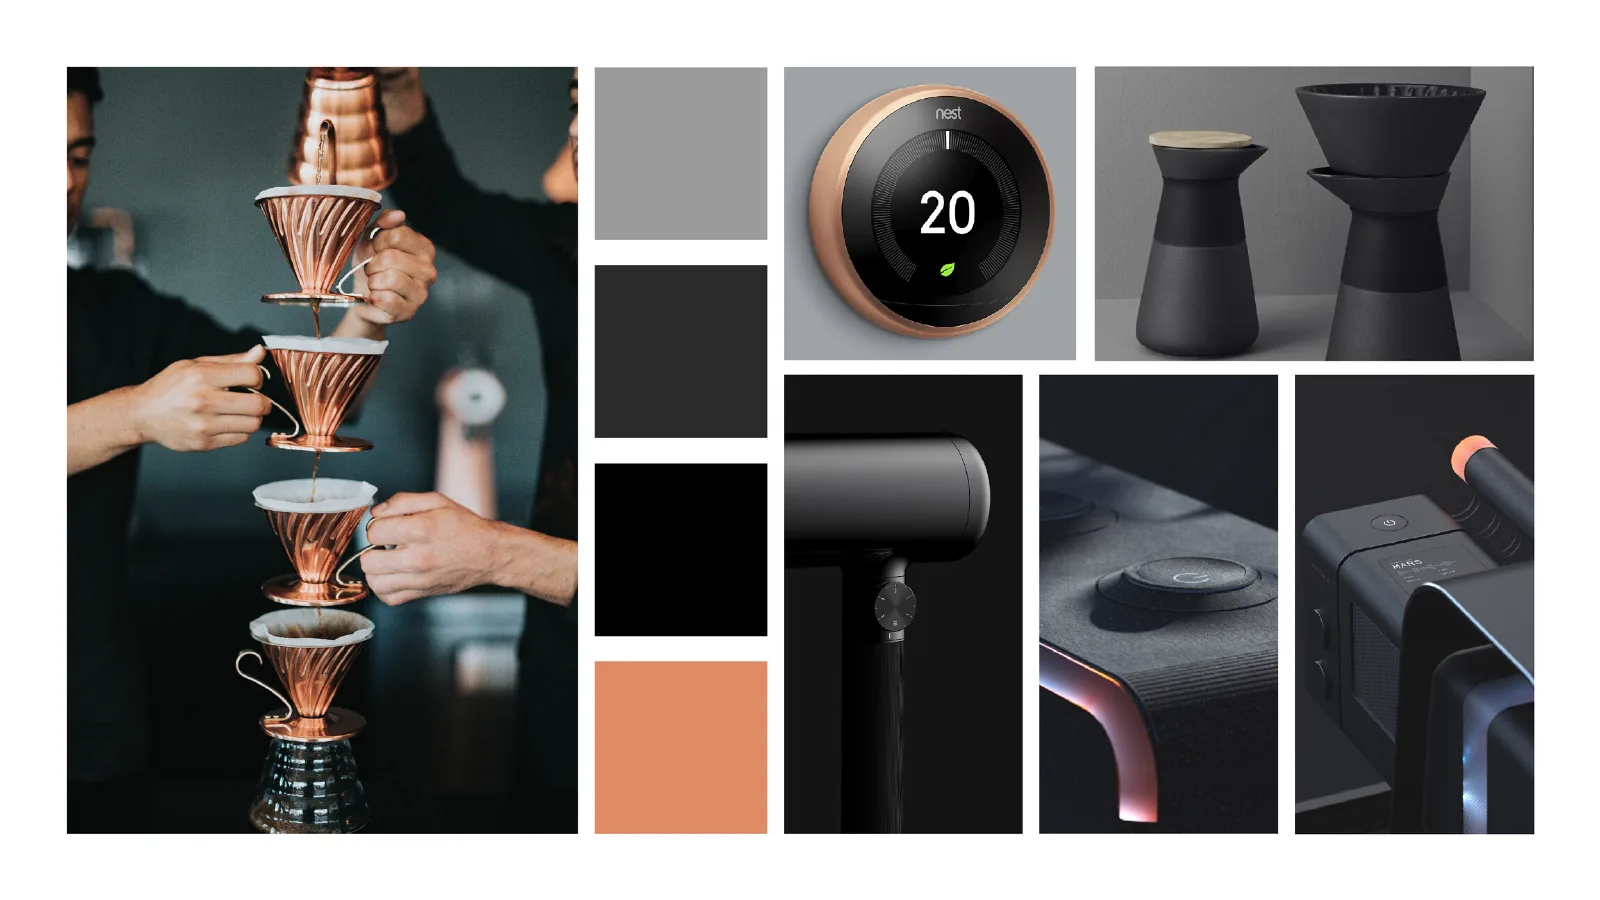
  17. The HUBBLE mood board, combining images of precision instruments, celestial bodies, copper, and black surfaces.
  18. An interaction section divider with a rendering of a hand using the circular display and knob.
  19. The circular knob interaction, showing the user’s name, rotation to select an option, and a press to confirm.
  20. Three circular interface screens for adjusting “Aroma,” “Strength,” and “Temperature.”
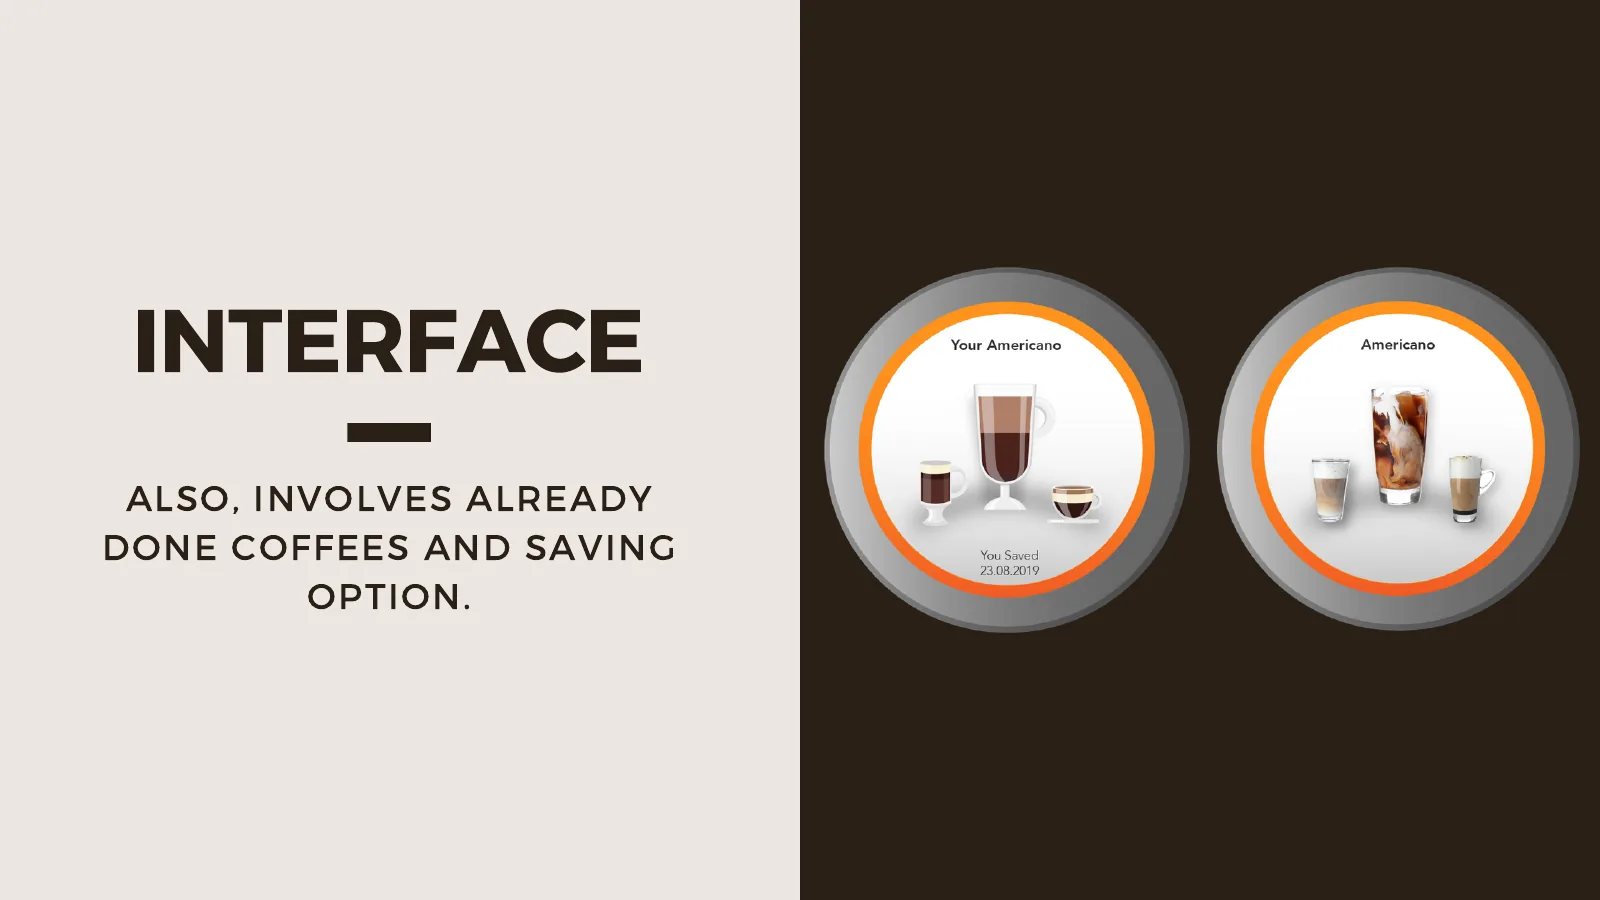
  21. A circular interface flow showing the saved recipe “Your Americano” and choices for volume and preferences.
  22. The height-adjustable nozzle positioned above three cups of different heights, from a small cup to a tall mug.
  23. A diagram showing how the dispensing head rotates to accommodate cups along either the long or short side of a counter.
  24. The water and bean tanks, designed to lift out from the top of the machine.
  25. The milk container and coffee grounds bin, designed to open with a push from the front.
  26. An internal components section divider with a transparent rendering of the enclosure and mechanisms.
  27. The internal arrangement of the grinder, pump, heater, brewing mechanism, rotation motor, and other components.
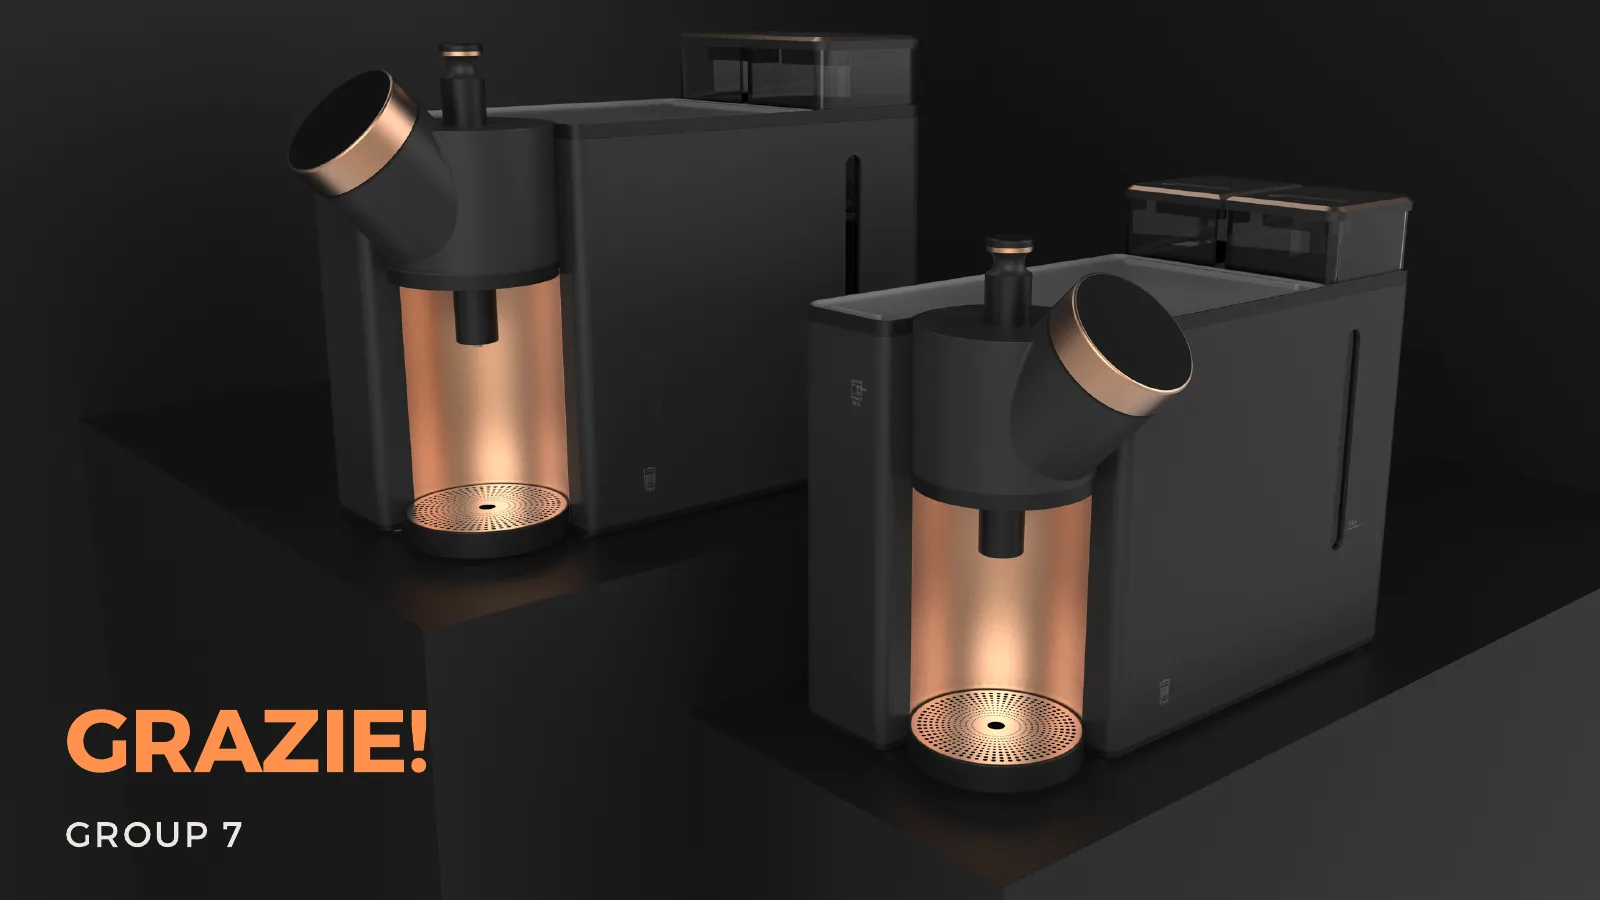
  28. Two final renderings of the HUBBLE coffee machine, showing its black and copper-colored enclosure from the front and at an angle.
Slides from the final presentation.

PAPR design for welders (summer 2020)

Challenge: Respiratory protection that works with existing welding shields

Welders need respiratory and facial protection from fumes and hot sparks. In confined workspaces, however, layers of protective equipment can make it difficult to put on and remove gear and can obstruct vision and movement. The brief called for a lightweight powered air-purifying respirator (PAPR) that could be fitted quickly to an existing welding shield.

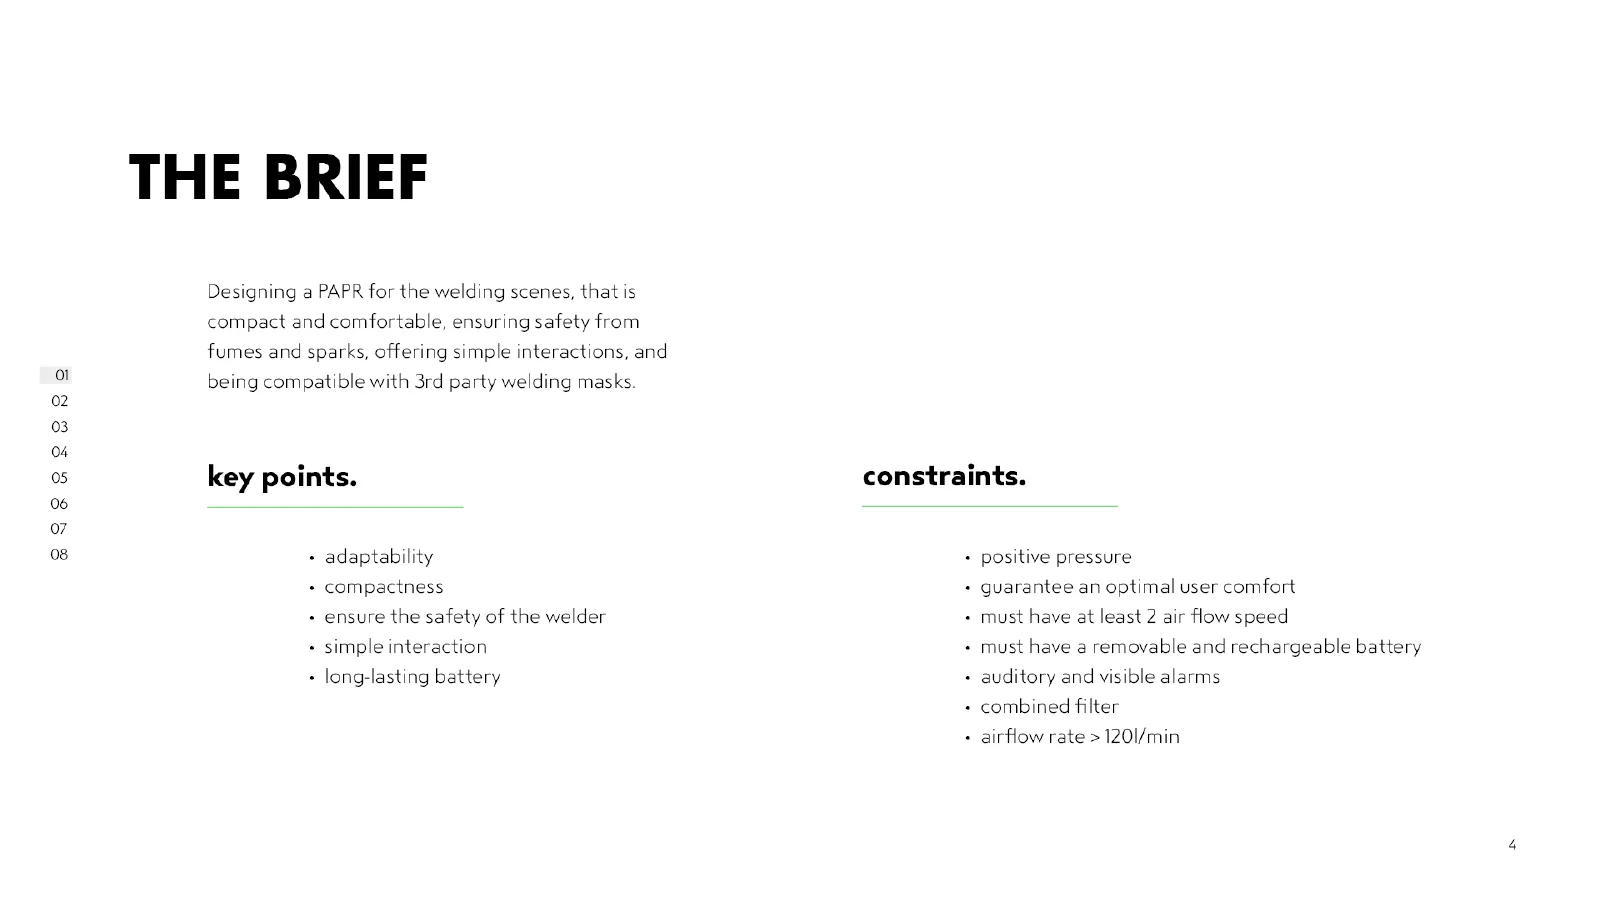
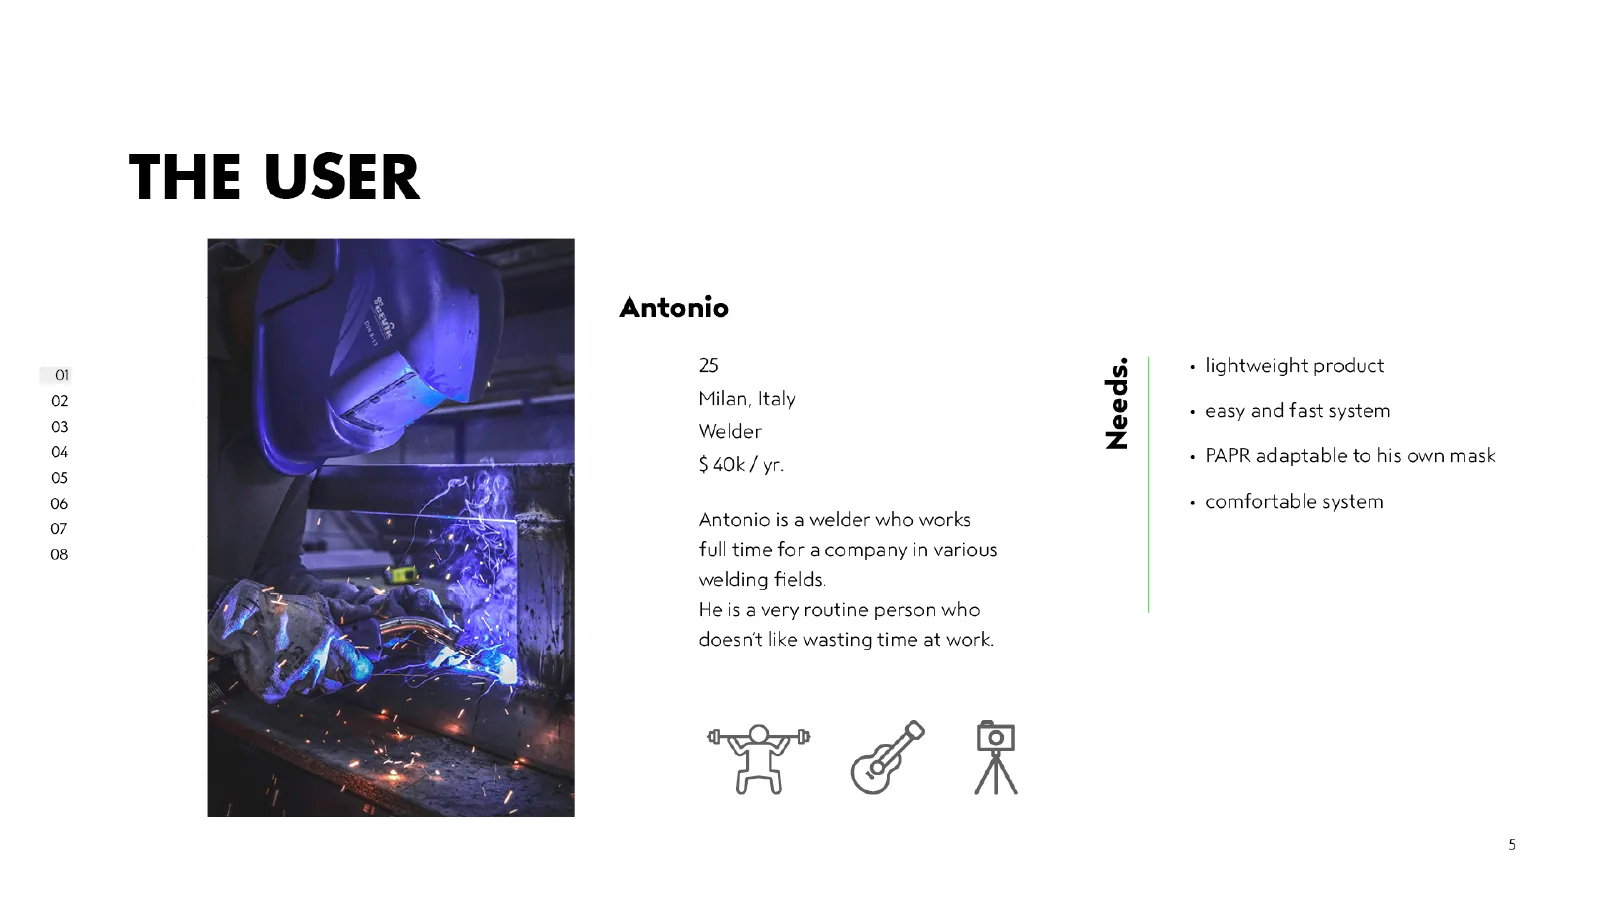
We created Antonio, a 25-year-old full-time welder in Milan, as the project persona. The design requirements included compatibility with different shields, a compact form, comfort, a replaceable battery with a long operating life, positive pressure, at least two airflow settings, visual and audible alarms, a combined filter, and airflow of at least 120 L/min.

A rendering of a welder wearing VCS-20, with a black welding shield, neck-covering hood, vest, and C-shaped shoulder-supported blower unit.
The proposed VCS-20 system integrates a hood that attaches to an existing welding shield, a vest that secures the system to the body, and a shoulder-supported blower unit.

Design: A hood, vest, and shoulder-supported PAPR unit

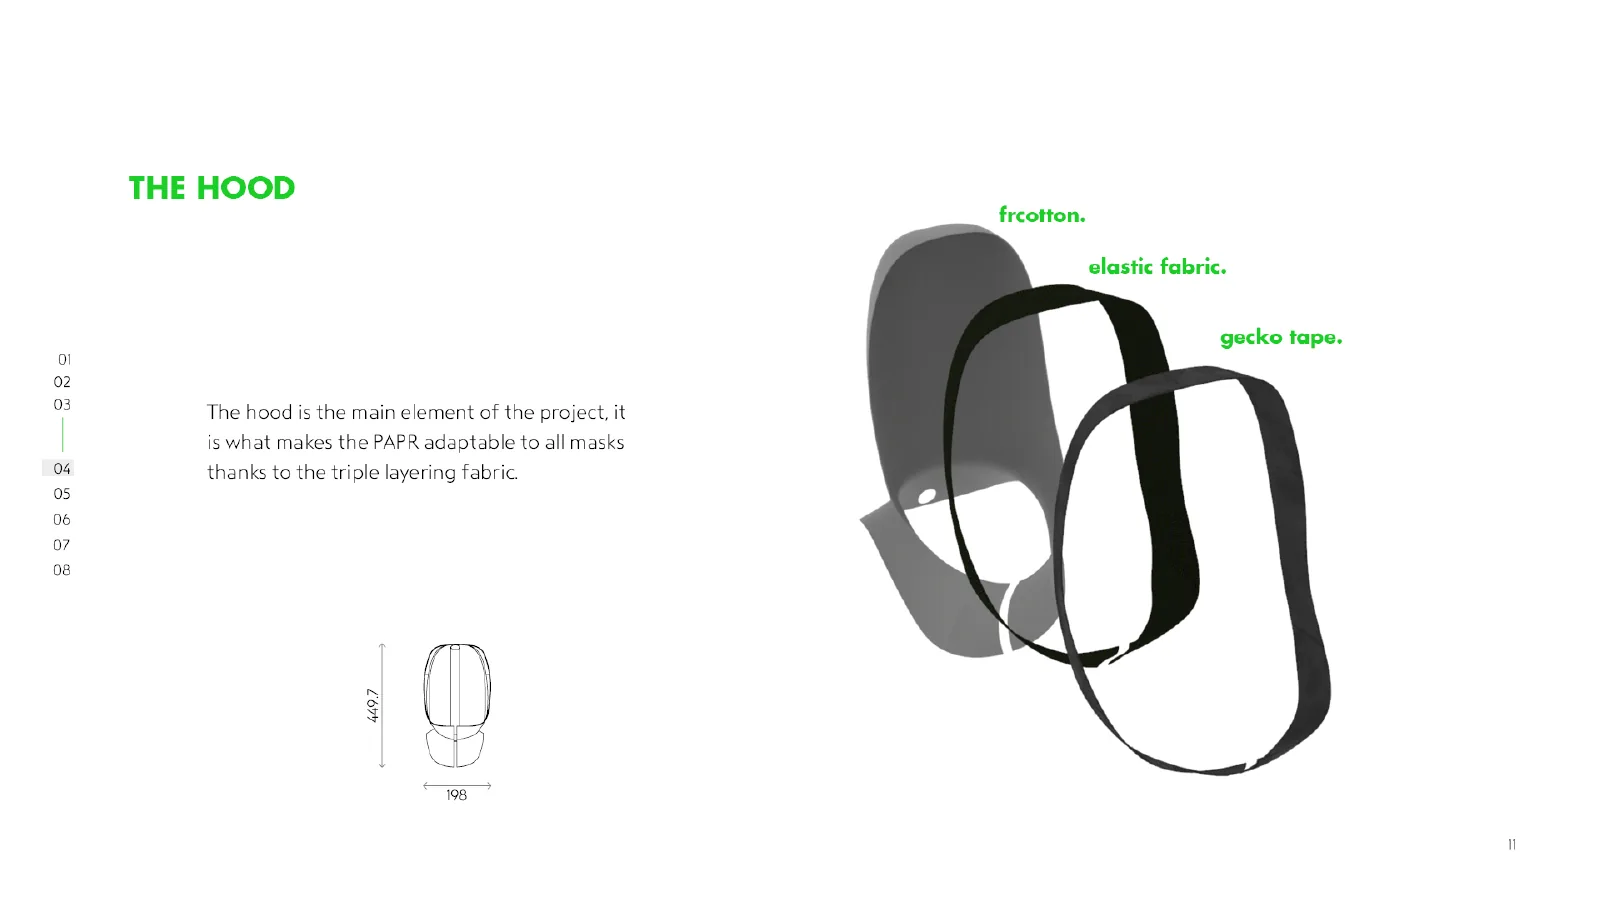
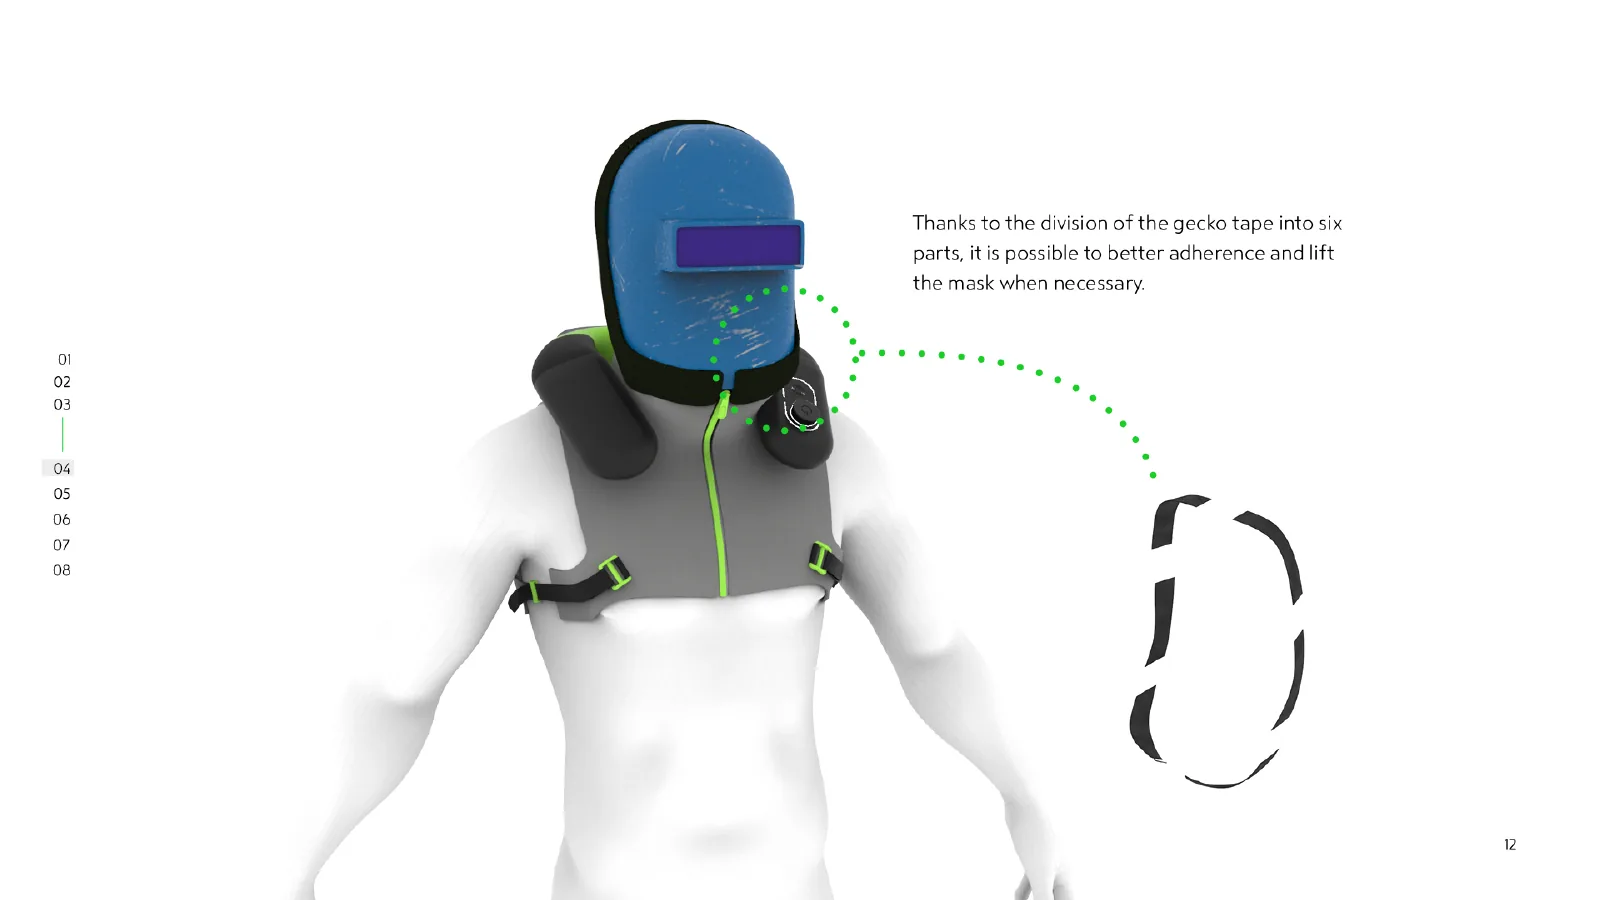
VCS-20 combines an adaptable hood, a vest, and a C-shaped PAPR unit. The hood pairs flame-resistant cotton with stretch fabric and uses six Gecko Tape attachment points to fit different shield shapes. The shield can be lifted on its own during a break, without removing the entire system.

The vest limits movement of the unit and adjusts to the wearer with hook-and-loop fasteners and straps. A magnetic connector at the neck supplies air to the hood, while the blower unit distributes its weight across both shoulders. Articulated rear and side joints and silicone components were designed to accommodate different body sizes and movement.

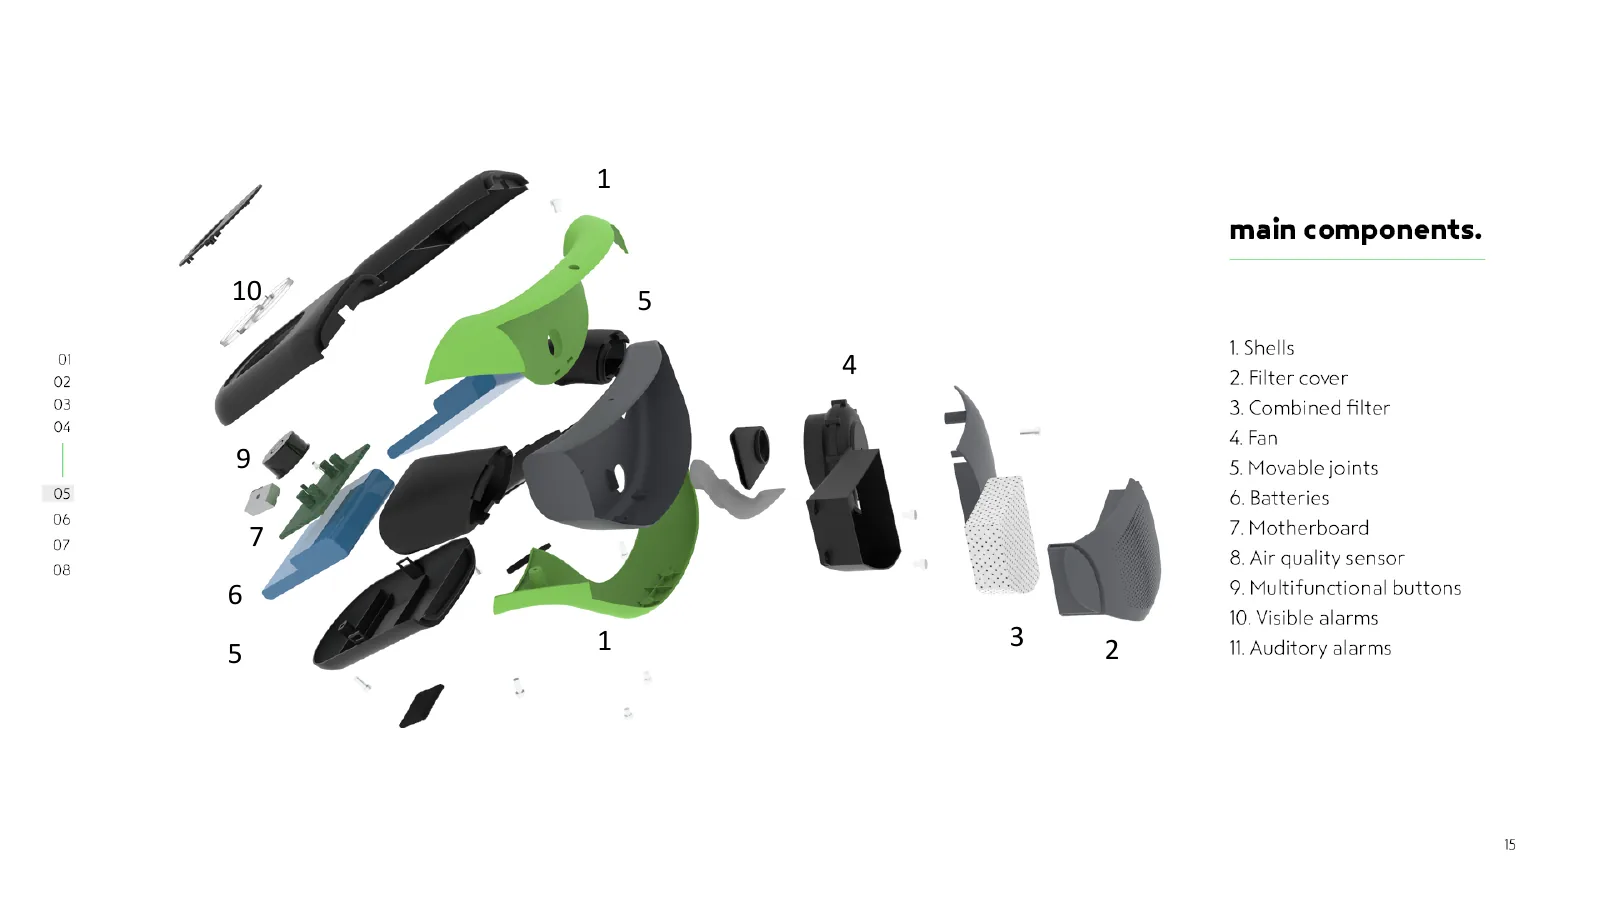
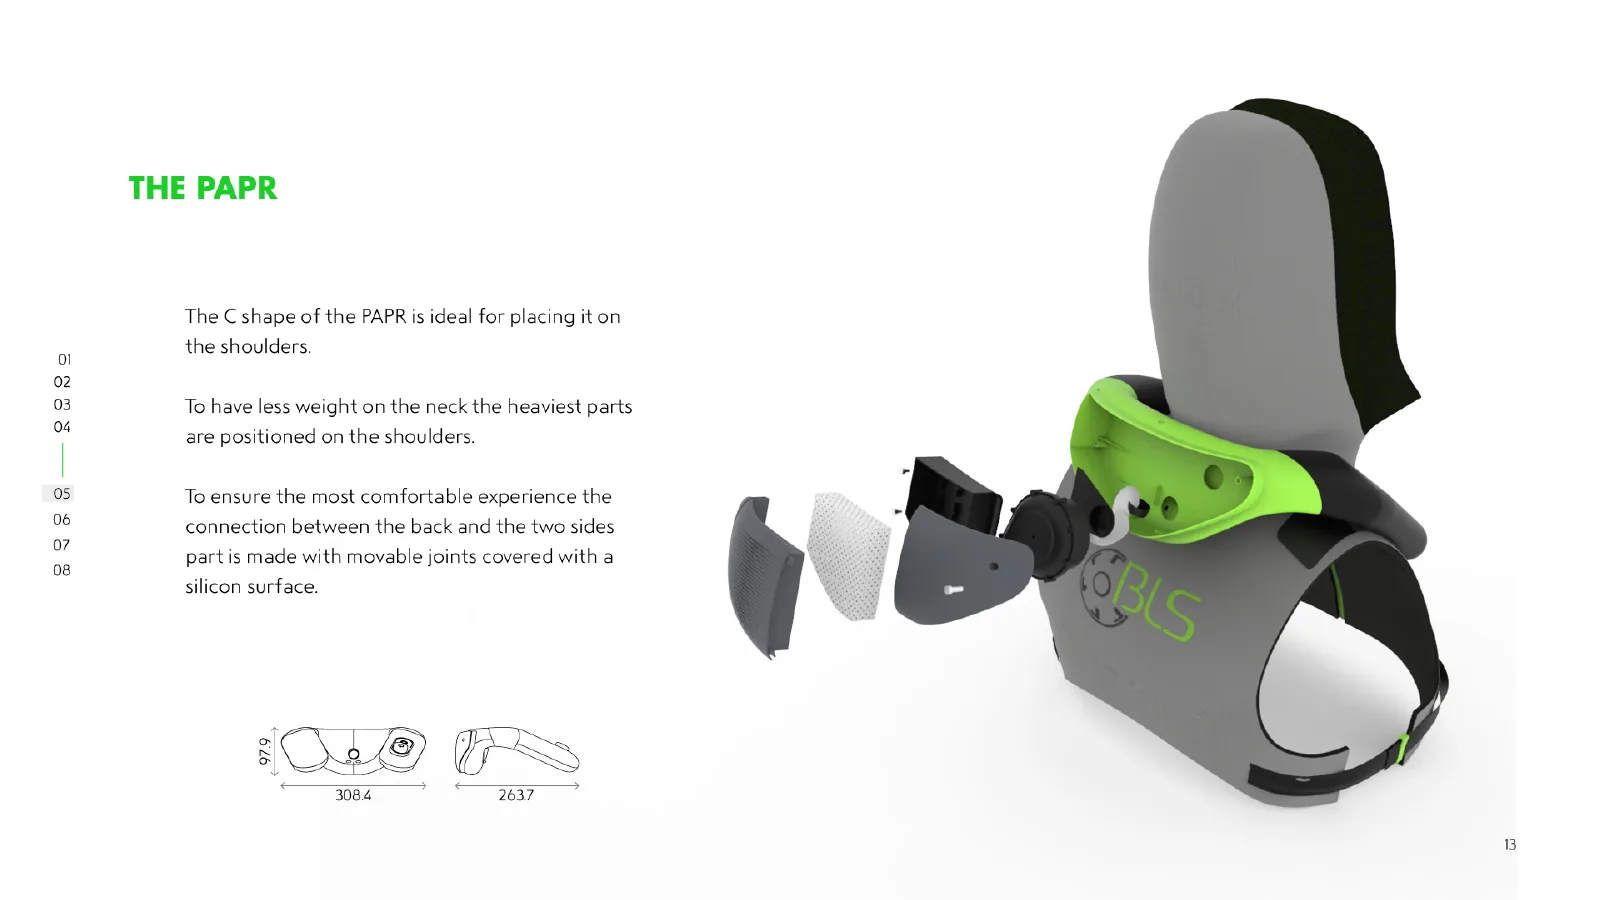
An exploded view of VCS-20, showing the enclosure, filter cover, combined filter, fan, joints, replaceable battery, circuit board, air sensor, and controller.
Exploded view of VCS-20, with the combined filter, fan, replaceable battery, circuit board, air sensor, controls, and alarms arranged around the shoulders.

Designing controls and feedback for use with gloves

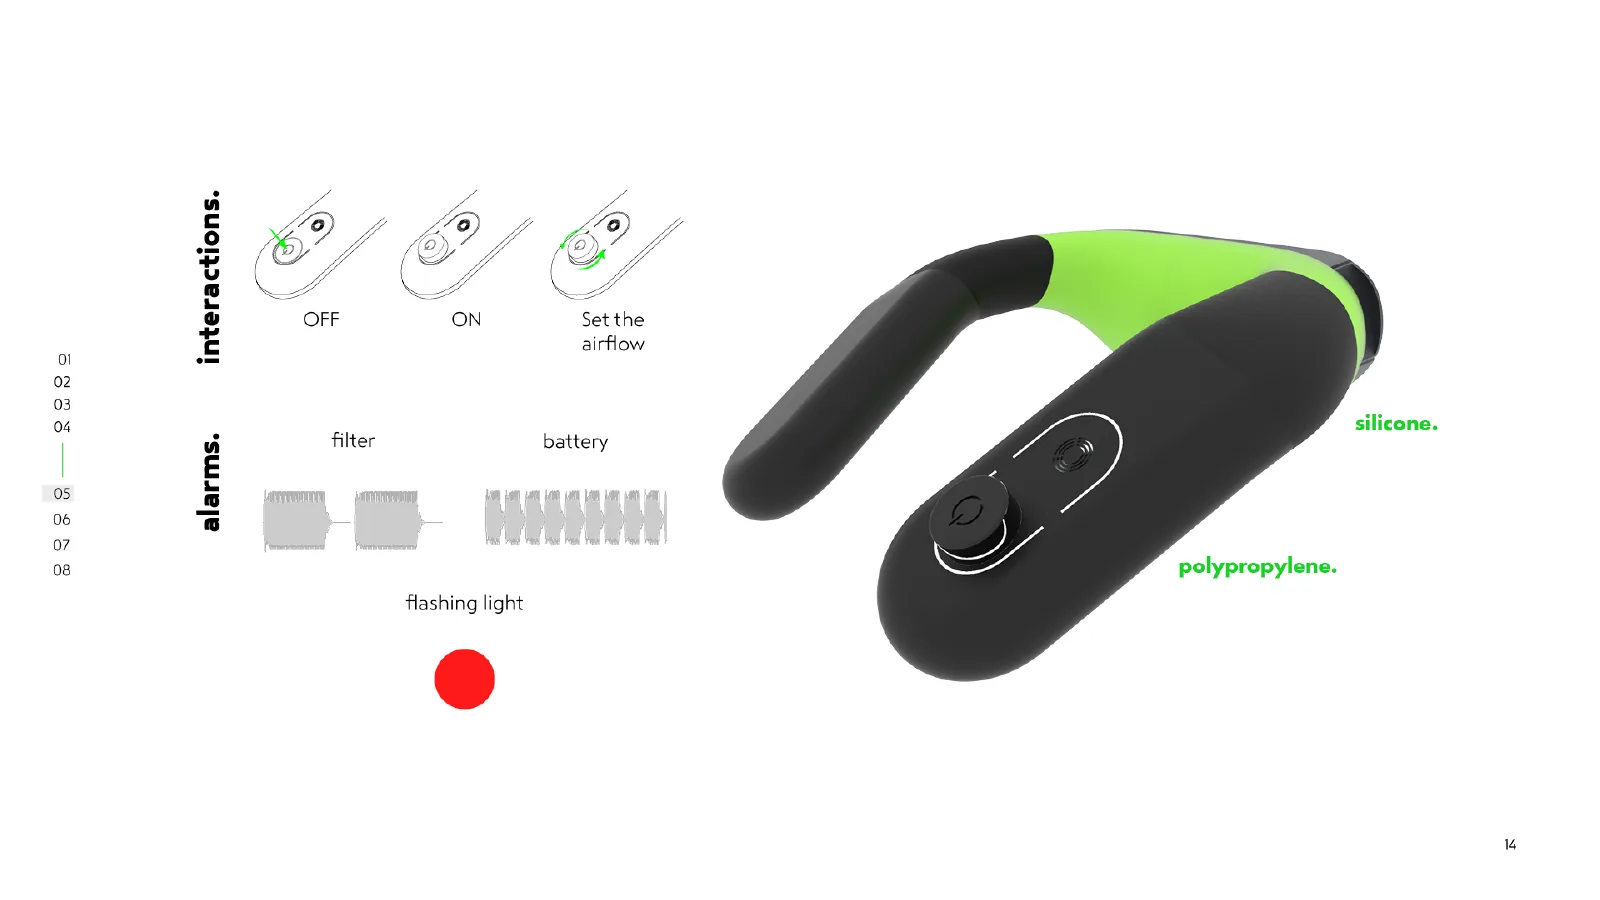
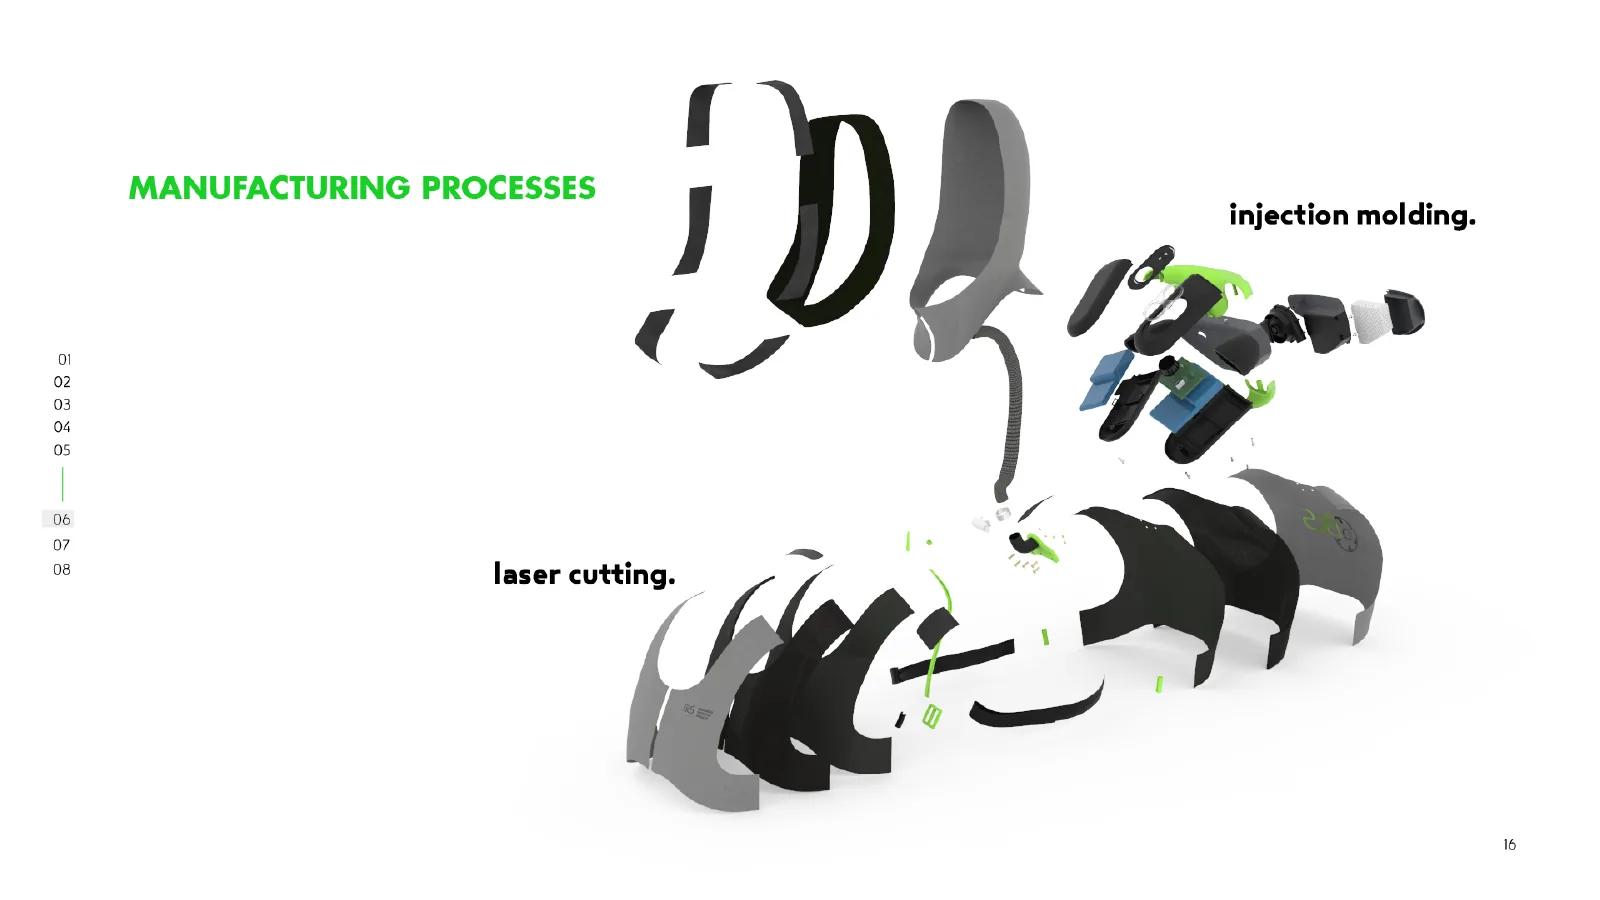
A push-and-rotate controller brings power and airflow adjustment into one control. The proposed visual and audible feedback indicates filter condition, battery status, and reduced airflow. We considered injection-molded shells and laser-cut textile parts, developing the material choices, component divisions, and assembly approach.

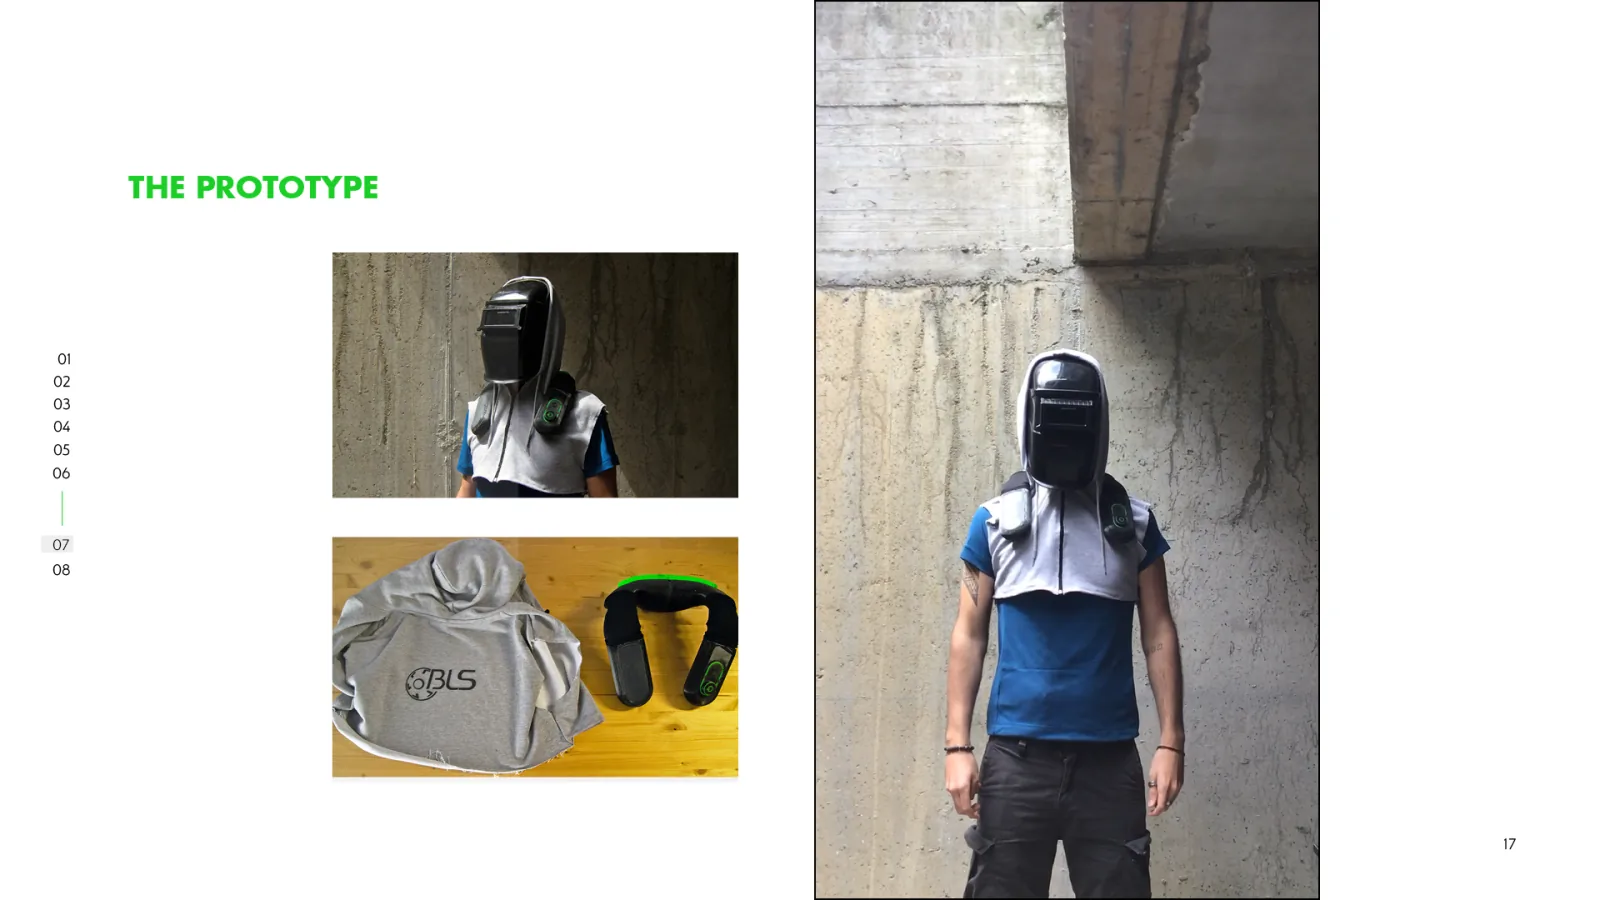
The team built a full-scale, wearable appearance prototype to explore fit and the process of putting on and removing the system.

A front view of a person wearing the VCS-20 prototype’s vest, hood, welding shield, and shoulder-supported blower, alongside separate views of the hood and unit.
Full-scale wearable VCS-20 prototype used to explore vest attachment, fit around the shoulders, and the sequence for putting on the hood and existing welding shield.

Outcome: Exploring fit through prototyping and simulating operation

The project brought together user requirements, the wearing system, exterior and internal layouts, materials and manufacturing methods, and a full-scale wearable prototype. It developed the PAPR as part of an integrated wearable system that includes the shield and clothing.

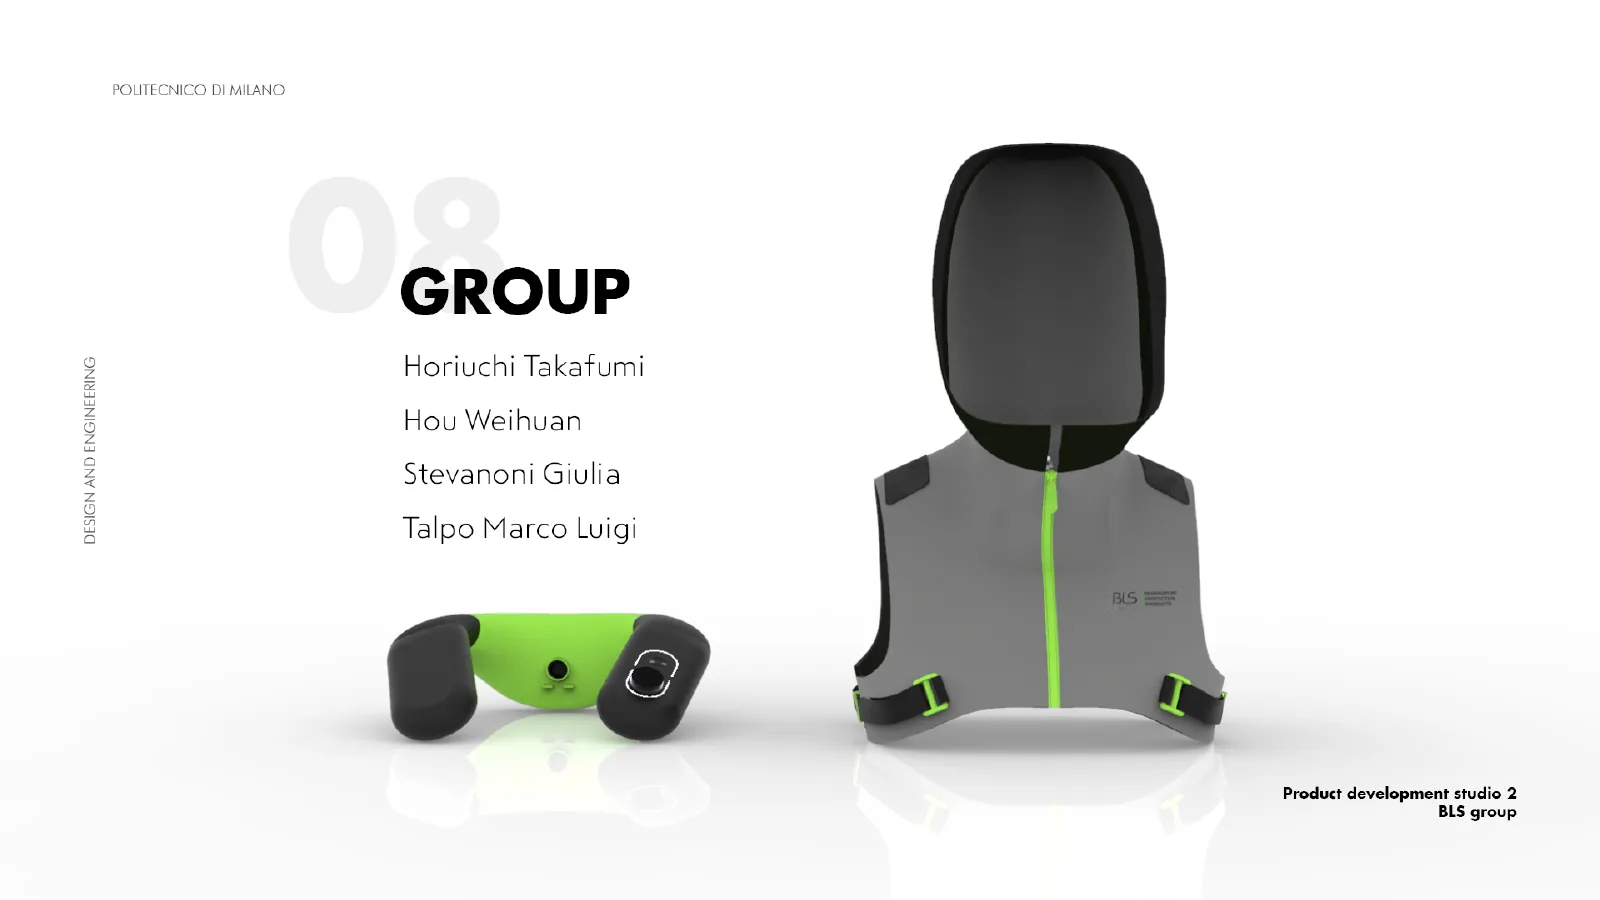
Product Development Studio 2, Group 8. Joint work by Takafumi Horiuchi, Hou Weihuan, Giulia Stevanoni, and Marco Luigi Talpo.

Final presentation
  1. A cover slide for the welder PAPR project, showing the BLS logo, product range, and team members’ names.
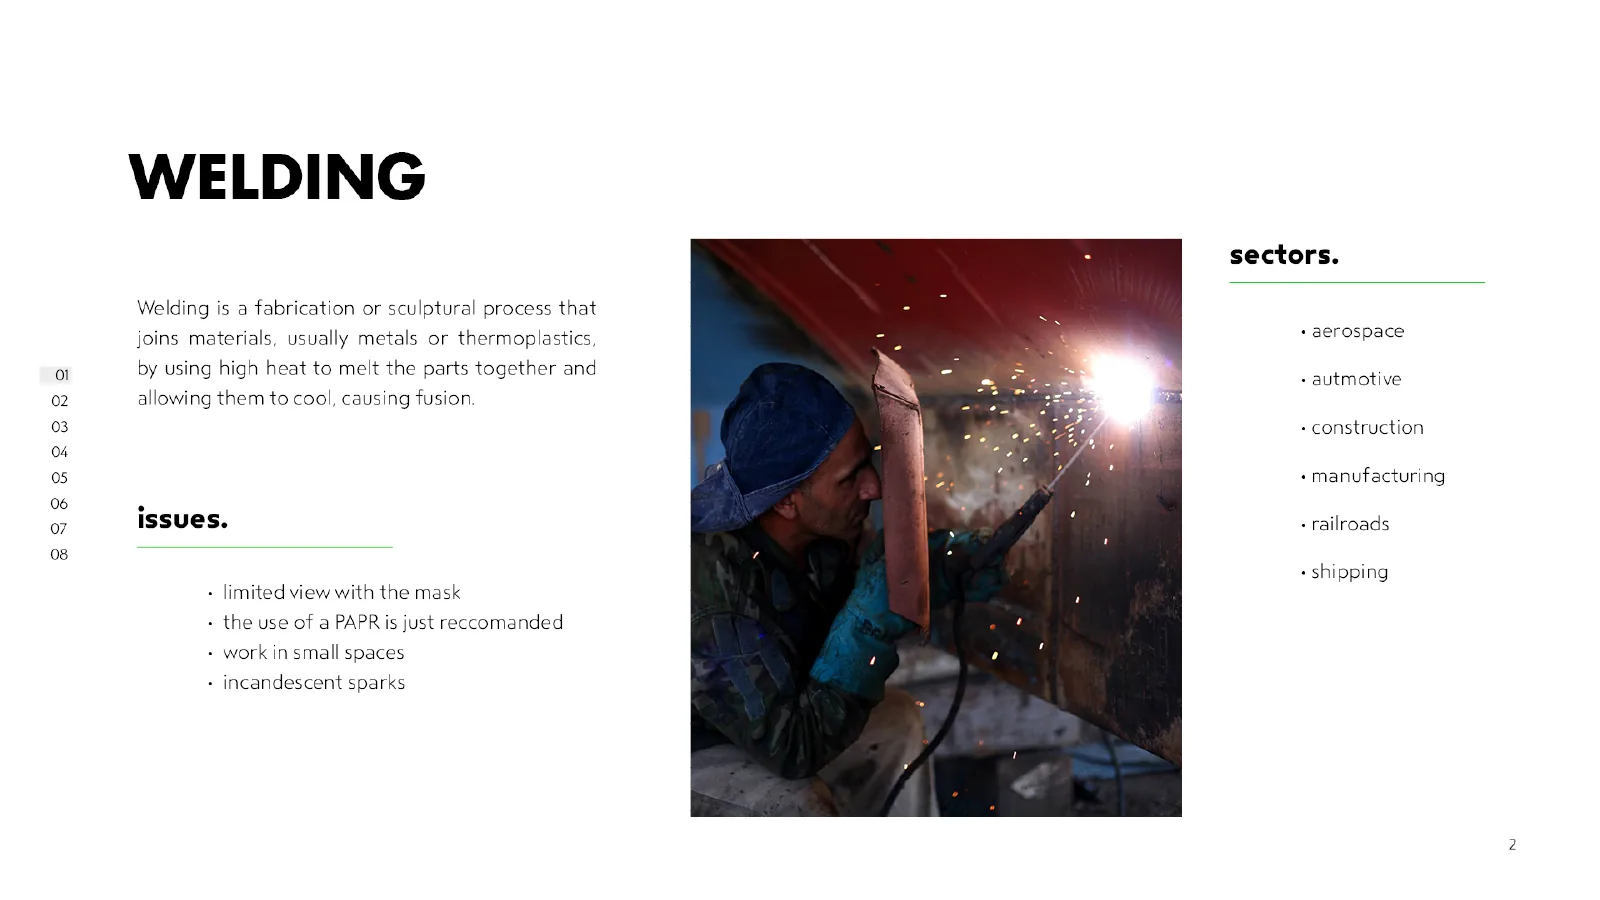
  2. A photograph of welding, the challenges of fumes, sparks, confined spaces, and complex protective equipment, and the main industries using welding.
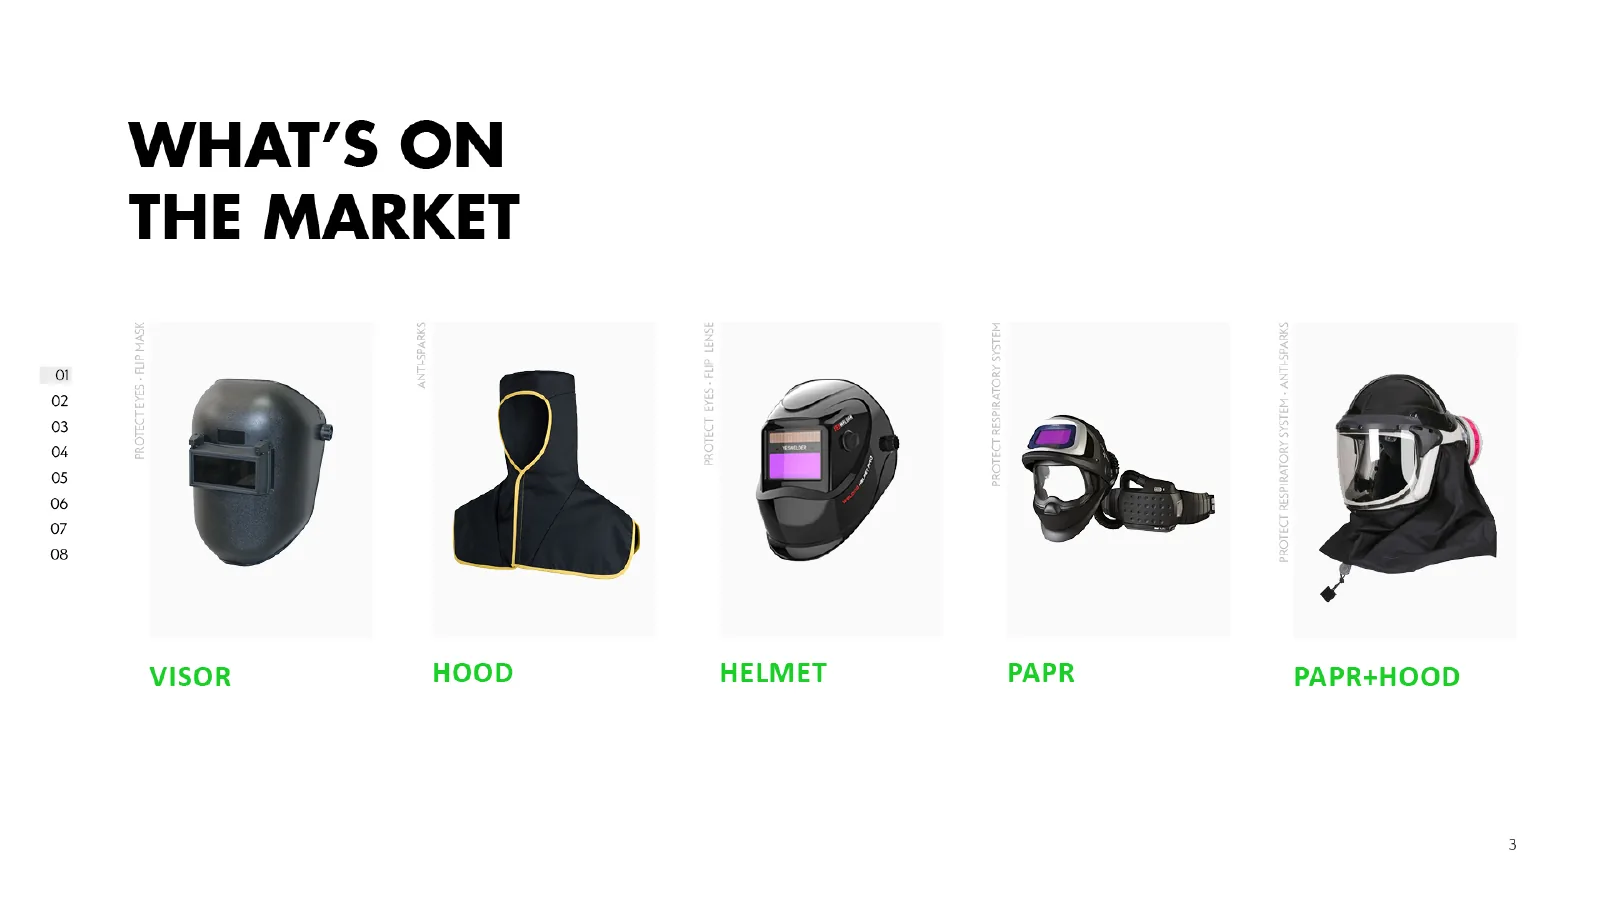
  3. Market research comparing commercially available welding respirators by configuration and wearing method.
  4. The design brief and requirements, including compatibility with existing welding shields, compactness, comfort, a replaceable battery, alarms, and airflow.
  5. Antonio, a 25-year-old welder persona, seeking light weight, quick controls and fitting, compatibility with an existing shield, and comfort.
  6. A final rendering of a welder wearing VCS-20, combining a hood, vest, and shoulder-supported blower unit.
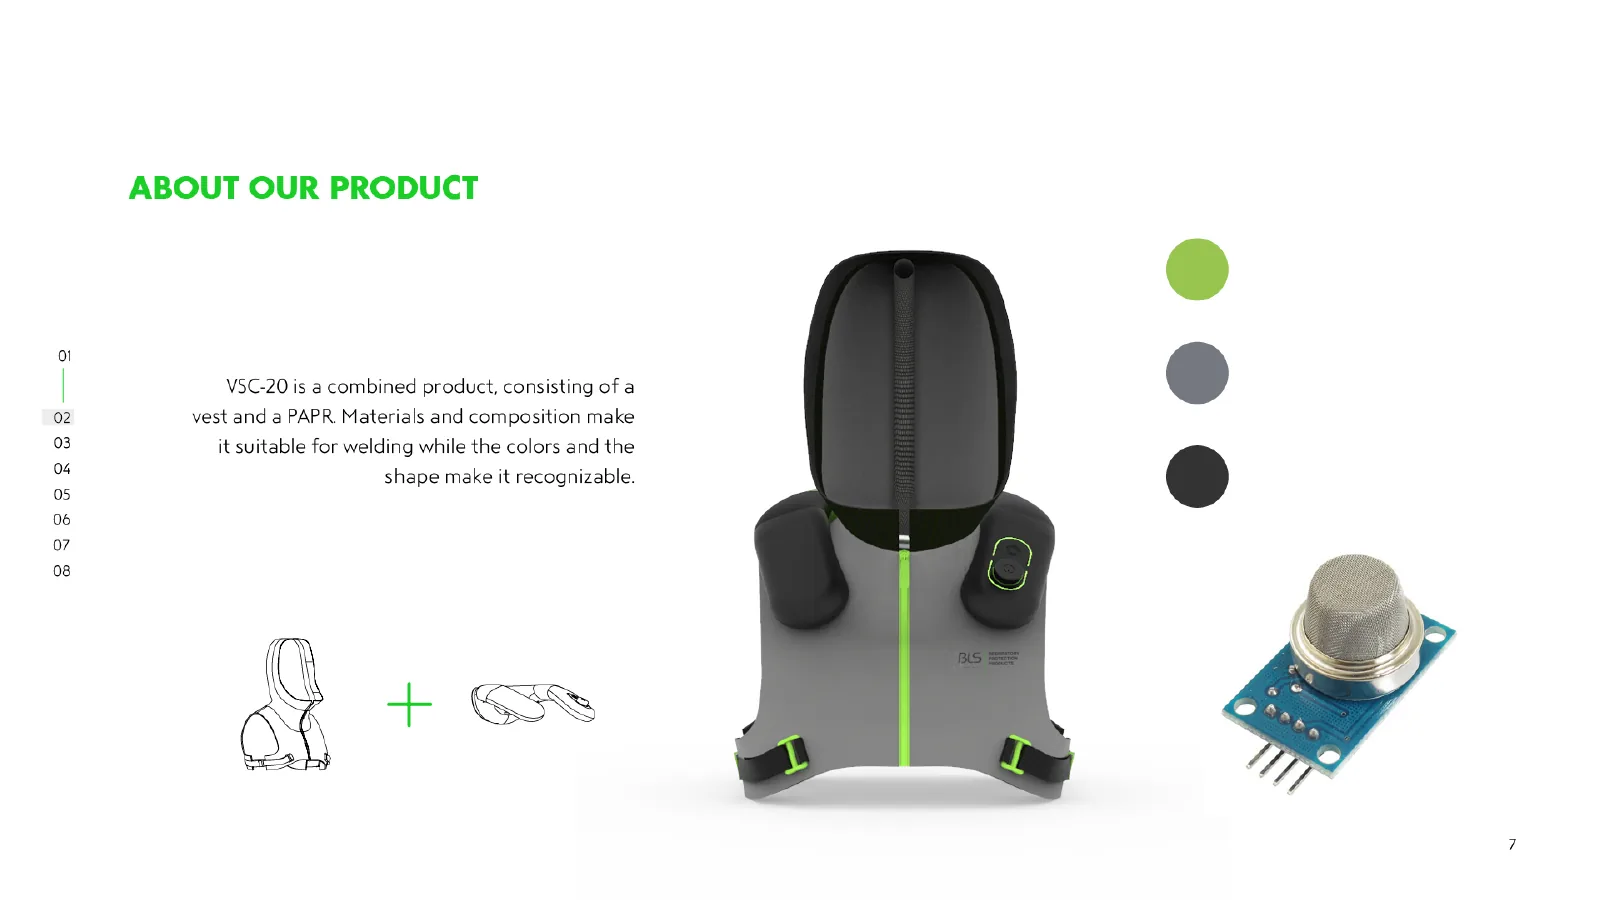
  7. An overview of VCS-20, including color options and the air sensor’s location.
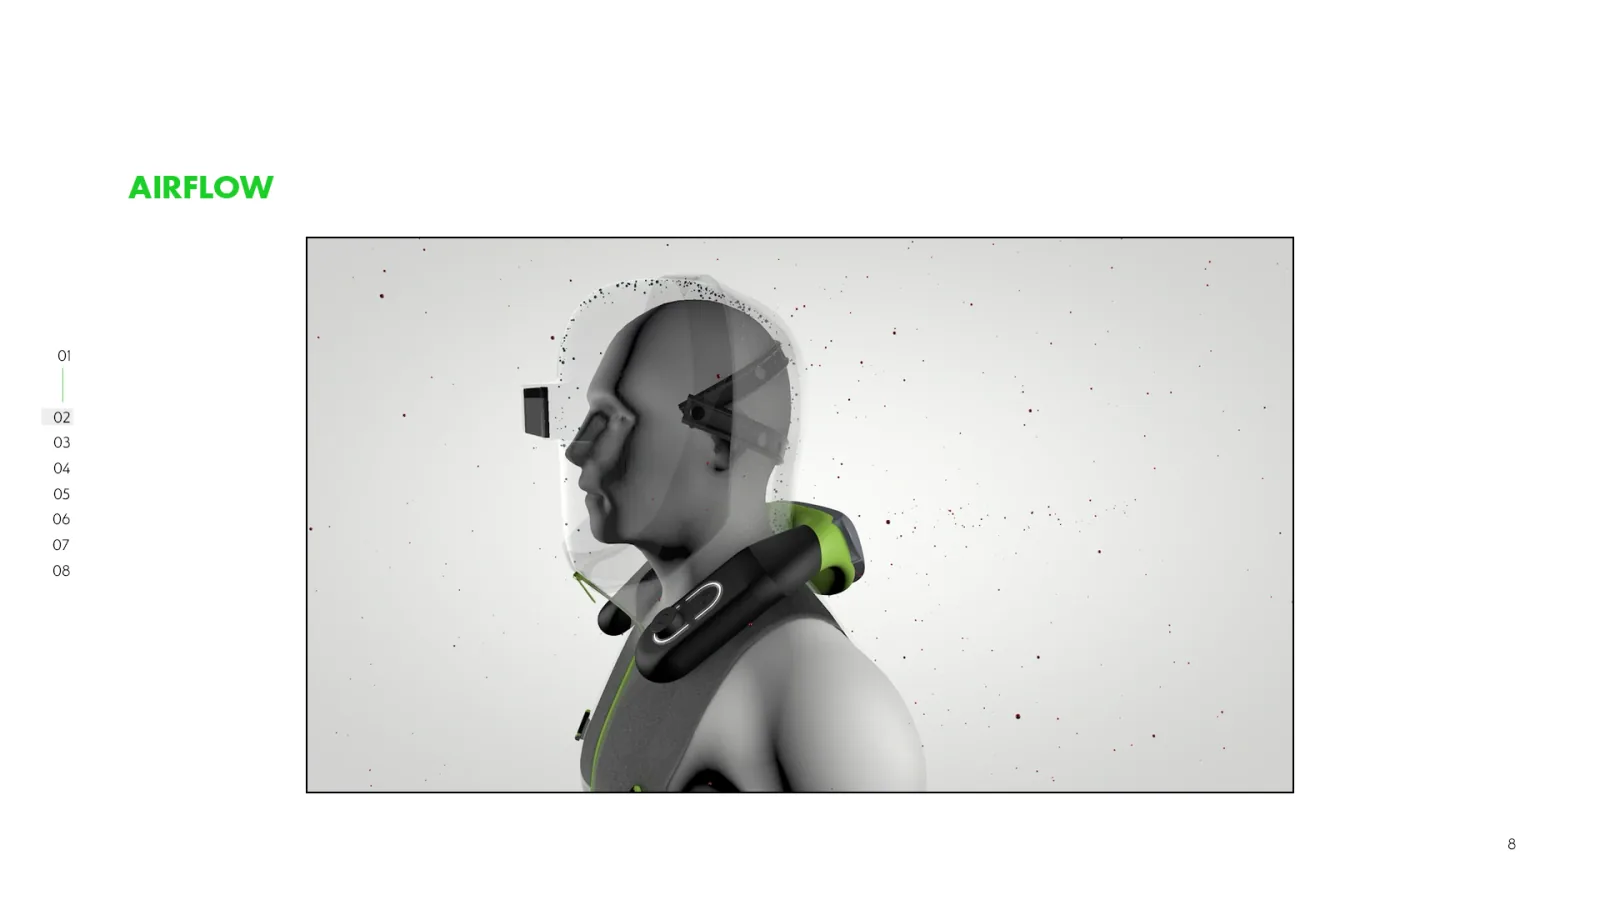
  8. An airflow simulation with pollutant particles around a 3D model, showing air moving from the shoulder unit into the hood.
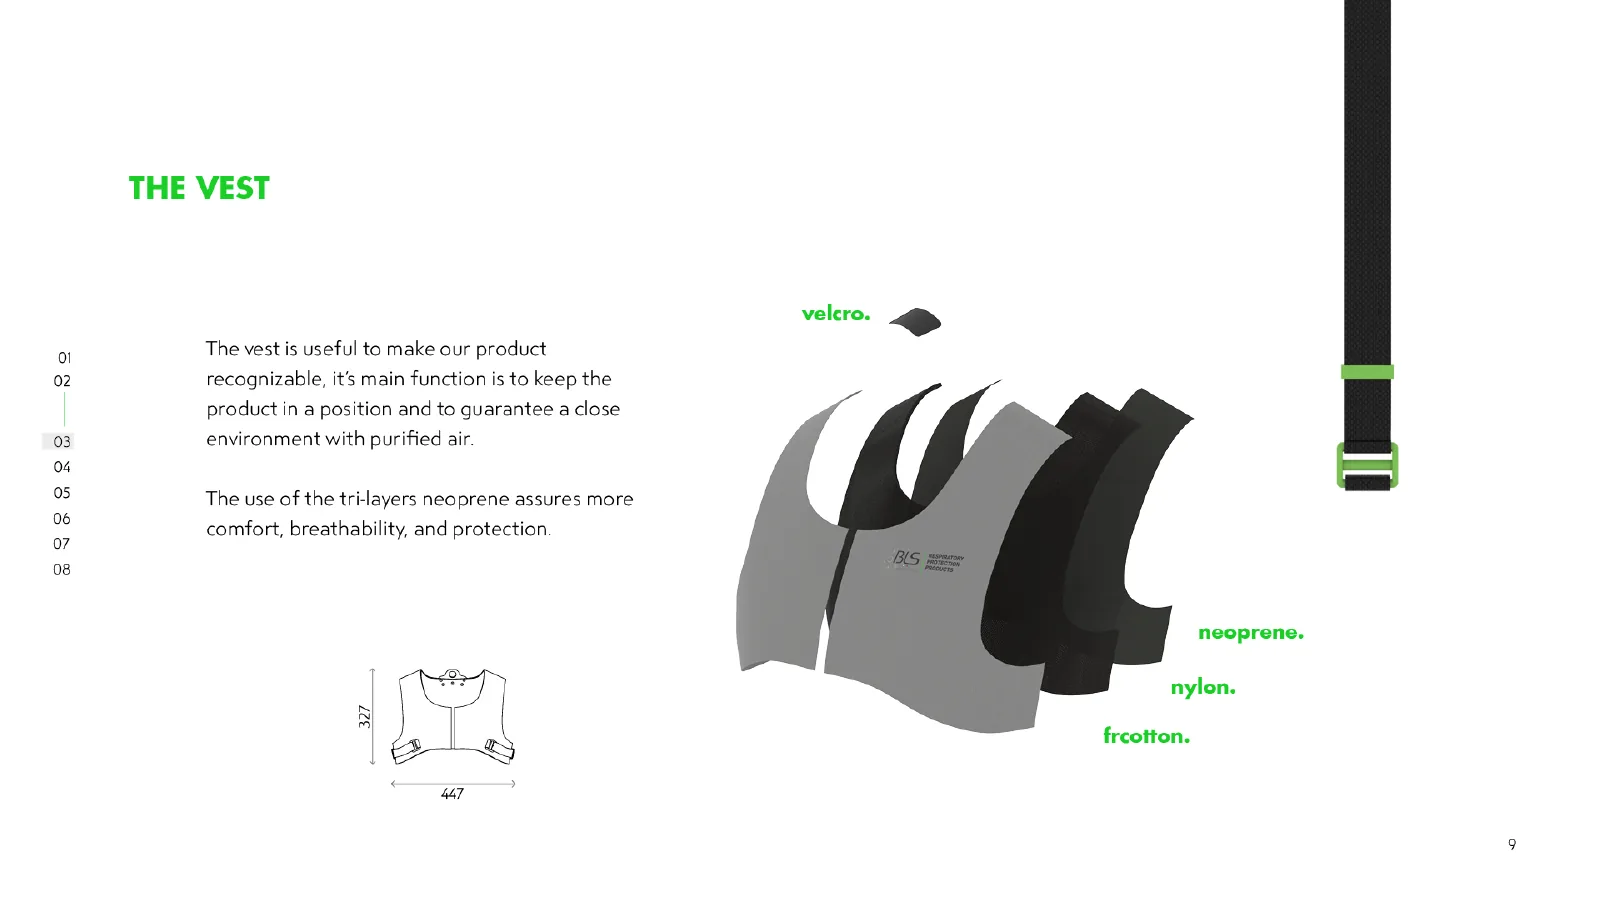
  9. The vest’s layered construction, dimensions, and materials, including flame-resistant cotton, neoprene, and nylon.
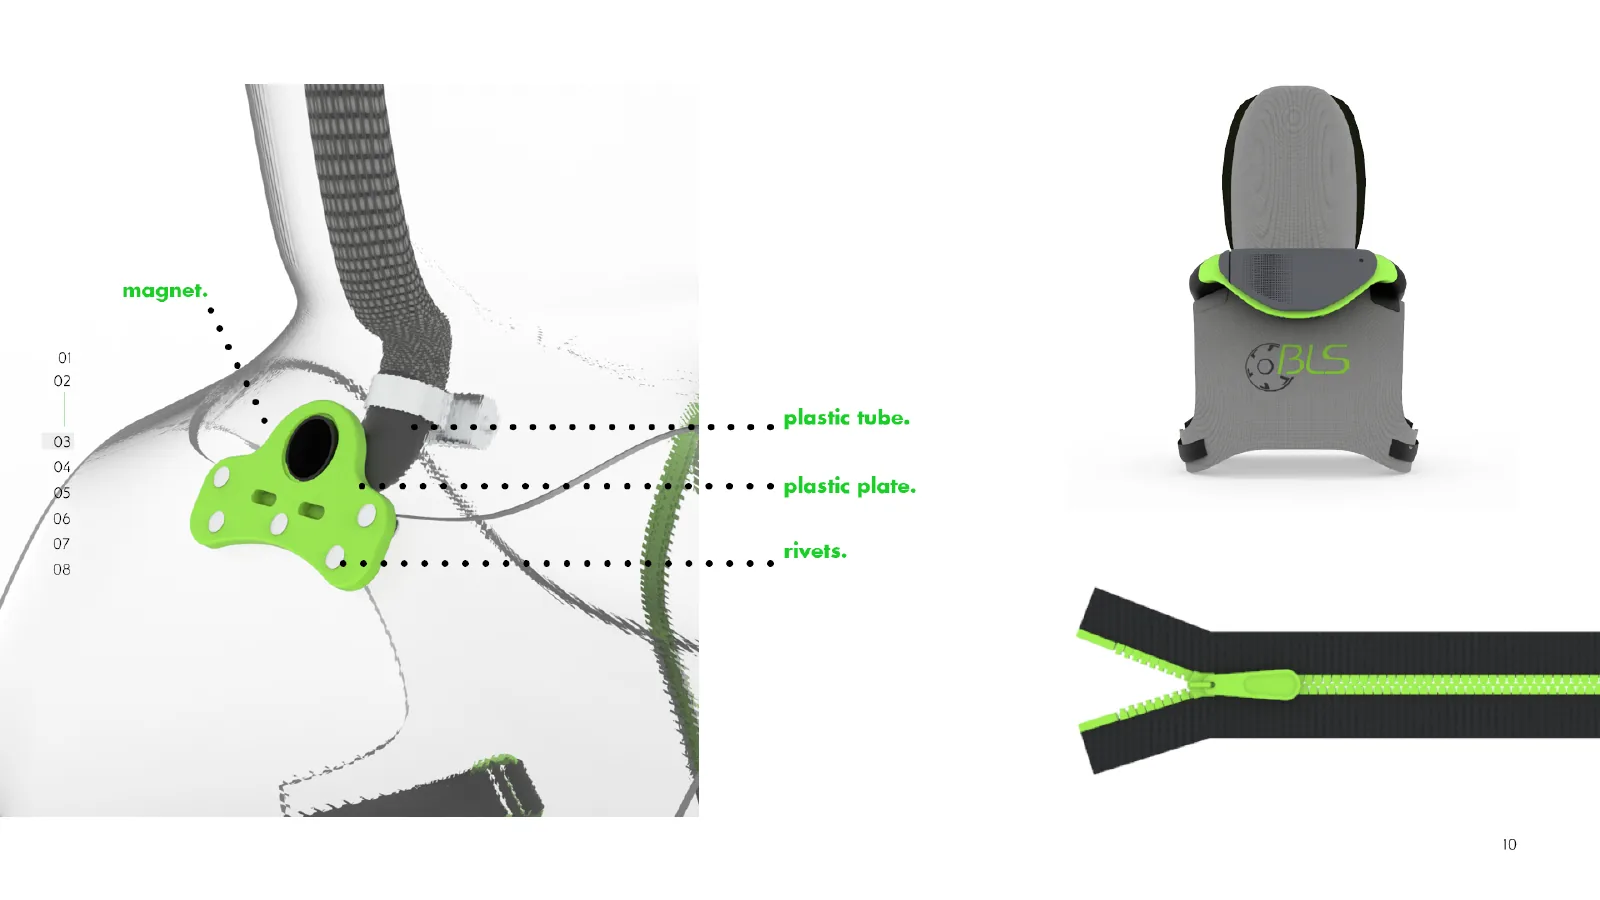
  10. Connection details for the magnetic neck connector, tube, plate, and rivets.
  11. The hood’s flame-resistant cotton and stretch fabric, pattern, and main dimensions.
  12. How six Gecko Tape attachment points secure the hood to existing welding shields of different shapes.
  13. An exploded view of the C-shaped, shoulder-supported PAPR unit, showing articulated rear and side joints and silicone components.
  14. The multifunction controller’s push-and-rotate actions, visual and audible alarms, and enclosure materials.
  15. A full exploded view of VCS-20, showing the enclosure, combined filter, fan, replaceable battery, circuit board, sensors, and other parts.
  16. Proposed manufacturing methods: laser cutting for textile parts and injection molding for enclosure parts.
  17. The full-scale wearable VCS-20 prototype, with a front view of a wearer and separate views of the hood and shoulder unit.
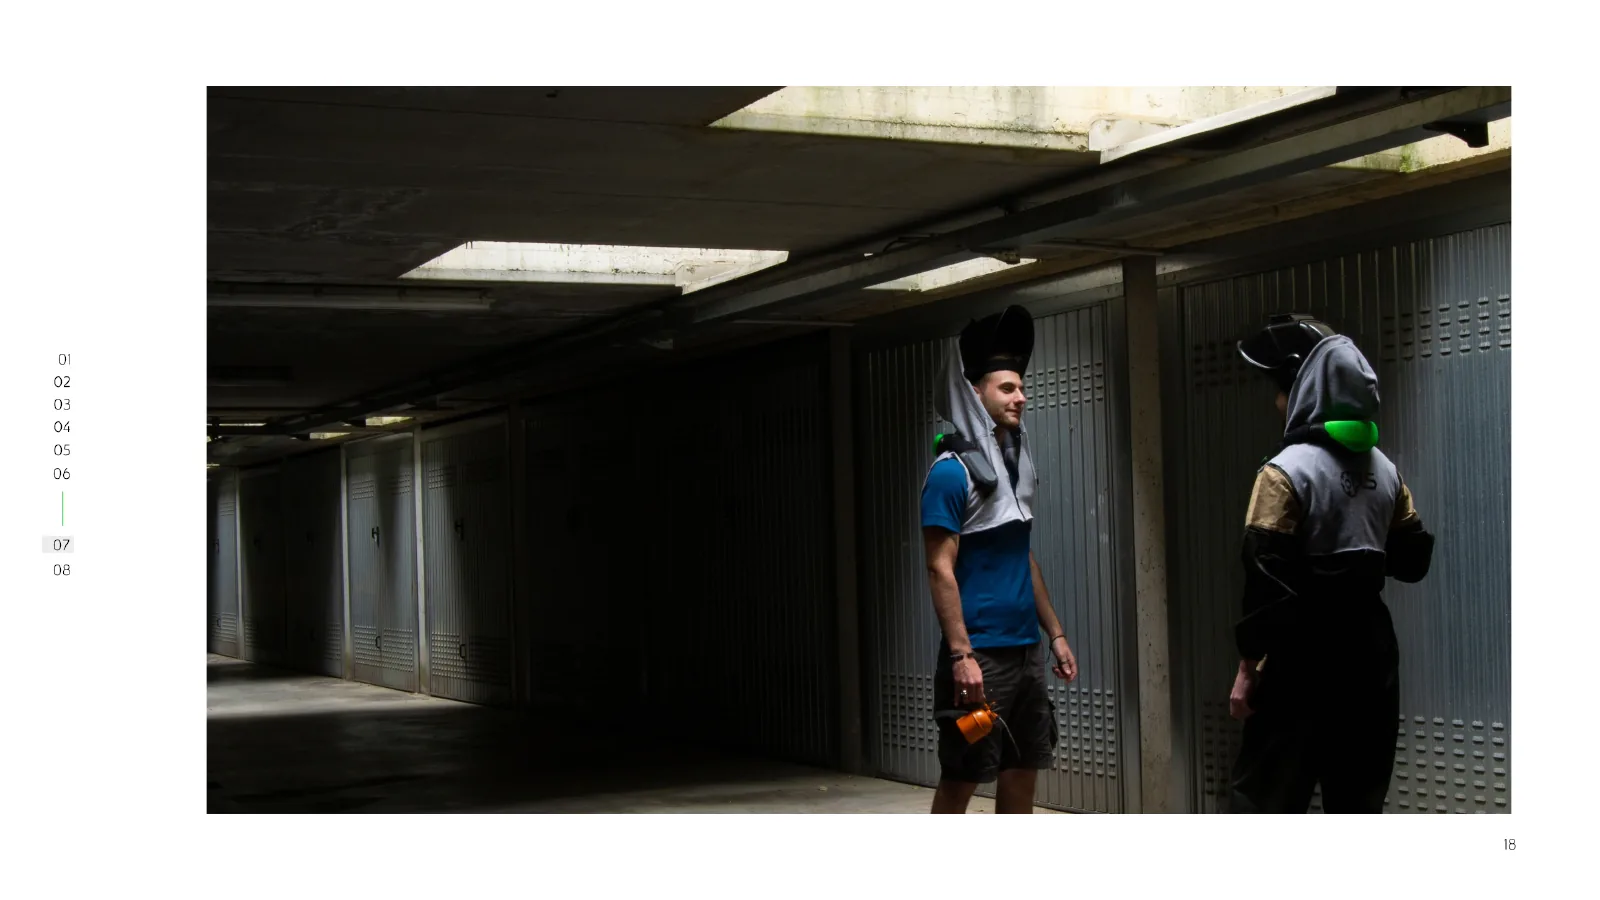
  18. Front and rear photographs of two people wearing VCS-20, showing how the prototype fits the body.
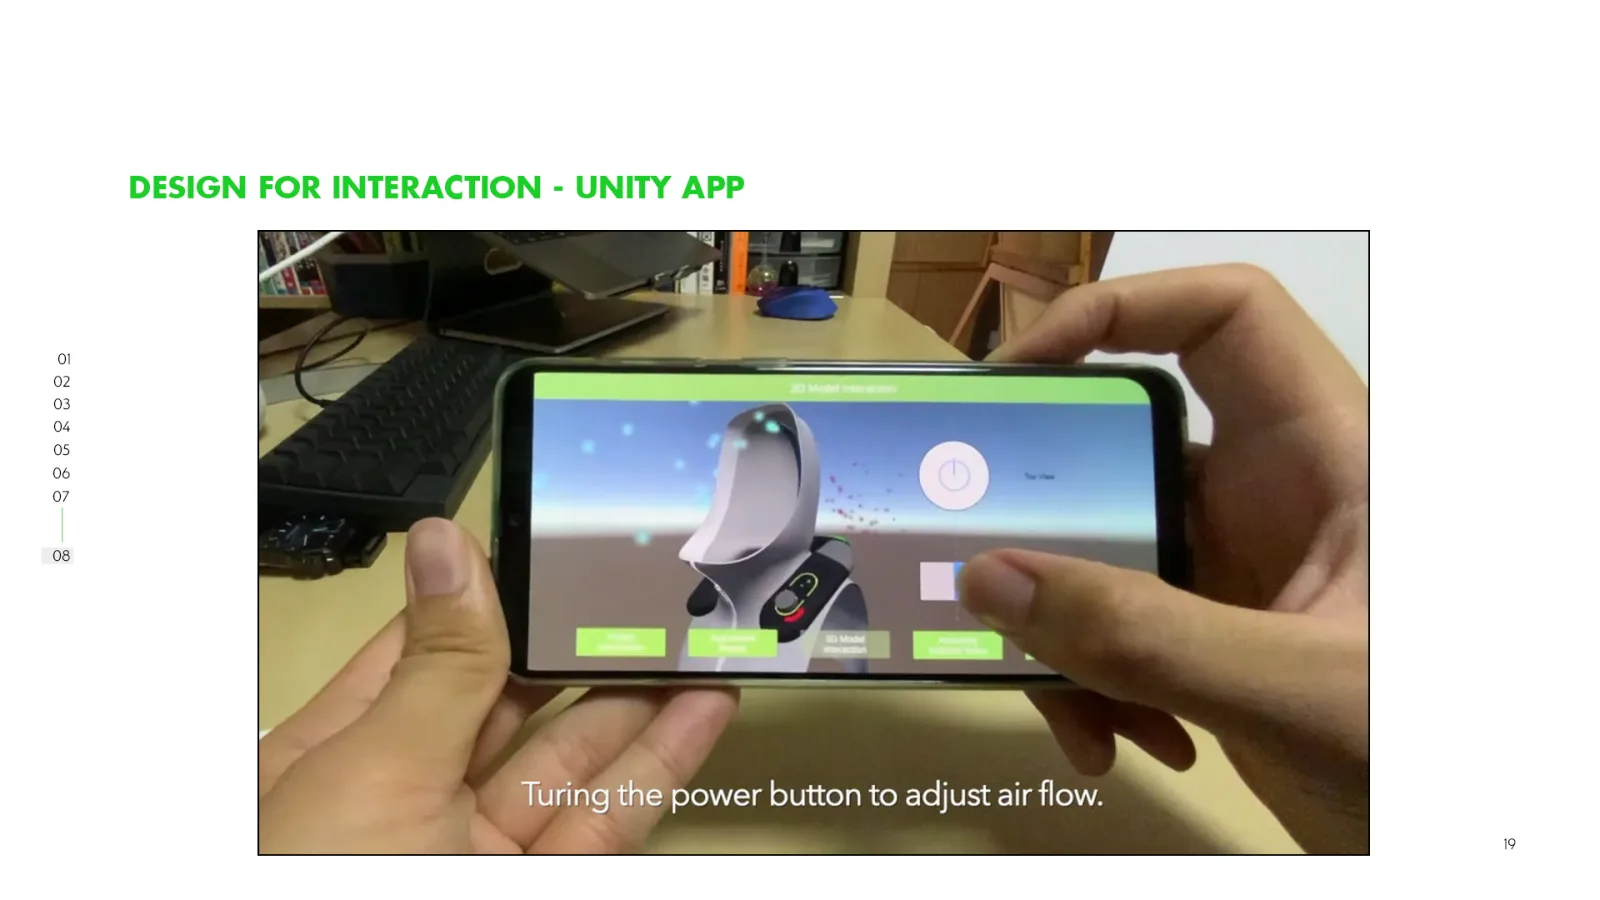
  19. An interactive Unity demonstration using a mobile interface and 3D model to control the simulated air movement and airflow rate.
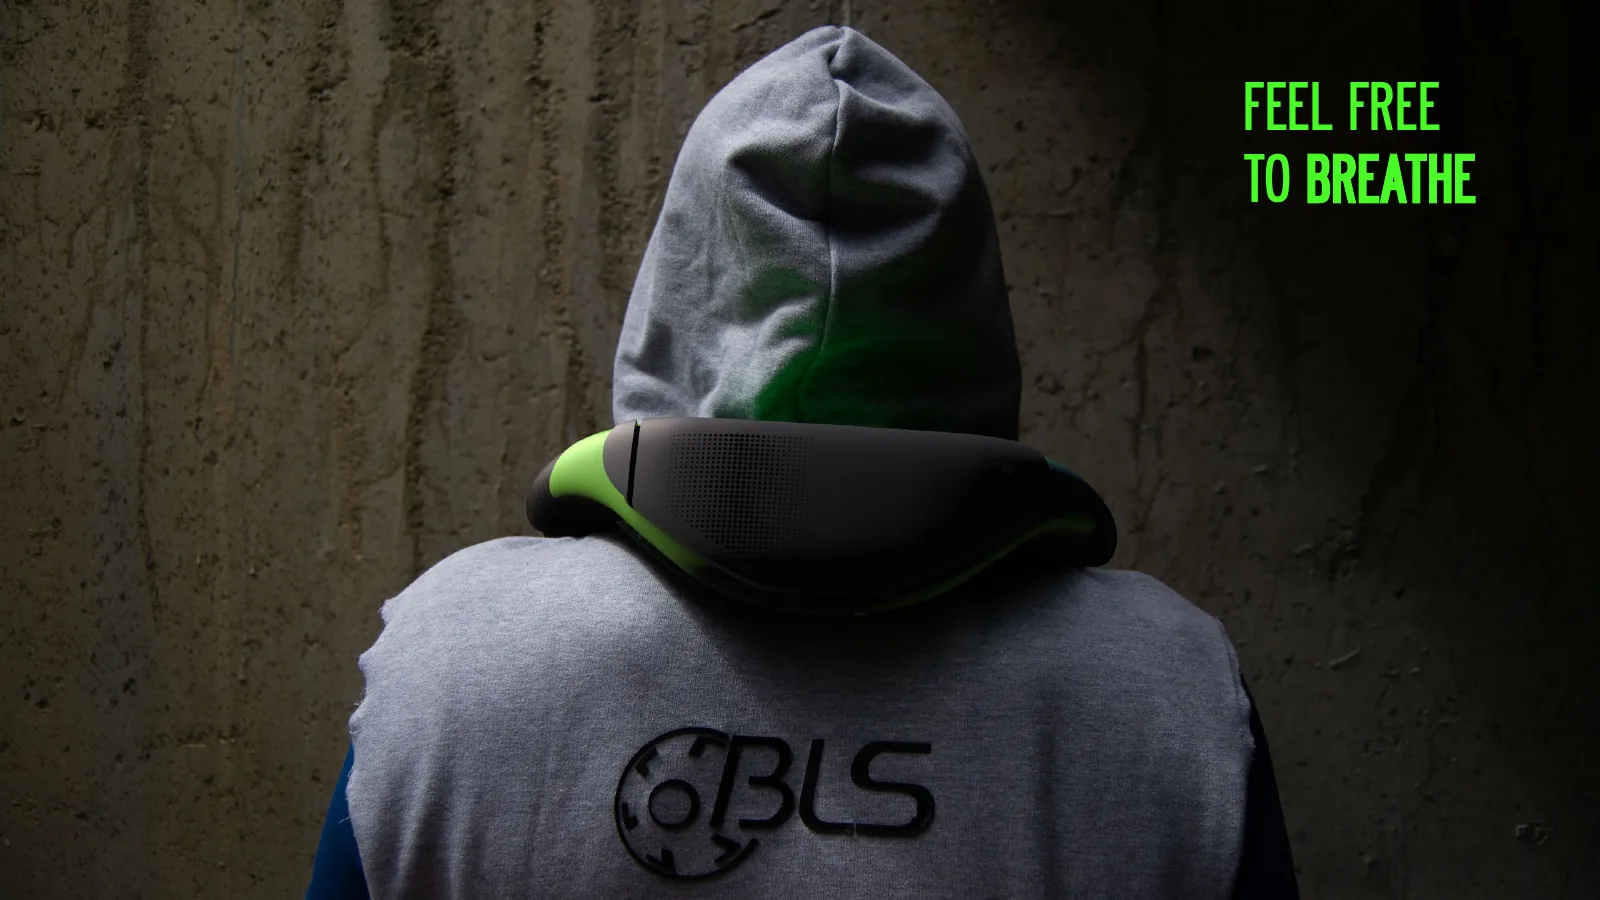
  20. An advertising concept featuring a welder wearing VCS-20 and the words “FEEL FREE TO BREATHE.”
Slides from the final presentation.

Blood donor screening device design (winter 2020)

Challenge: Self-service, contactless pre-donation screening

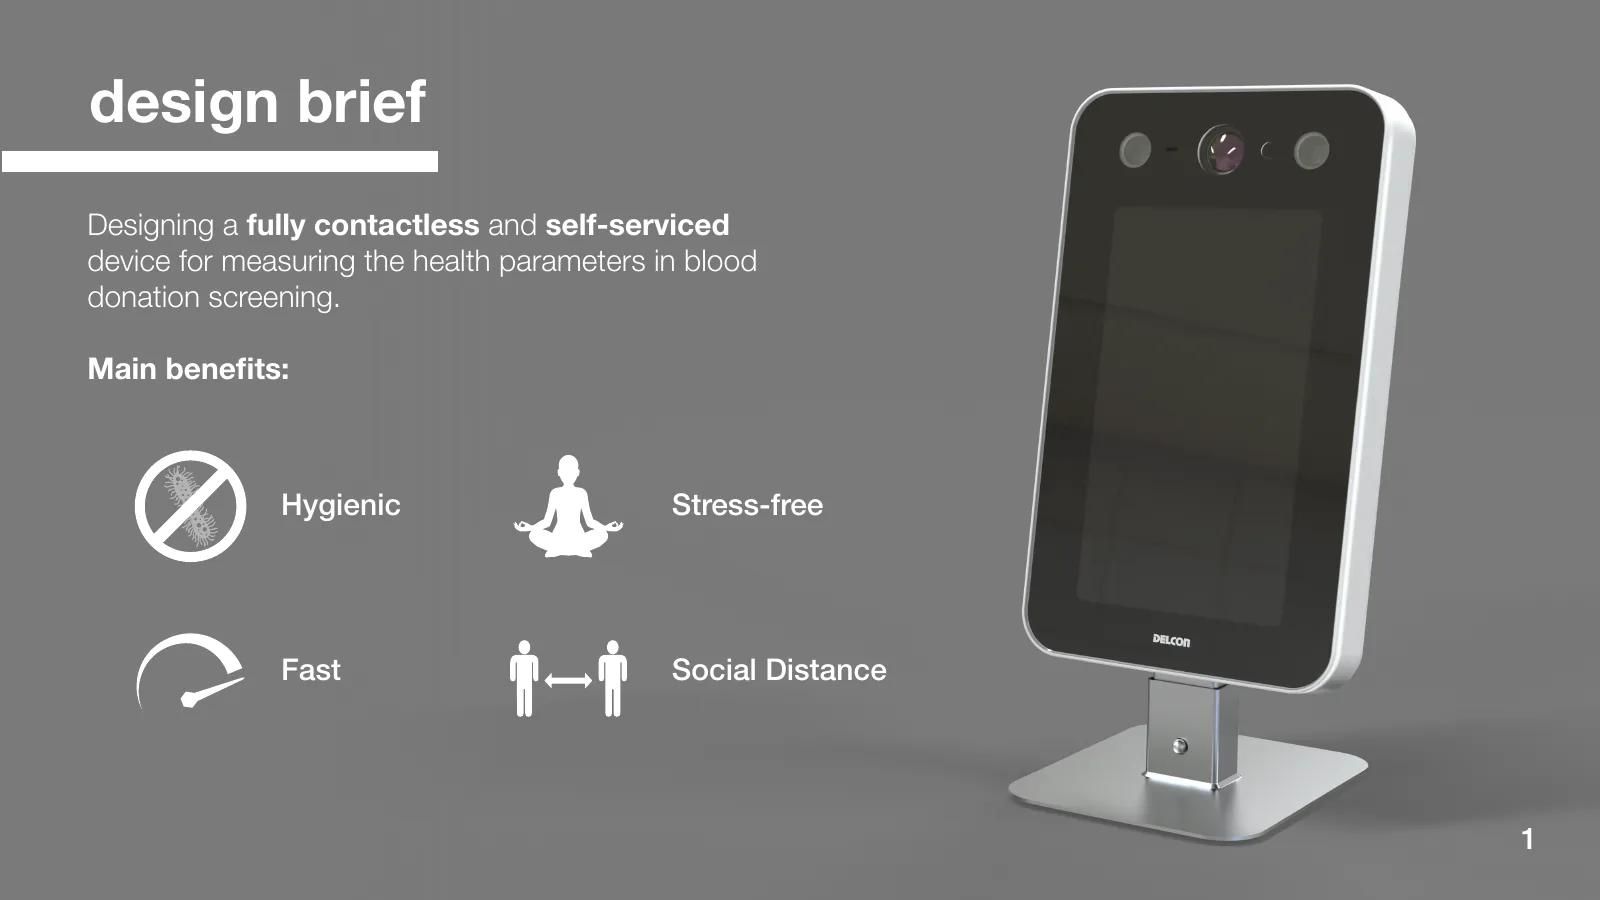
Pre-donation screening includes checks of temperature, heart rate, blood pressure, and hemoglobin. During the COVID-19 pandemic, shared equipment and close contact with staff raised additional hygiene concerns and stress. We reconsidered the measurement process from both perspectives.

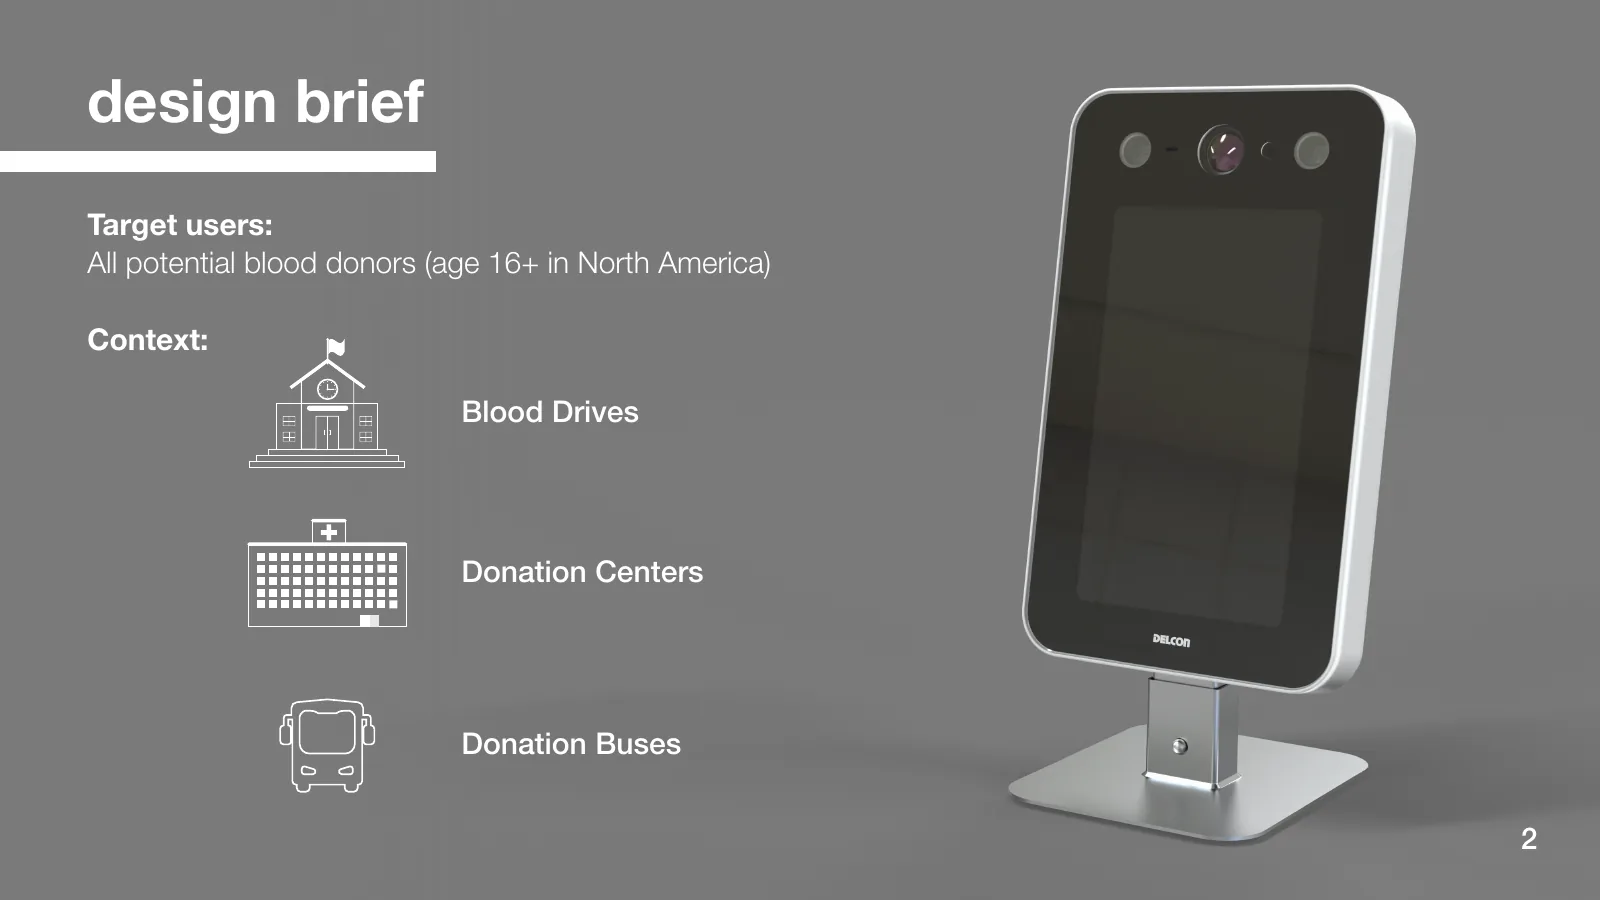
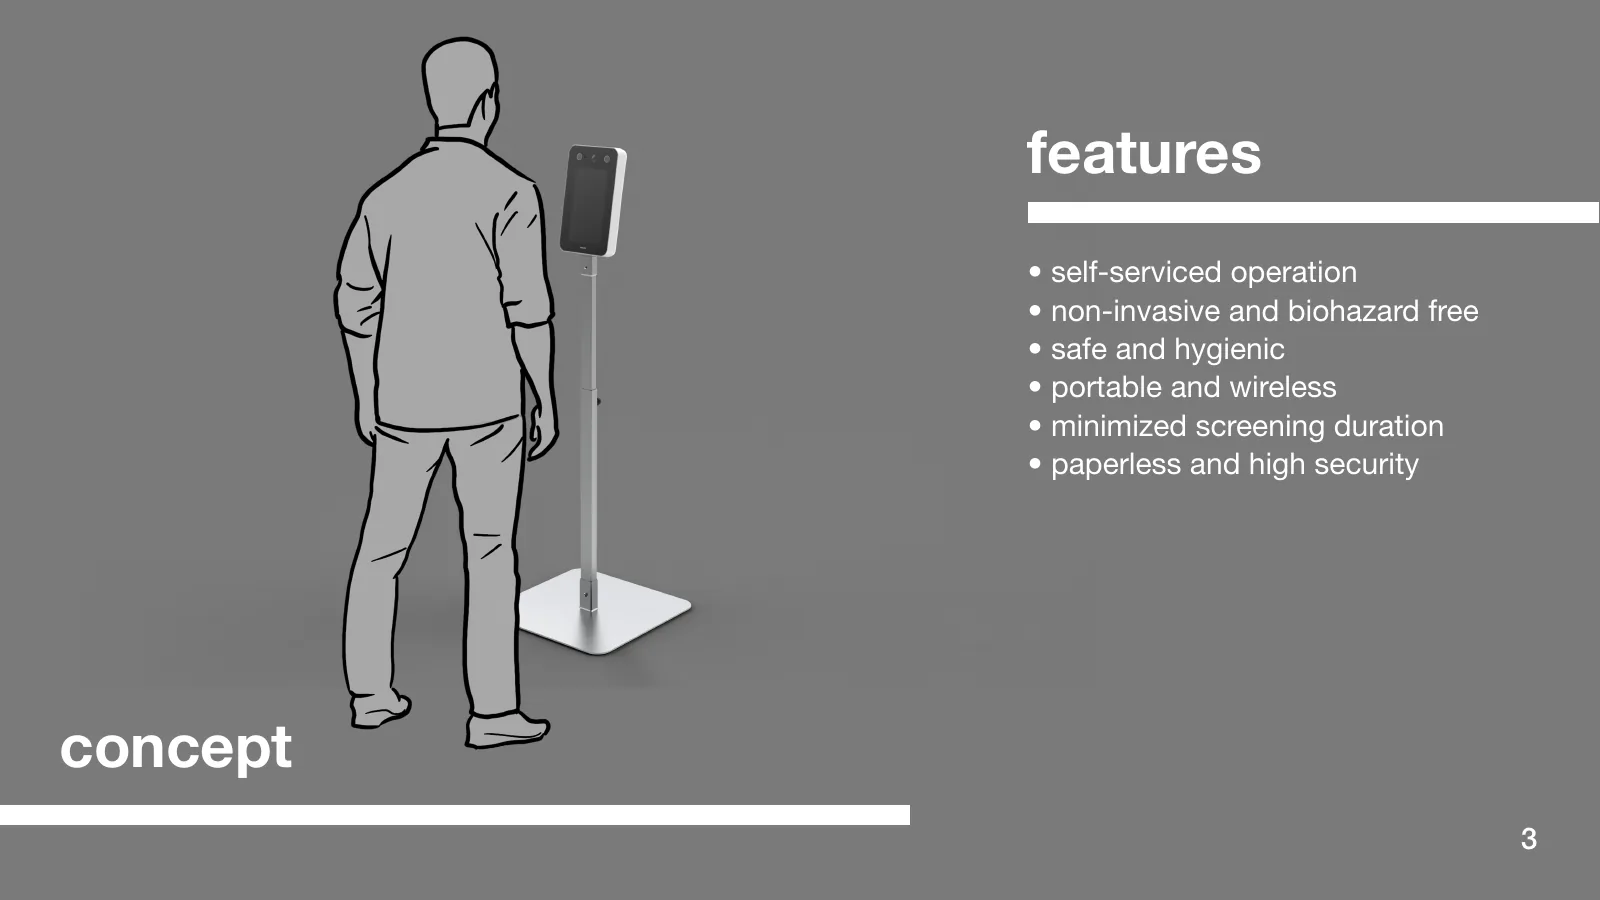
The proposal was a self-service terminal for donors aged 16 and over in North America, intended for donation centers, mobile venues, and blood donation buses. The main requirements were contactless, non-invasive measurements; an easy-to-clean, portable form; short measurement times; paperless records; secure data sharing; and both tabletop and standing use.

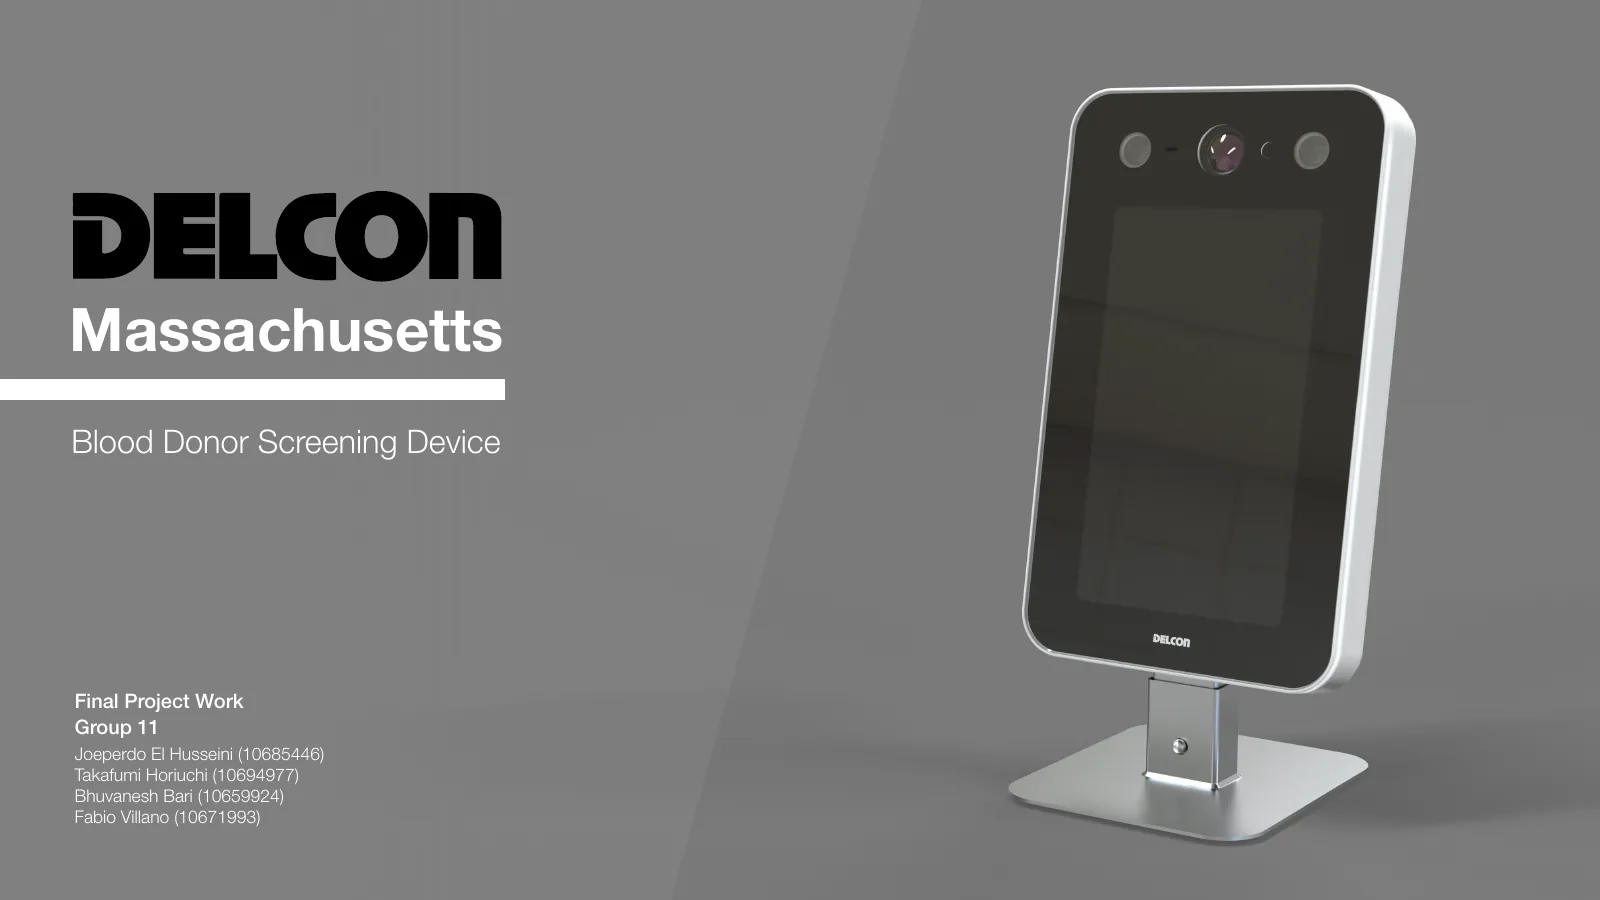
The DELCON Massachusetts pre-donation screening concept, with a large display in a white tabletop enclosure and cameras and lights along the top.
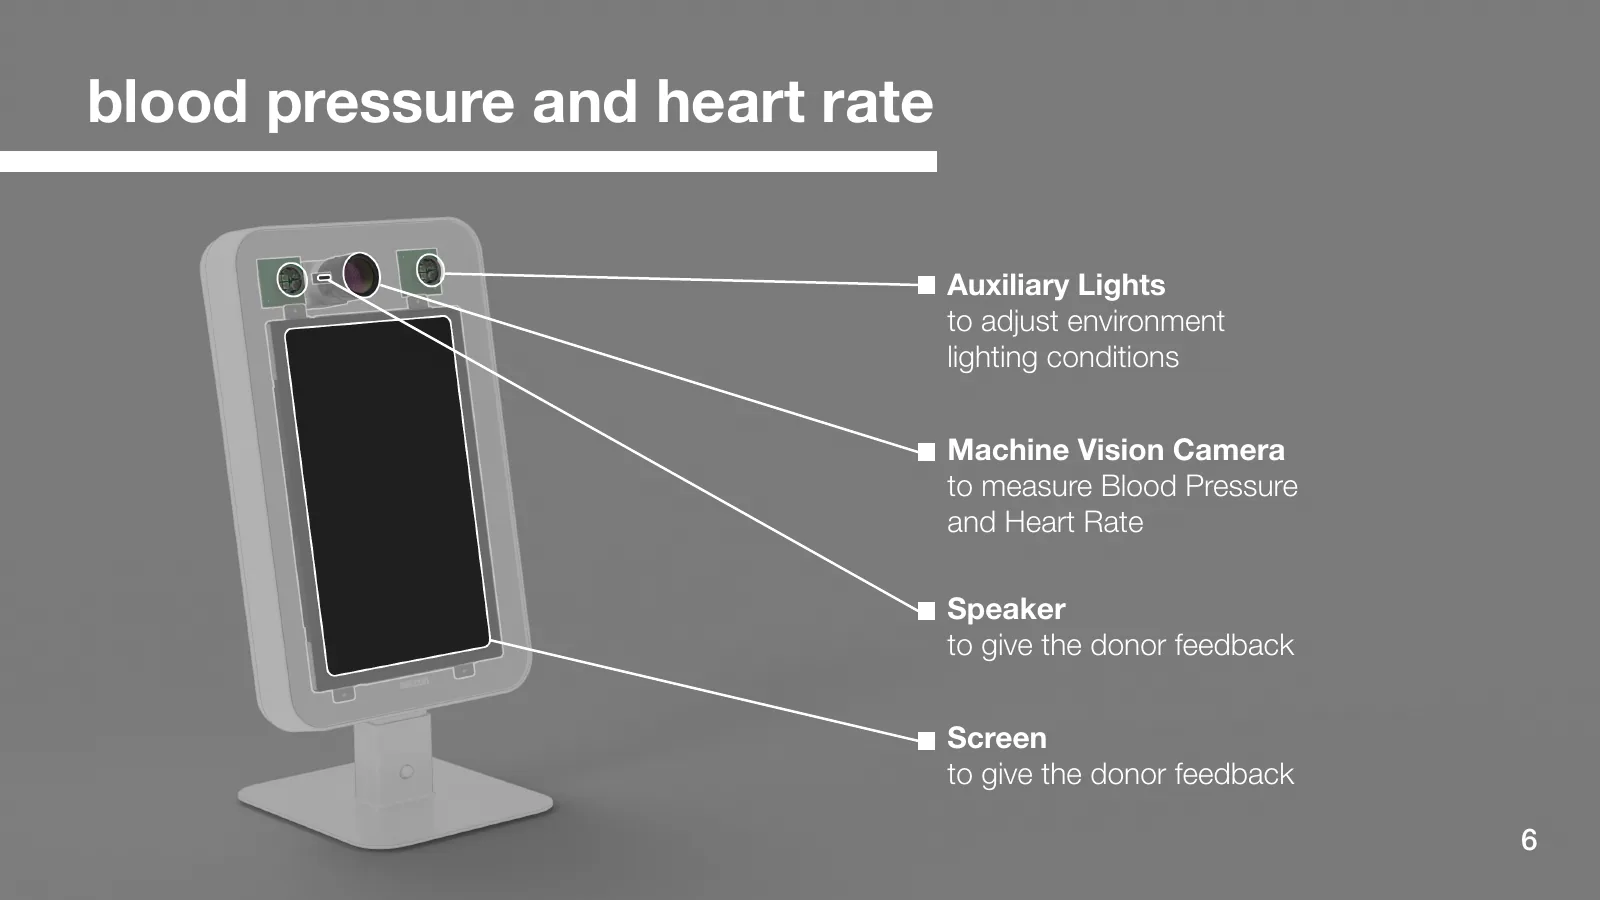
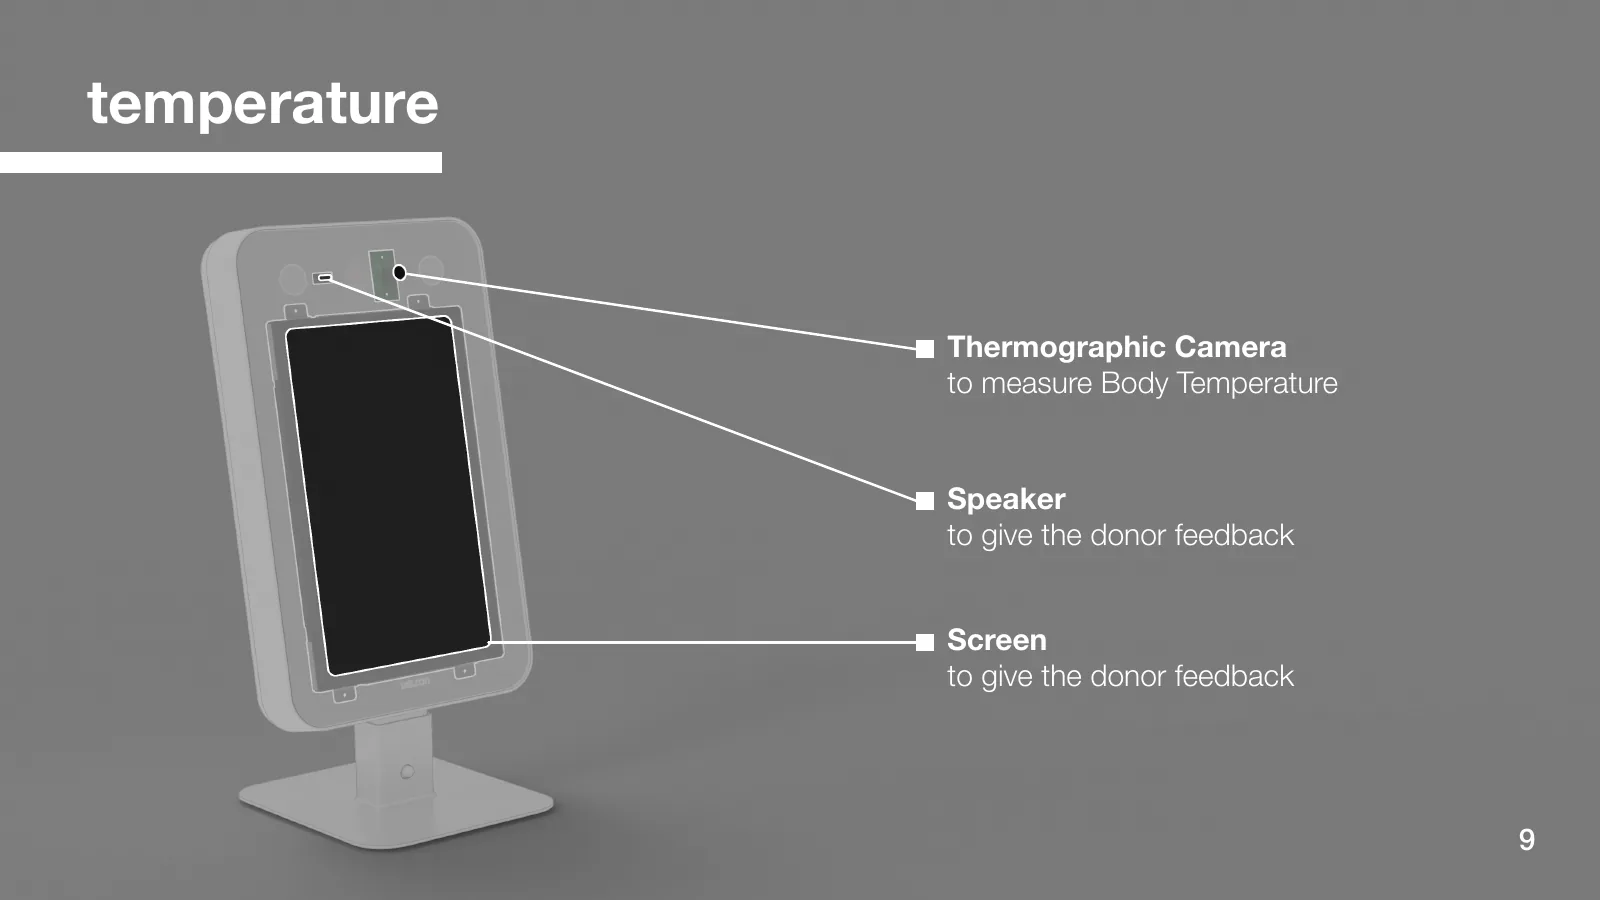
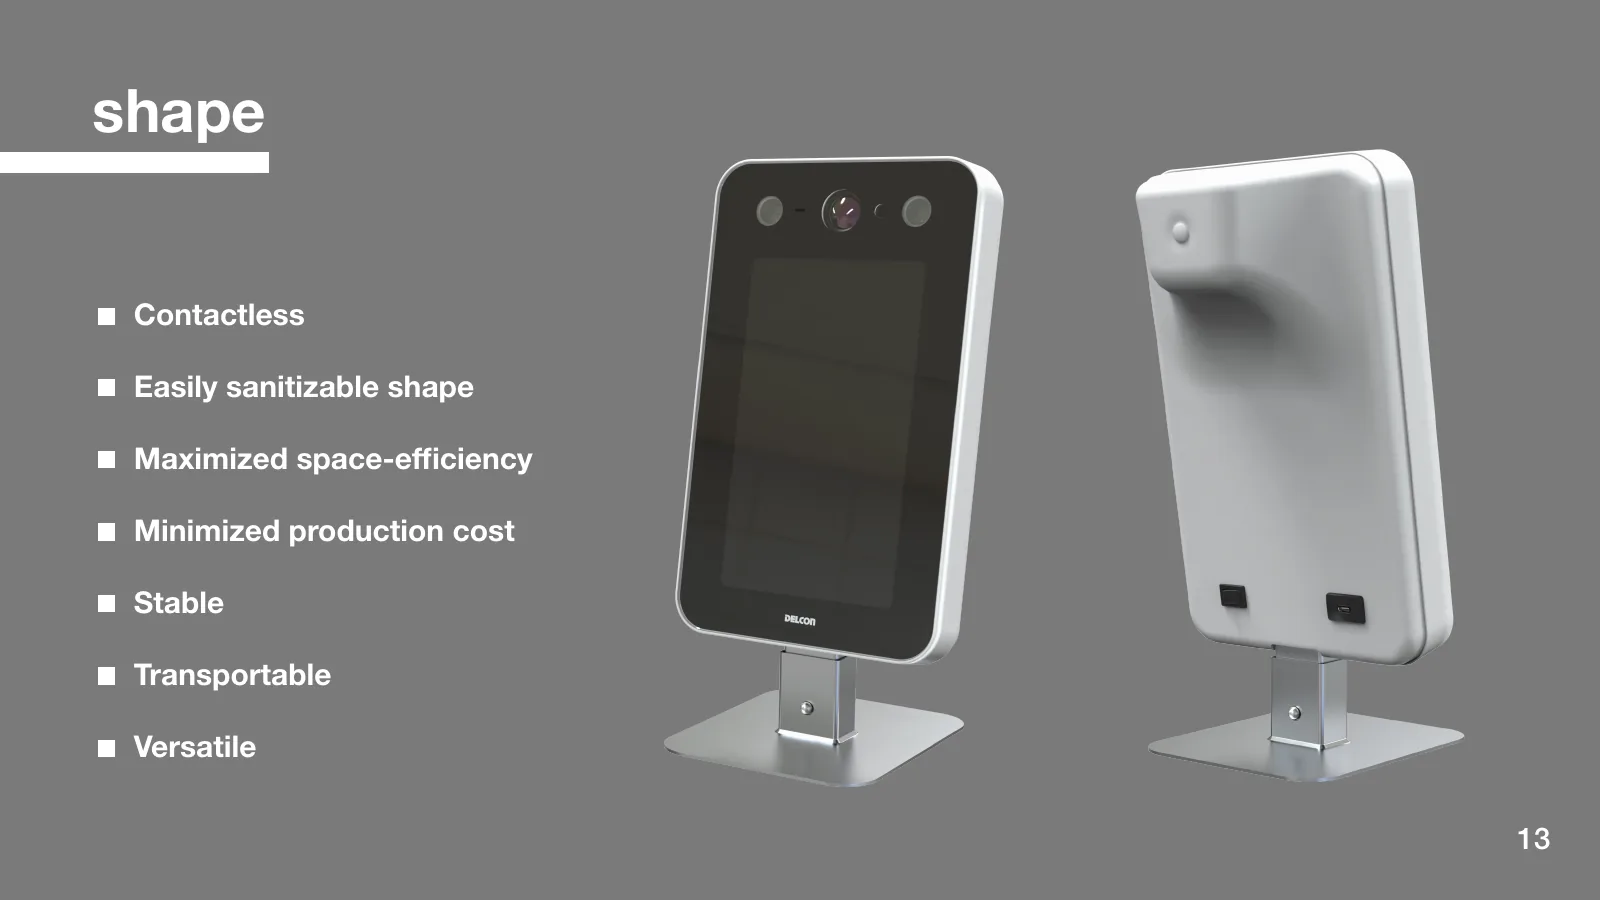
The proposed pre-donation screening terminal groups a machine-vision camera for facial and nail-bed imaging, a thermal camera, and supporting lights at the top. A screen and speaker sit within a rounded enclosure designed for easy cleaning.

Concept: Four screening indicators using three optical methods

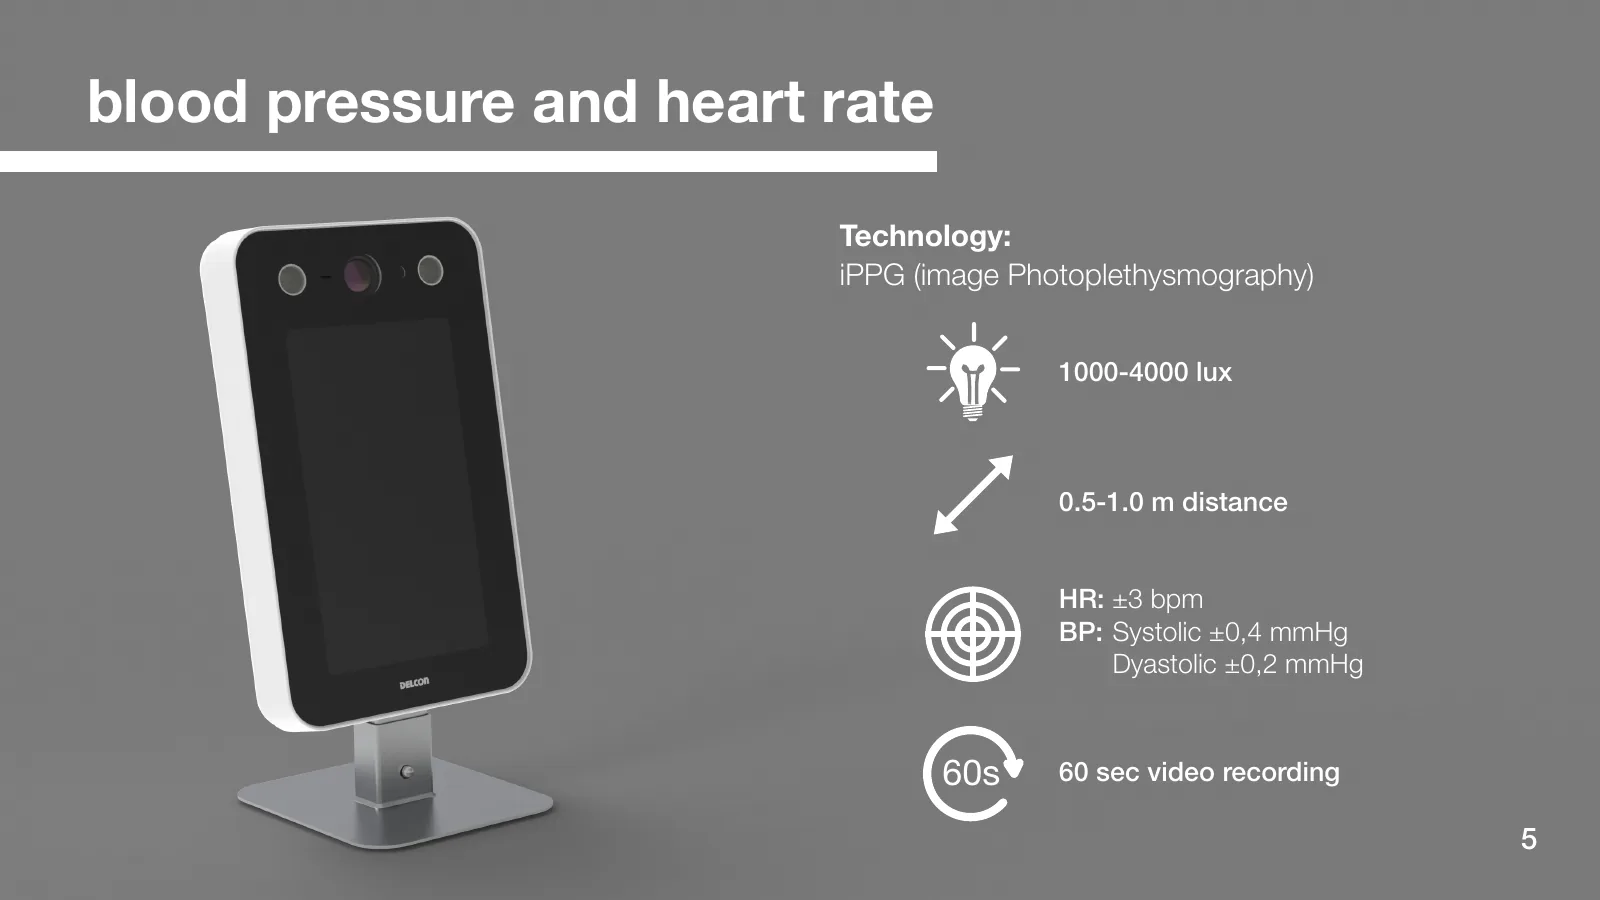
The concept combines imaging photoplethysmography (iPPG) to estimate heart rate and blood pressure from facial color changes, thermography to read facial surface temperature, and camera images with machine learning to estimate hemoglobin from the nail bed. We selected these methods to explore measurement without attaching sensors to the body or taking blood samples.

Measurement methods and design assumptions documented in the project. These figures are not validated performance results. The definitions and sources of the ± values still need confirmation.
MeasurementMethodDesign assumptions in the project
Heart rate and blood pressureFacial iPPGDistance: 0.5–1 m; illuminance: 1000–4000 lx; measurement time: about 60 s. Heart rate: ±3 bpm; systolic blood pressure: ±0.4 mmHg; diastolic blood pressure: ±0.2 mmHg.
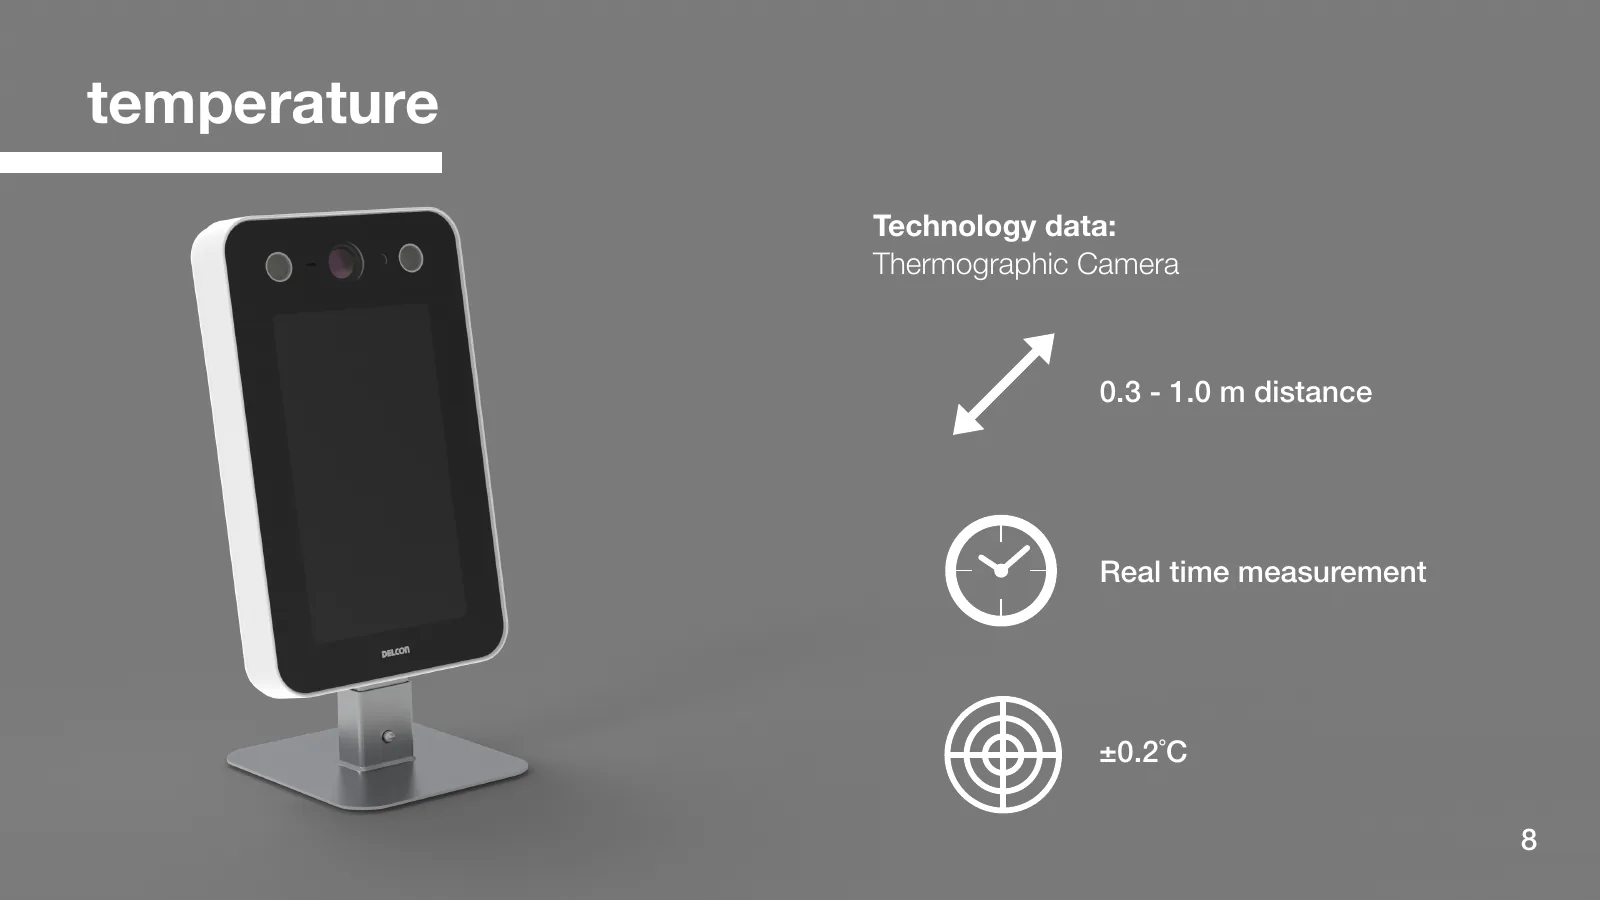
TemperatureThermographyDistance: 0.3–1 m; real-time measurement; ±0.2 °C.
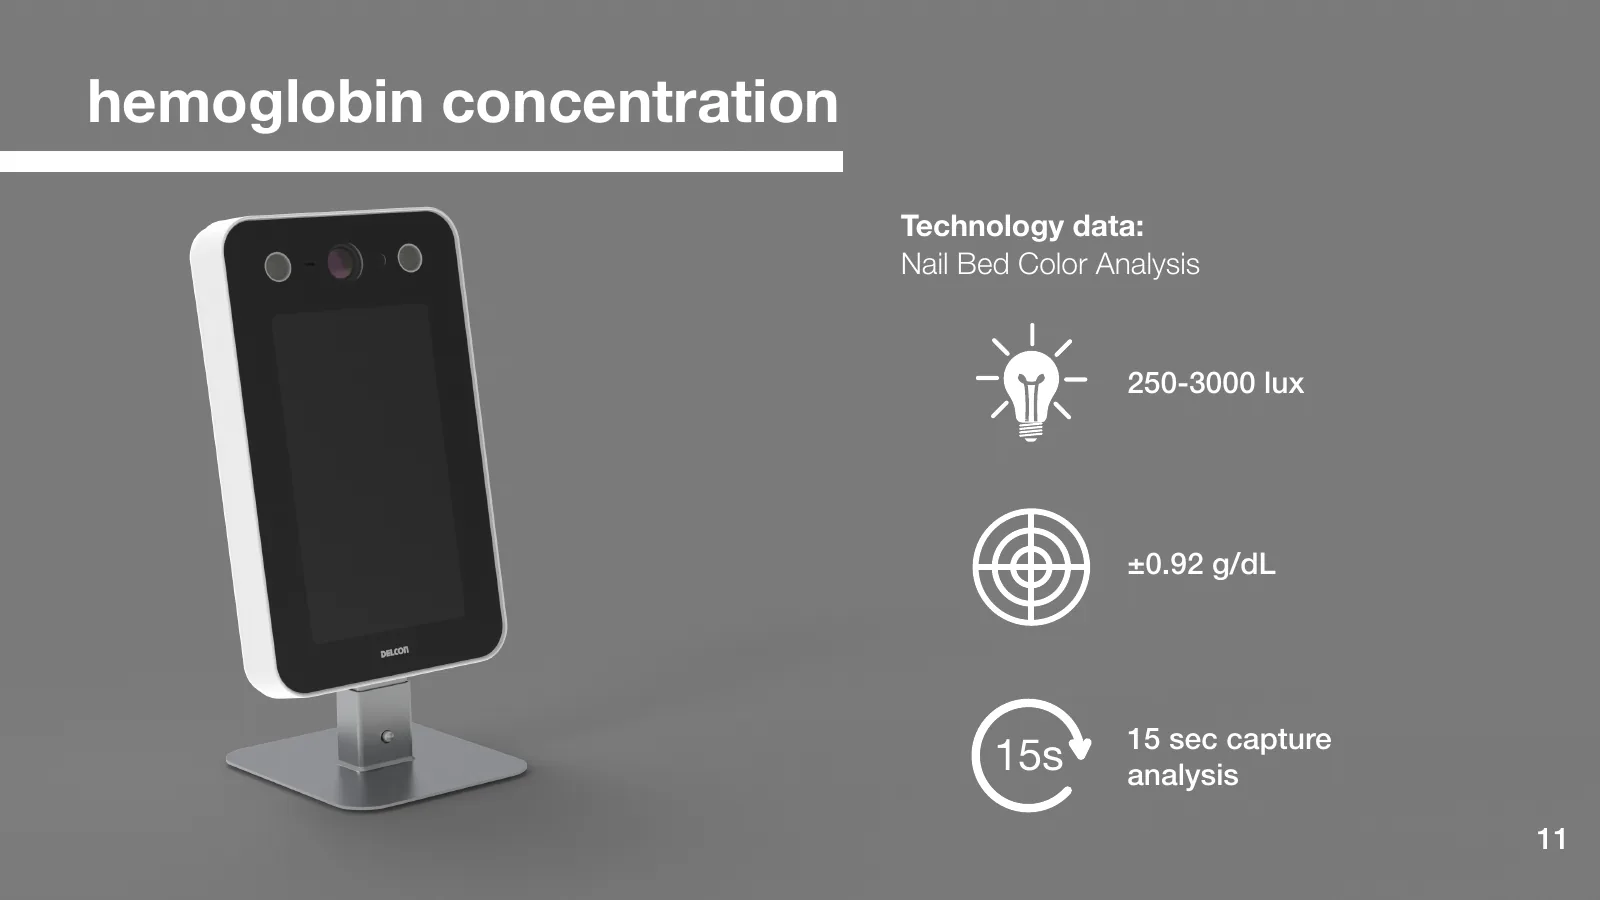
HemoglobinNail-bed images and machine learningIlluminance: 250–3000 lx; measurement time: about 15 s; ±0.92 g/dL.

From a QR code to shared results

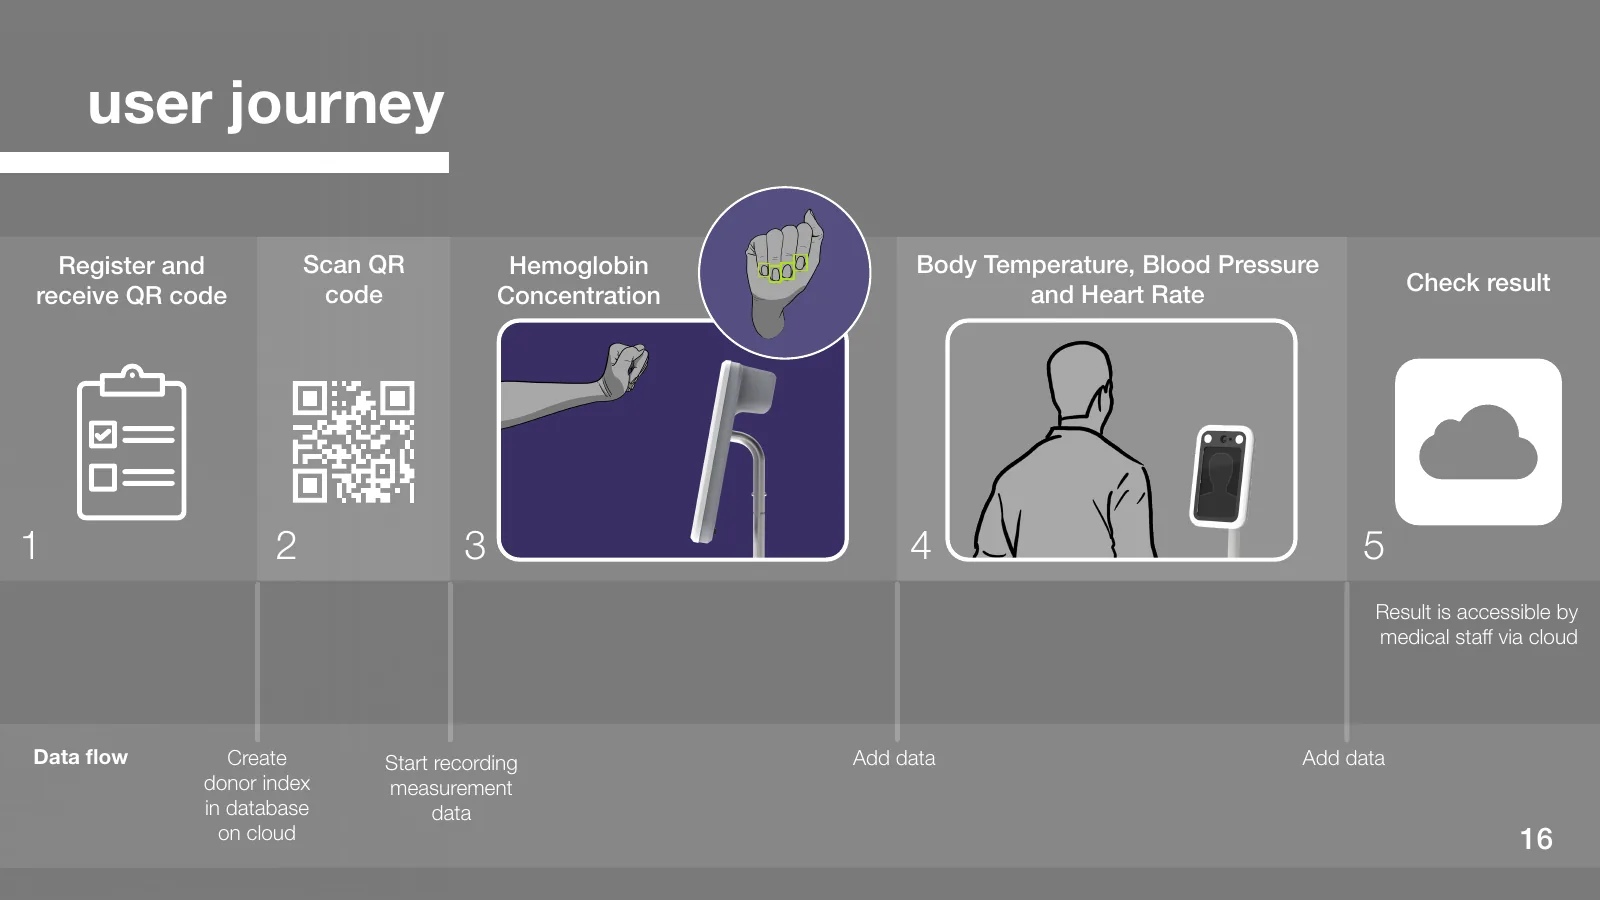
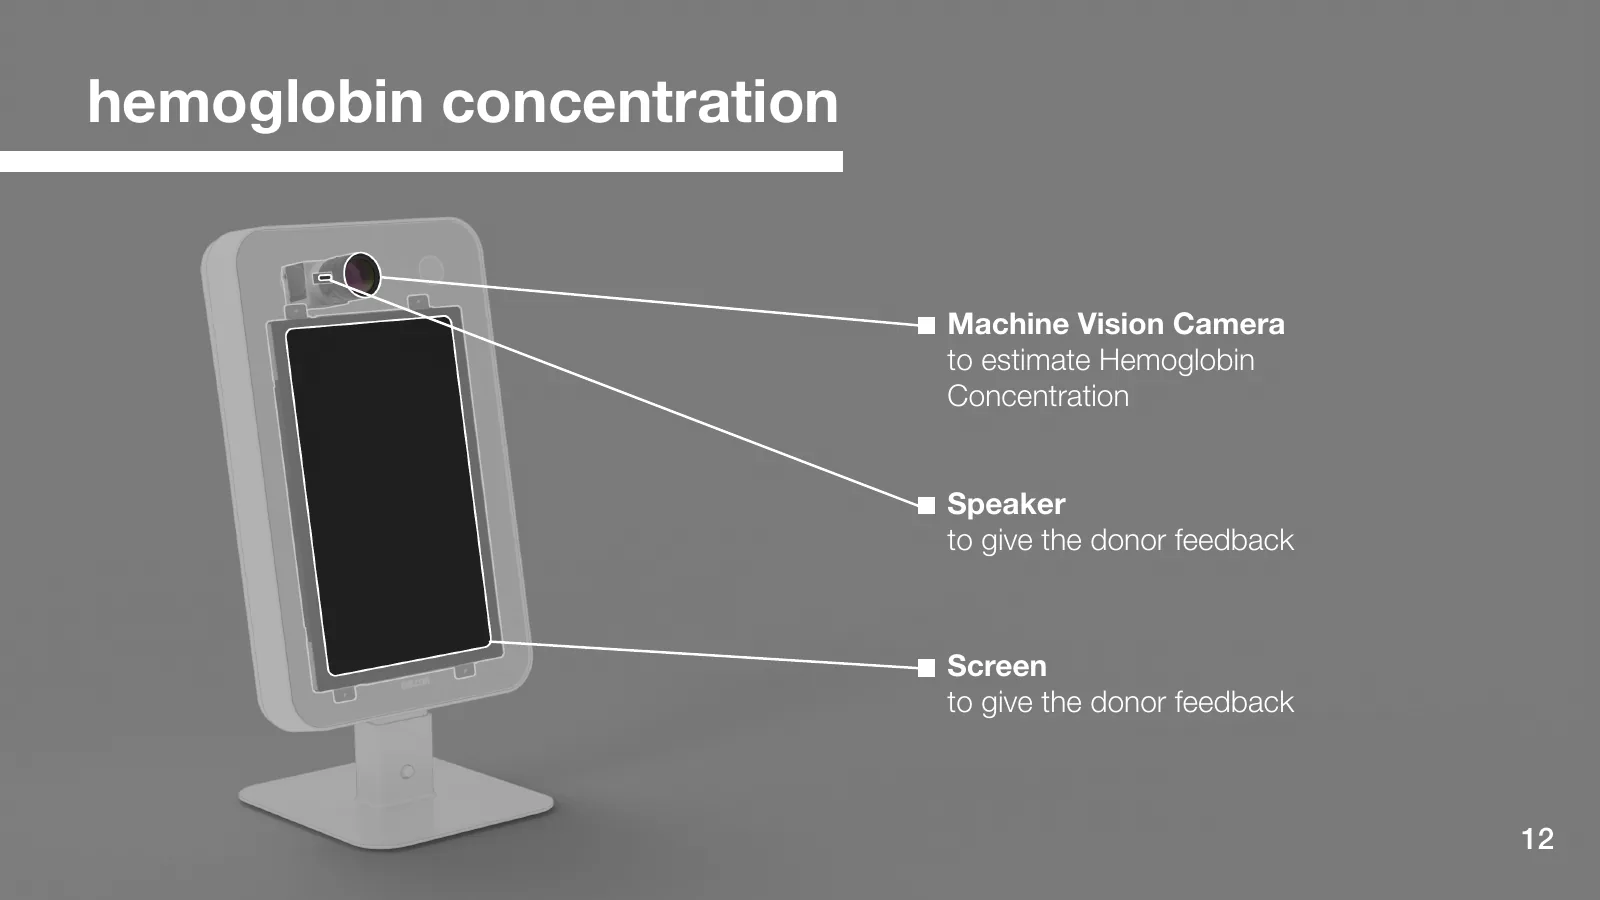
In the proposed workflow, the donor scans the QR code received during preregistration, then presents a fingernail to the upper machine-vision camera for hemoglobin estimation. Next, the donor stands in front of the terminal so the same camera and the thermal camera can capture the images needed for temperature, heart rate, and blood pressure screening. The screen and speaker would guide positioning and progress, and the results would be added to a cloud record for staff review.

The proposed pre-donation screening workflow: QR scanning, nail-bed imaging, contactless facial screening, and sharing results with staff through the cloud.
Proposed workflow at a single terminal: QR identification, hemoglobin estimation from the nail bed, contactless facial screening for three indicators, and cloud-based sharing of results with staff.

Adapting one terminal for tabletop or floor-standing use

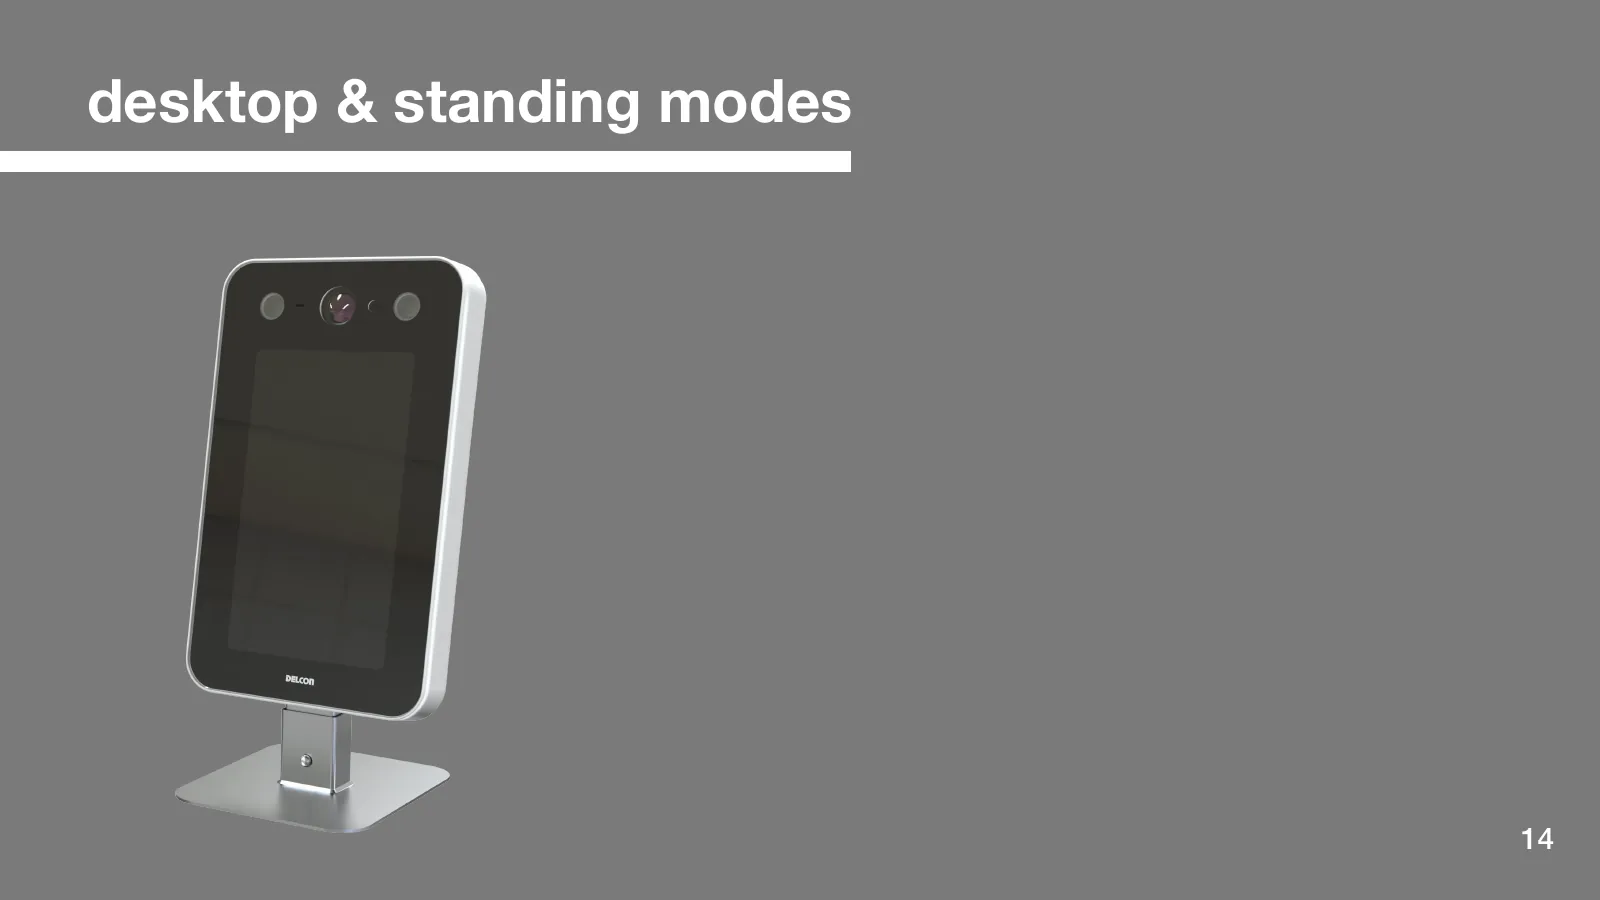
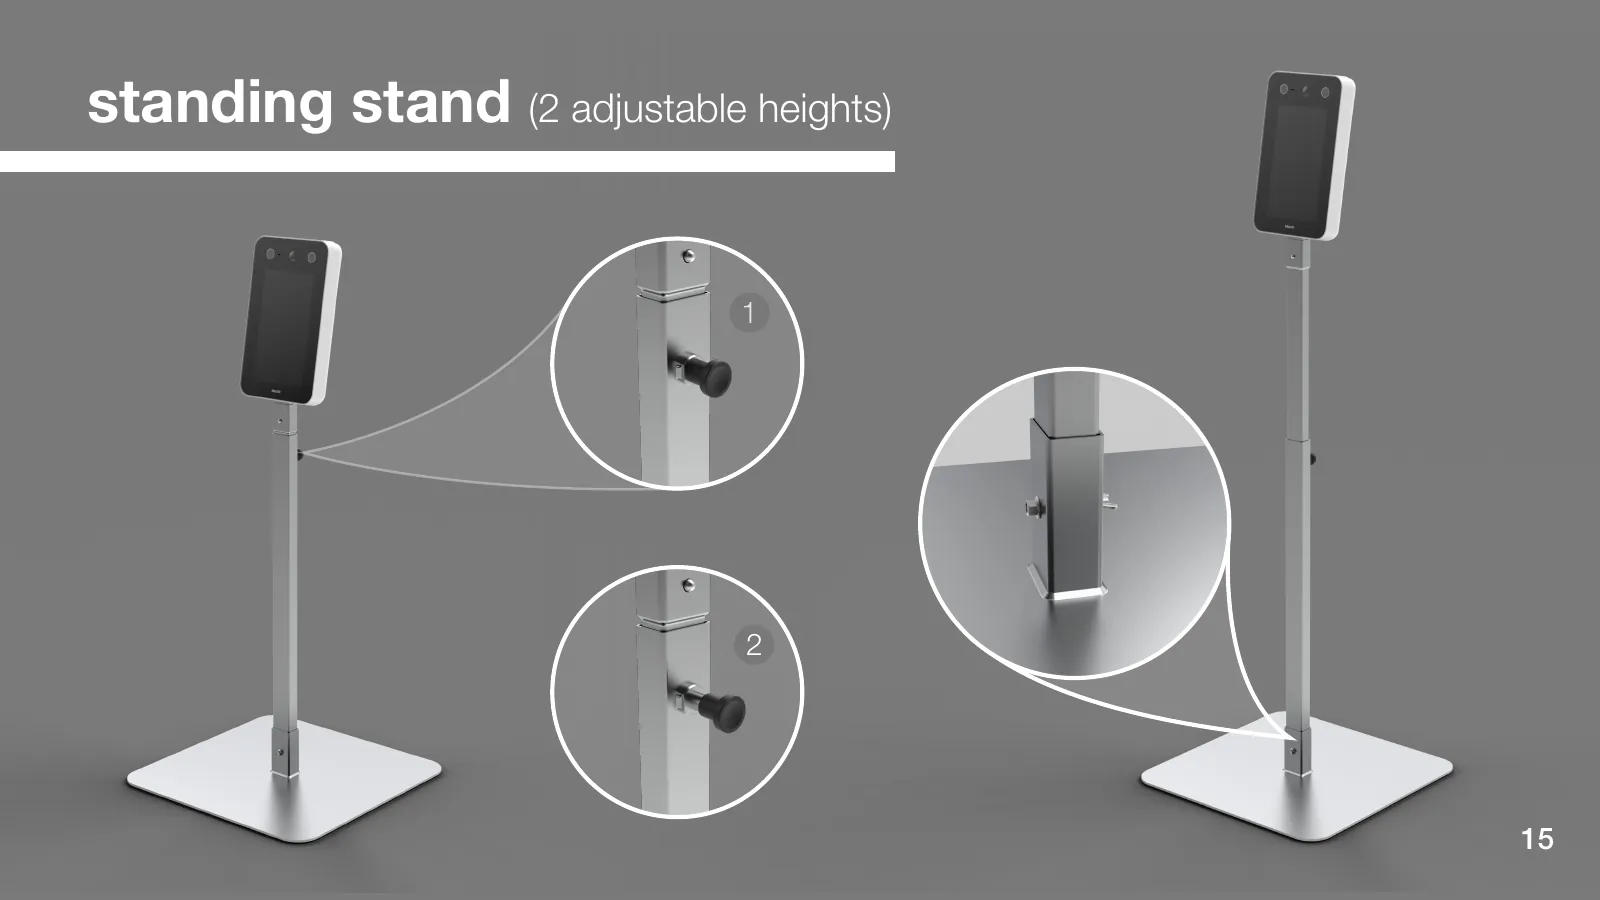
We designed the same terminal for direct placement on a table or attachment to a dedicated floor stand, with a pin mechanism offering two height settings. The machine-vision camera, thermal camera, and supporting lights are grouped at the top, with the screen and speaker on the front. The design allows for battery or cable power.

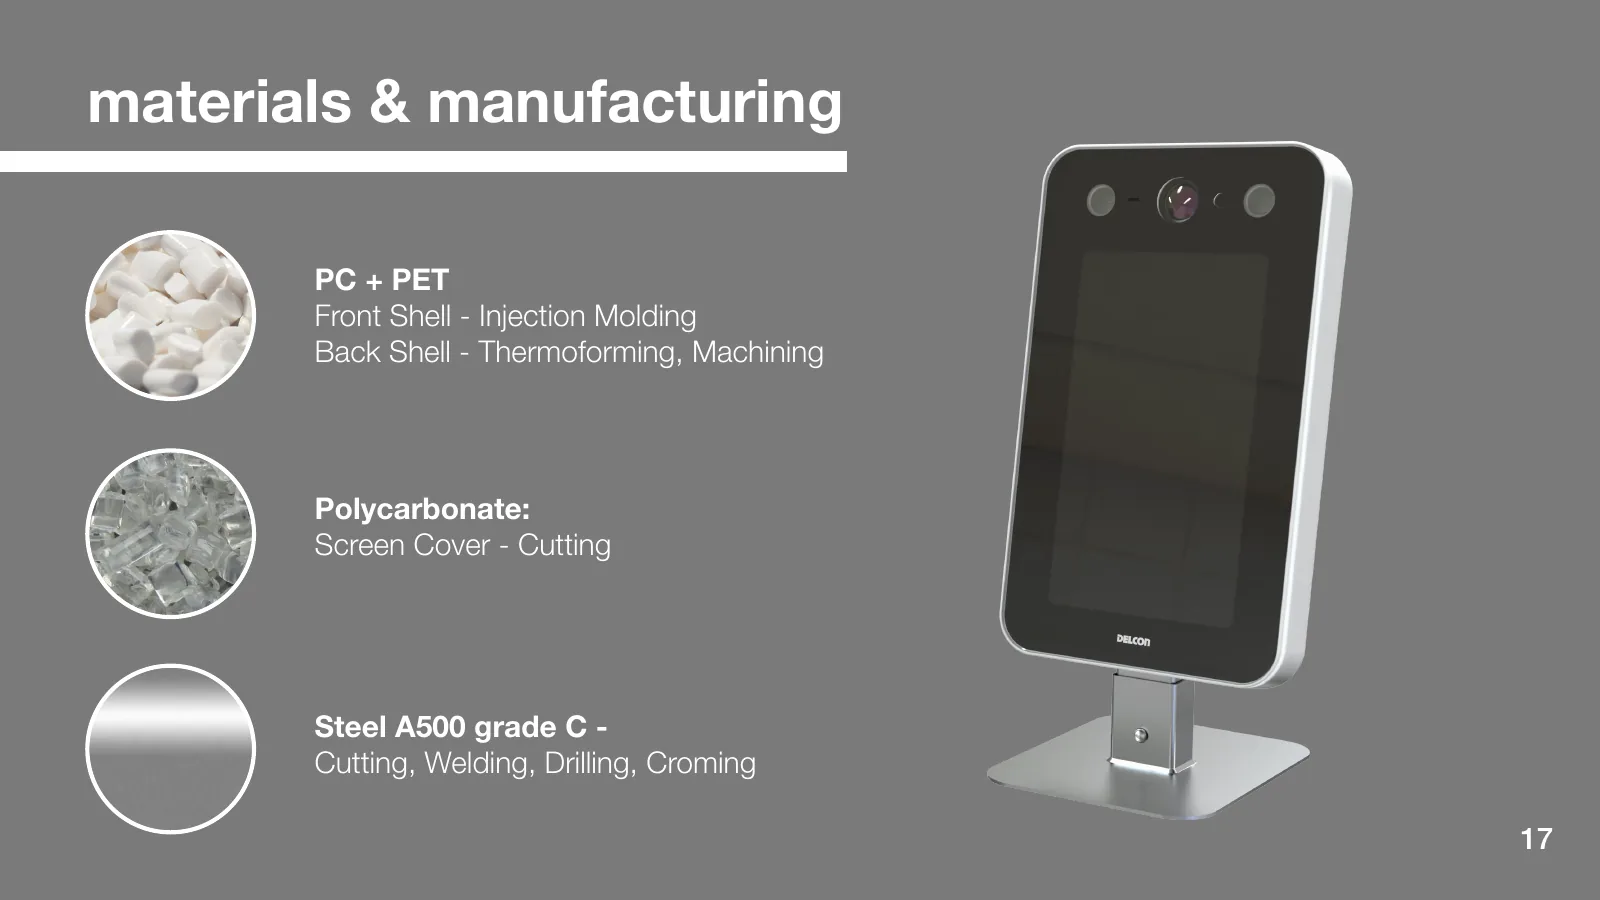
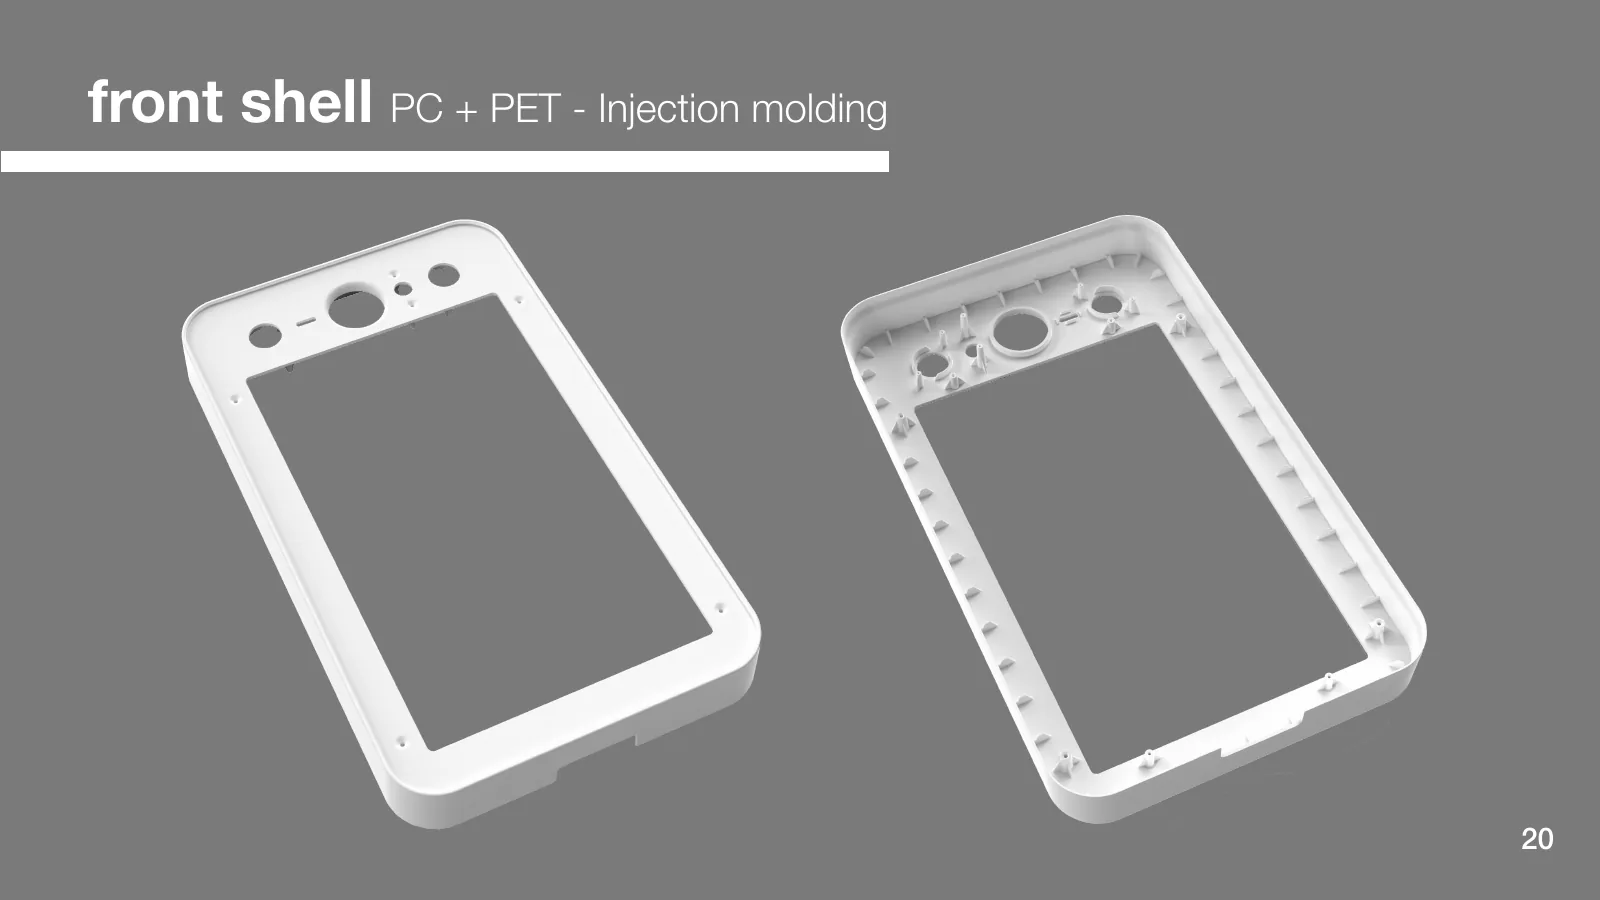
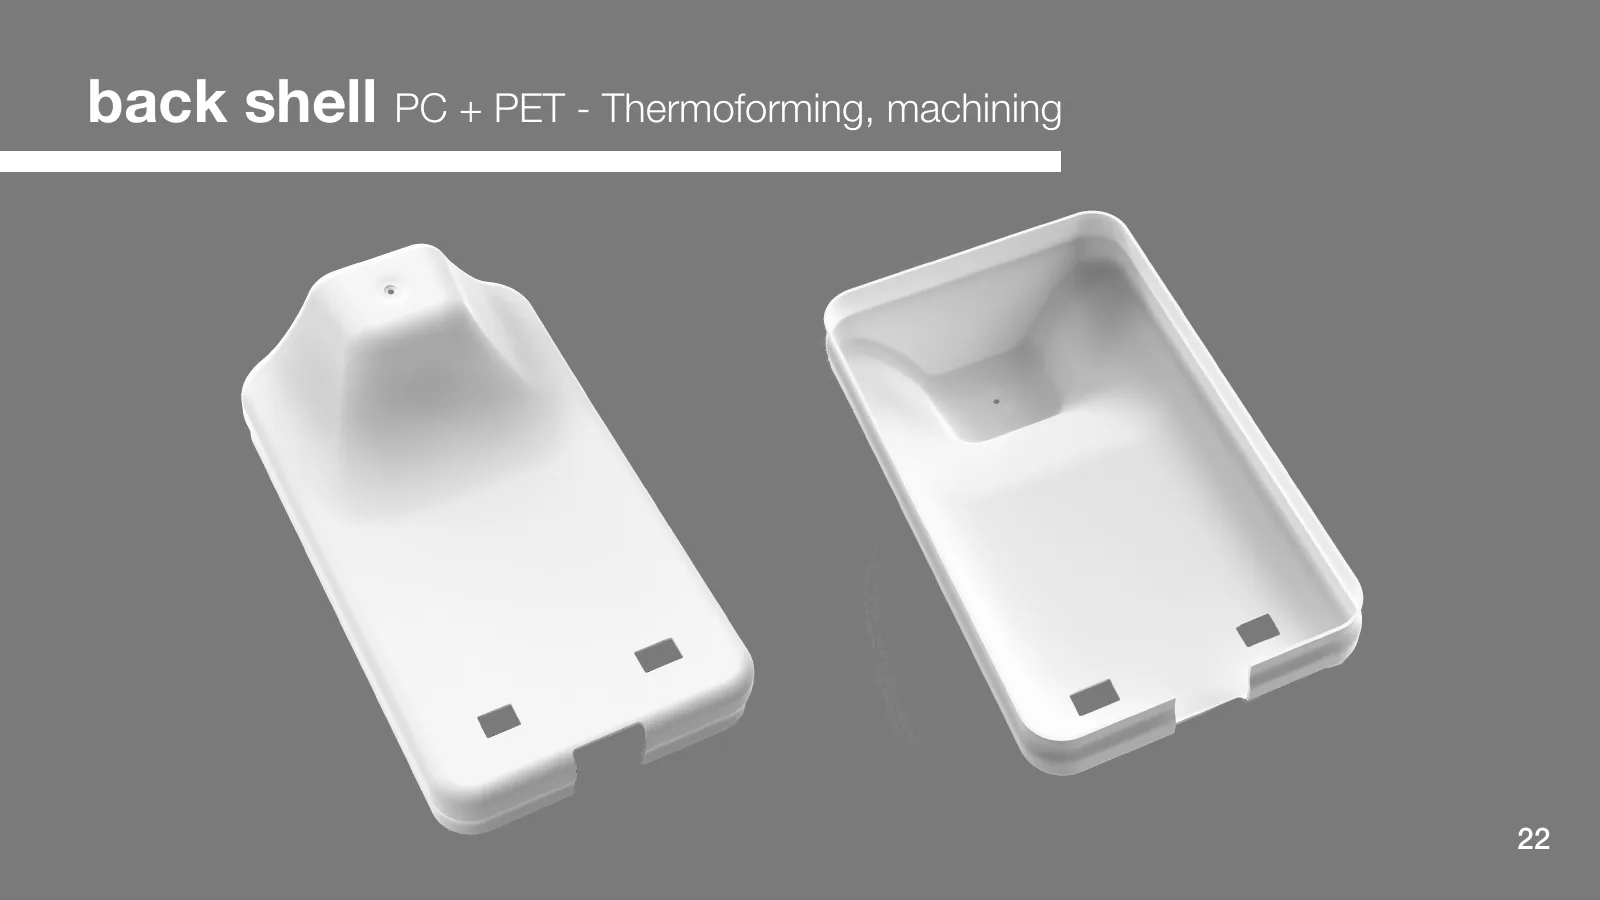
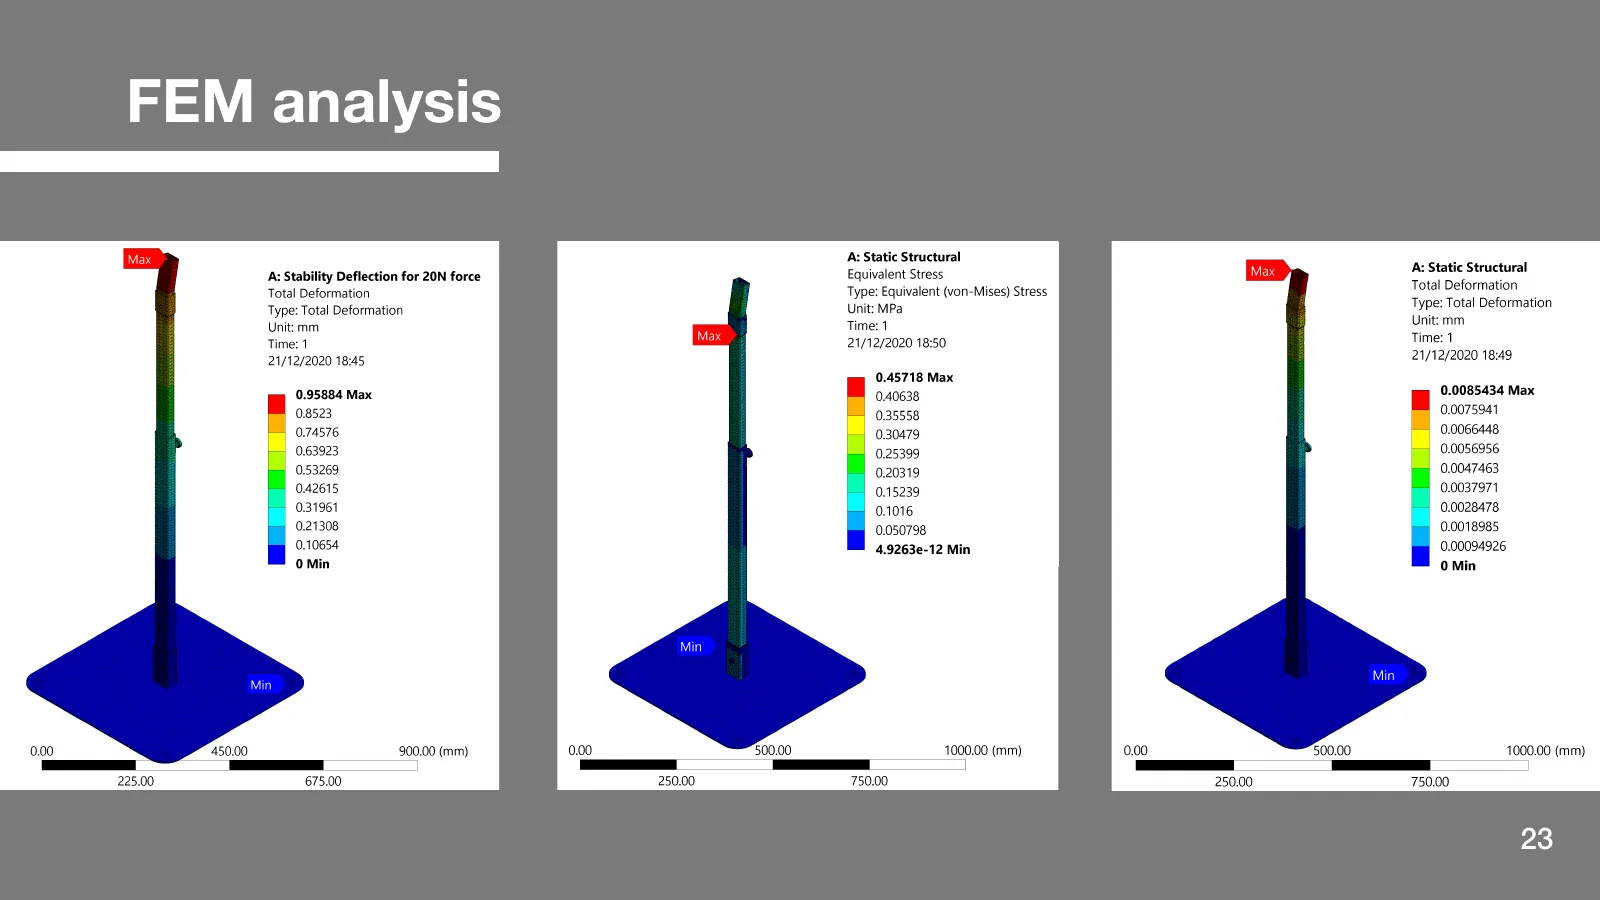
Proposed materials and processes include injection-molded PC and PET front components, a thermoformed and machined rear enclosure, a polycarbonate screen cover, and an A500 steel stand. We developed the internal layout, exploded views, assembly sequence, and manufacturing approach, and examined the stand’s structural stability using finite-element analysis.

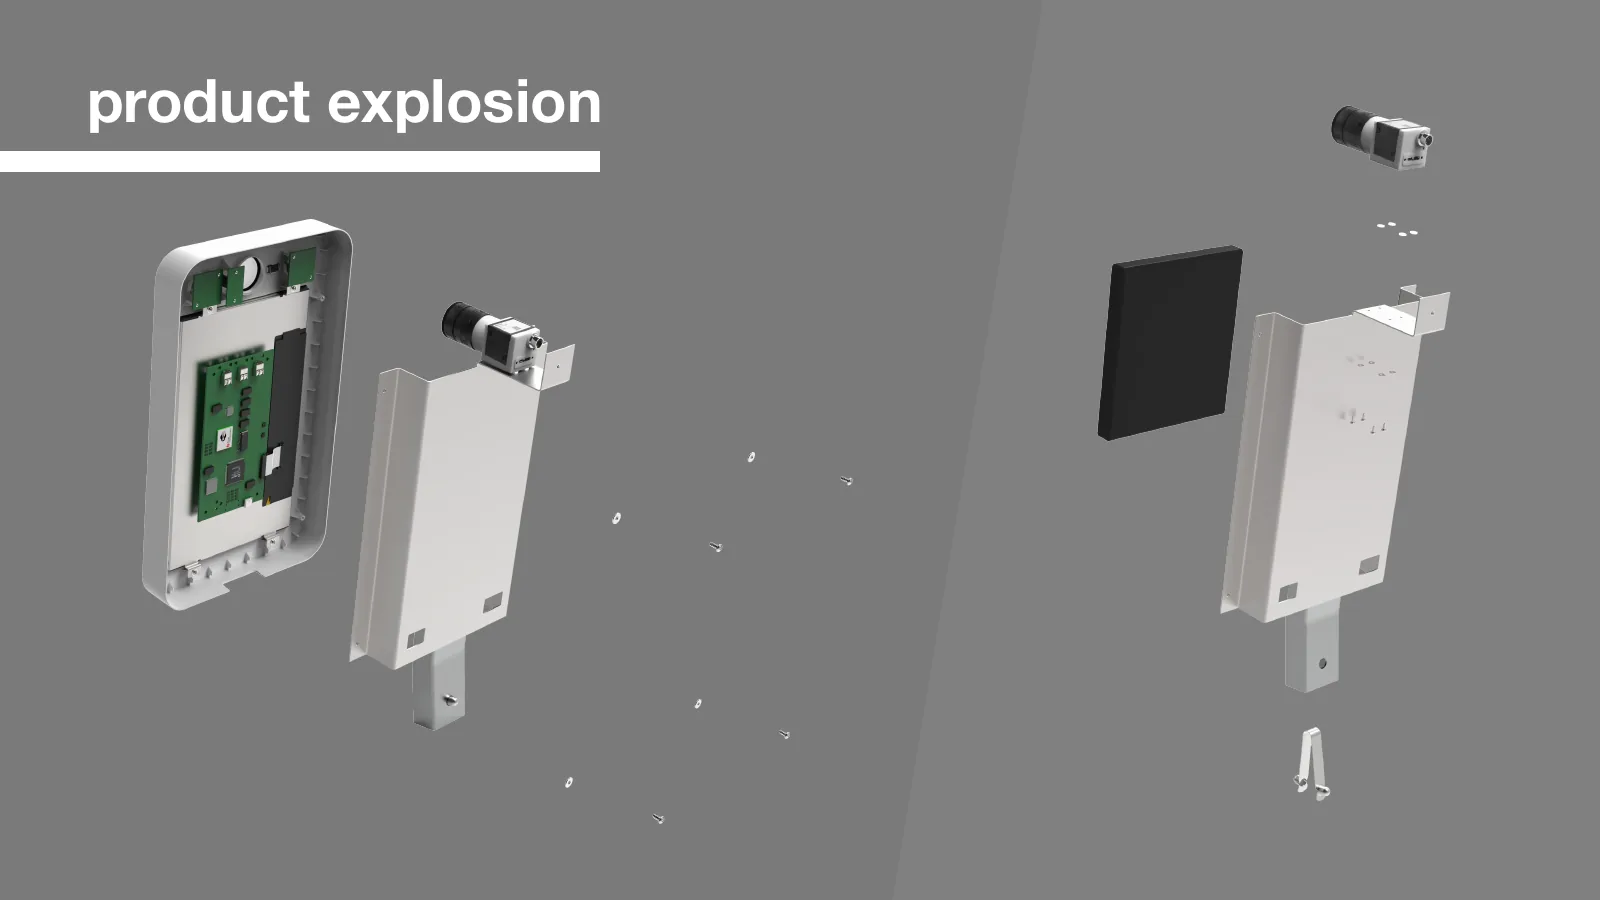
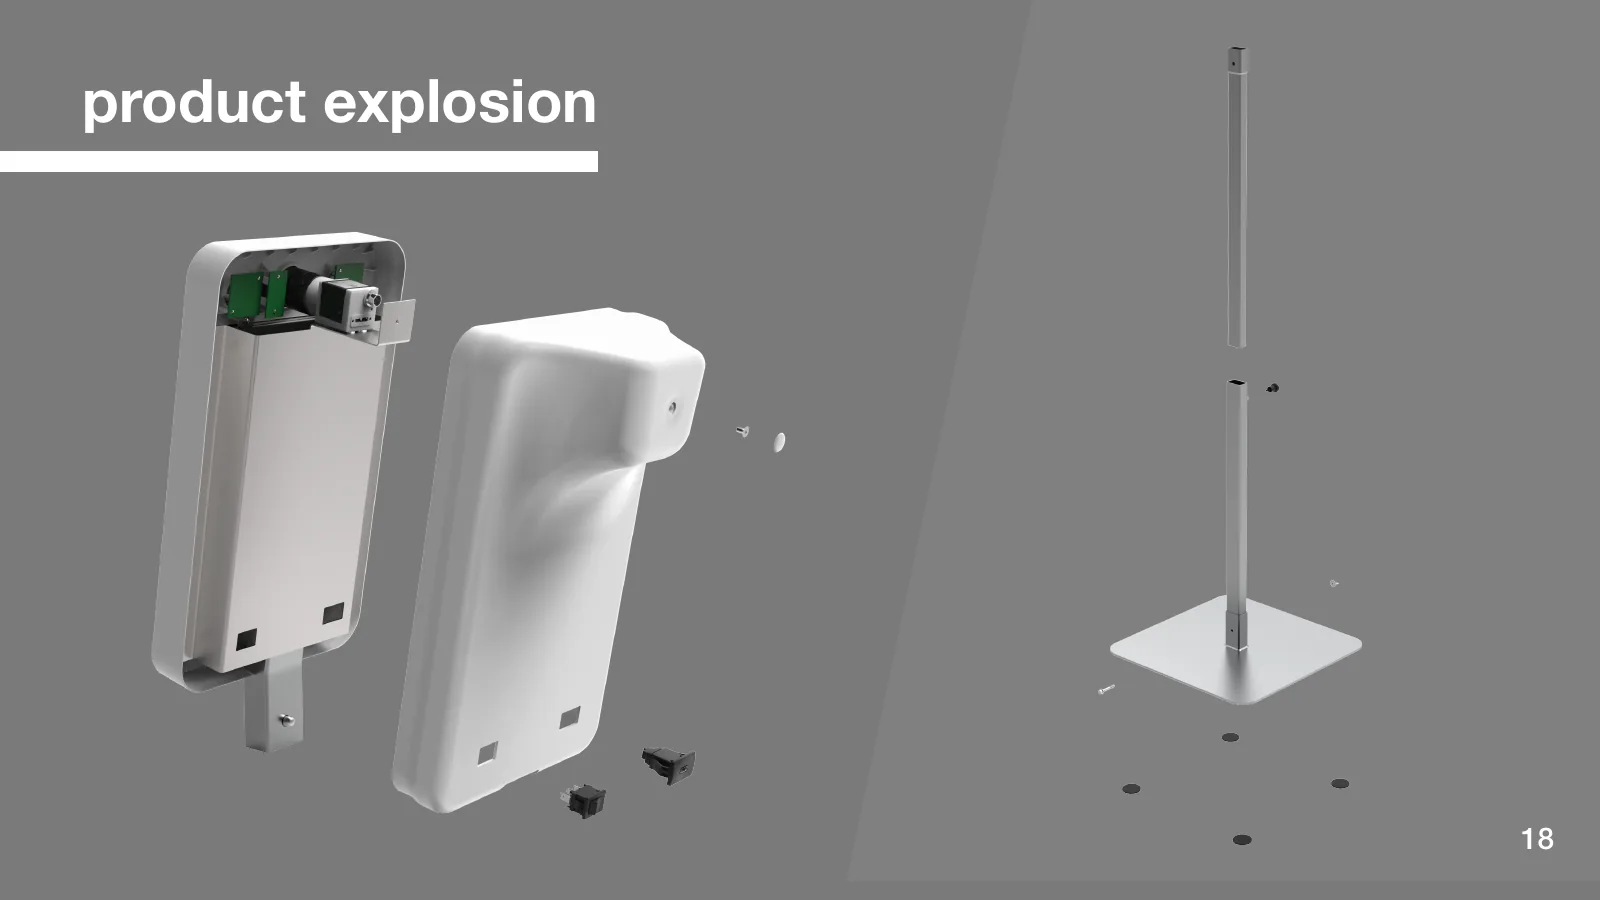
An exploded view of the pre-donation screening terminal, with the front and rear enclosures, screen, upper cameras, lights, speaker, circuit board, and supporting parts.
Exploded view of the screening terminal, showing the relationship between the upper cameras, screen, circuit board, front and rear enclosures, and the supporting components that secure them.

Outcome: An integrated screening concept and staff workflow

The final concept brings together use settings and requirements, selected measurement methods, a QR and cloud-based workflow, tabletop and floor-standing enclosures, internal layout, materials and manufacturing methods, exploded views, and structural analysis.

Design Studio, Group 11. Joint work by Fabio Villano, Bhuvanesh Bari, Takafumi Horiuchi, and Joeperdo El Husseini.

Final presentation
  1. A cover slide for the pre-donation screening terminal, with a tabletop rendering, project name, and team members’ names.
  2. The design brief and four intended benefits: hygiene, lower stress, speed, and physical distancing.
  3. The intended users and settings: blood donors aged 16 and over in North America, medical staff, donation centers, mobile venues, and blood donation buses.
  4. The floor-standing terminal concept and key features, including the screen, upper cameras, and supporting lights.
  5. The proposed use of facial iPPG to estimate heart rate and blood pressure, with distance, illuminance, measurement time, and design assumptions.
  6. The camera, lighting, and image-processing components proposed for iPPG measurement.
  7. The proposed use of thermography to read temperature from the facial surface, with distance, measurement speed, and design assumptions.
  8. The thermal camera and supporting components proposed for temperature measurement.
  9. The proposed use of nail-bed images and machine learning to estimate hemoglobin, with illuminance, measurement time, and design assumptions.
  10. The proposed hemoglobin estimation setup, sharing the upper machine-vision camera used for heart rate and blood pressure.
  11. The rounded enclosure, designed for stability, easy cleaning, and portability.
  12. A comparison of the same screening terminal in tabletop and floor-standing configurations.
  13. The pin mechanism that adjusts the floor stand between two heights.
  14. The proposed workflow: QR scanning, nail-bed imaging, contactless facial screening, and sharing results with staff.
  15. Materials for the front and rear enclosures, screen, and stand, with proposed processes including injection molding, thermoforming, and machining.
  16. An exploded view of the complete terminal and floor stand, showing the enclosures, screen, internal components, column, and base.
  17. An exploded view of the terminal, showing the front and rear enclosures, screen, upper cameras, lights, speaker, circuit board, and supporting parts.
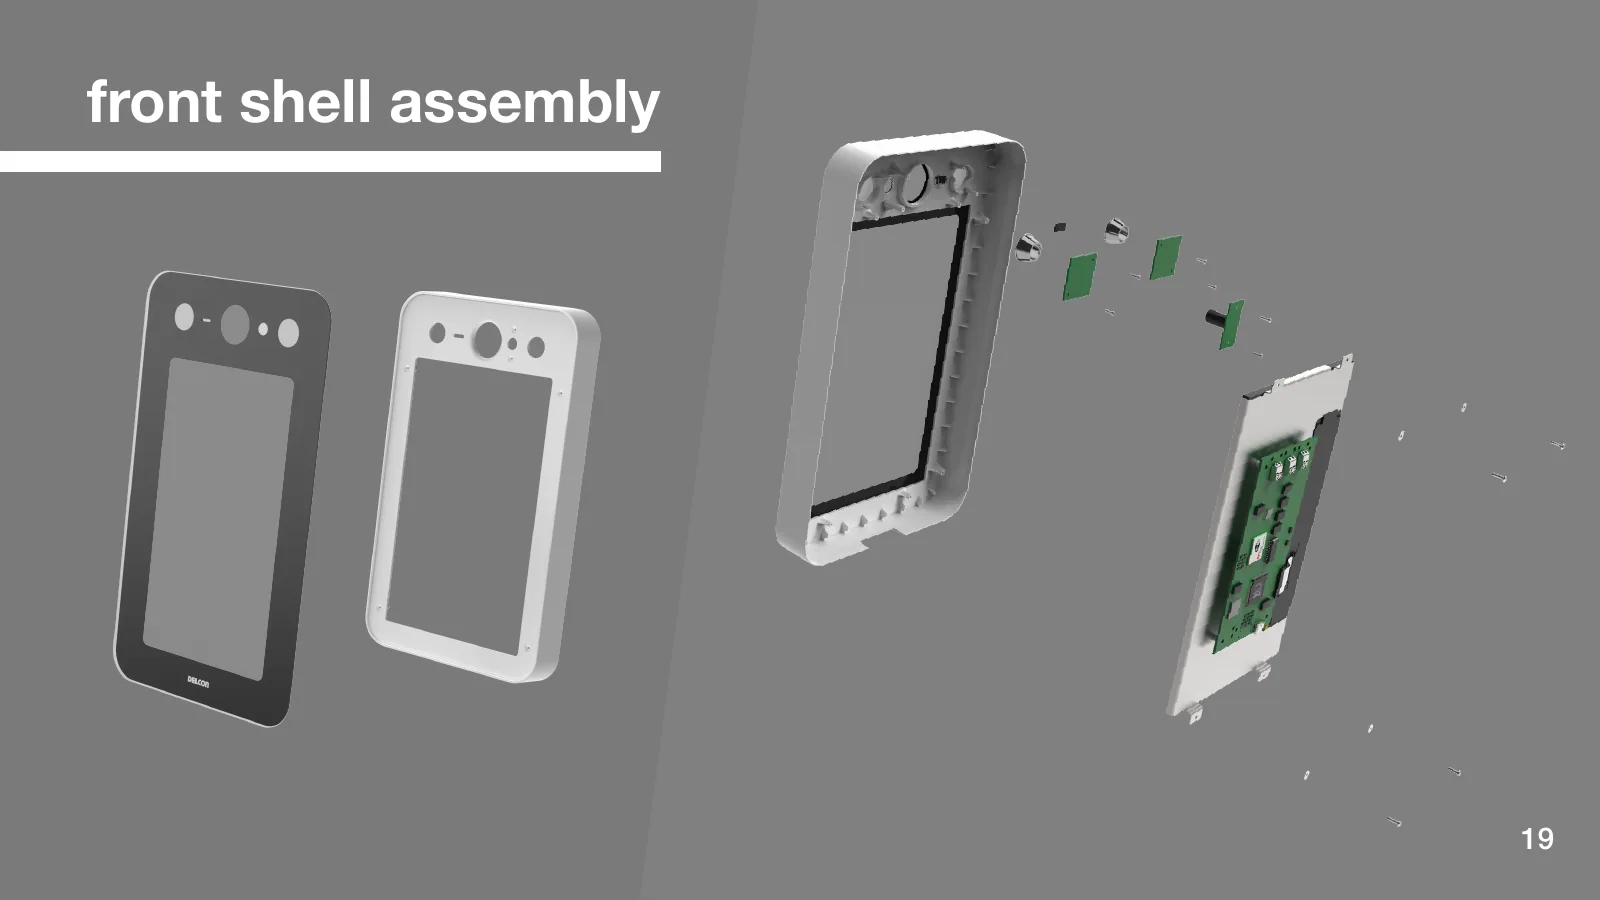
  18. The front assembly of the terminal and the supporting components that secure each part.
  19. The shape, main dimensions, and manufacturing details of the terminal’s front enclosure.
  20. The shape, main dimensions, and manufacturing details of the terminal’s rear enclosure.
  21. Finite-element analysis of the floor stand under load, with deformation and stress distributions shown in color.
  22. A closing slide with “Thank you” on a gray background.
Slides from the final presentation.